
Configuration
If you have PrestaShop multi-store, configure everything from the view "All shops." Once configured, leave it active only in the store that interests you.
The first step is to set up the seQura module.
Setup
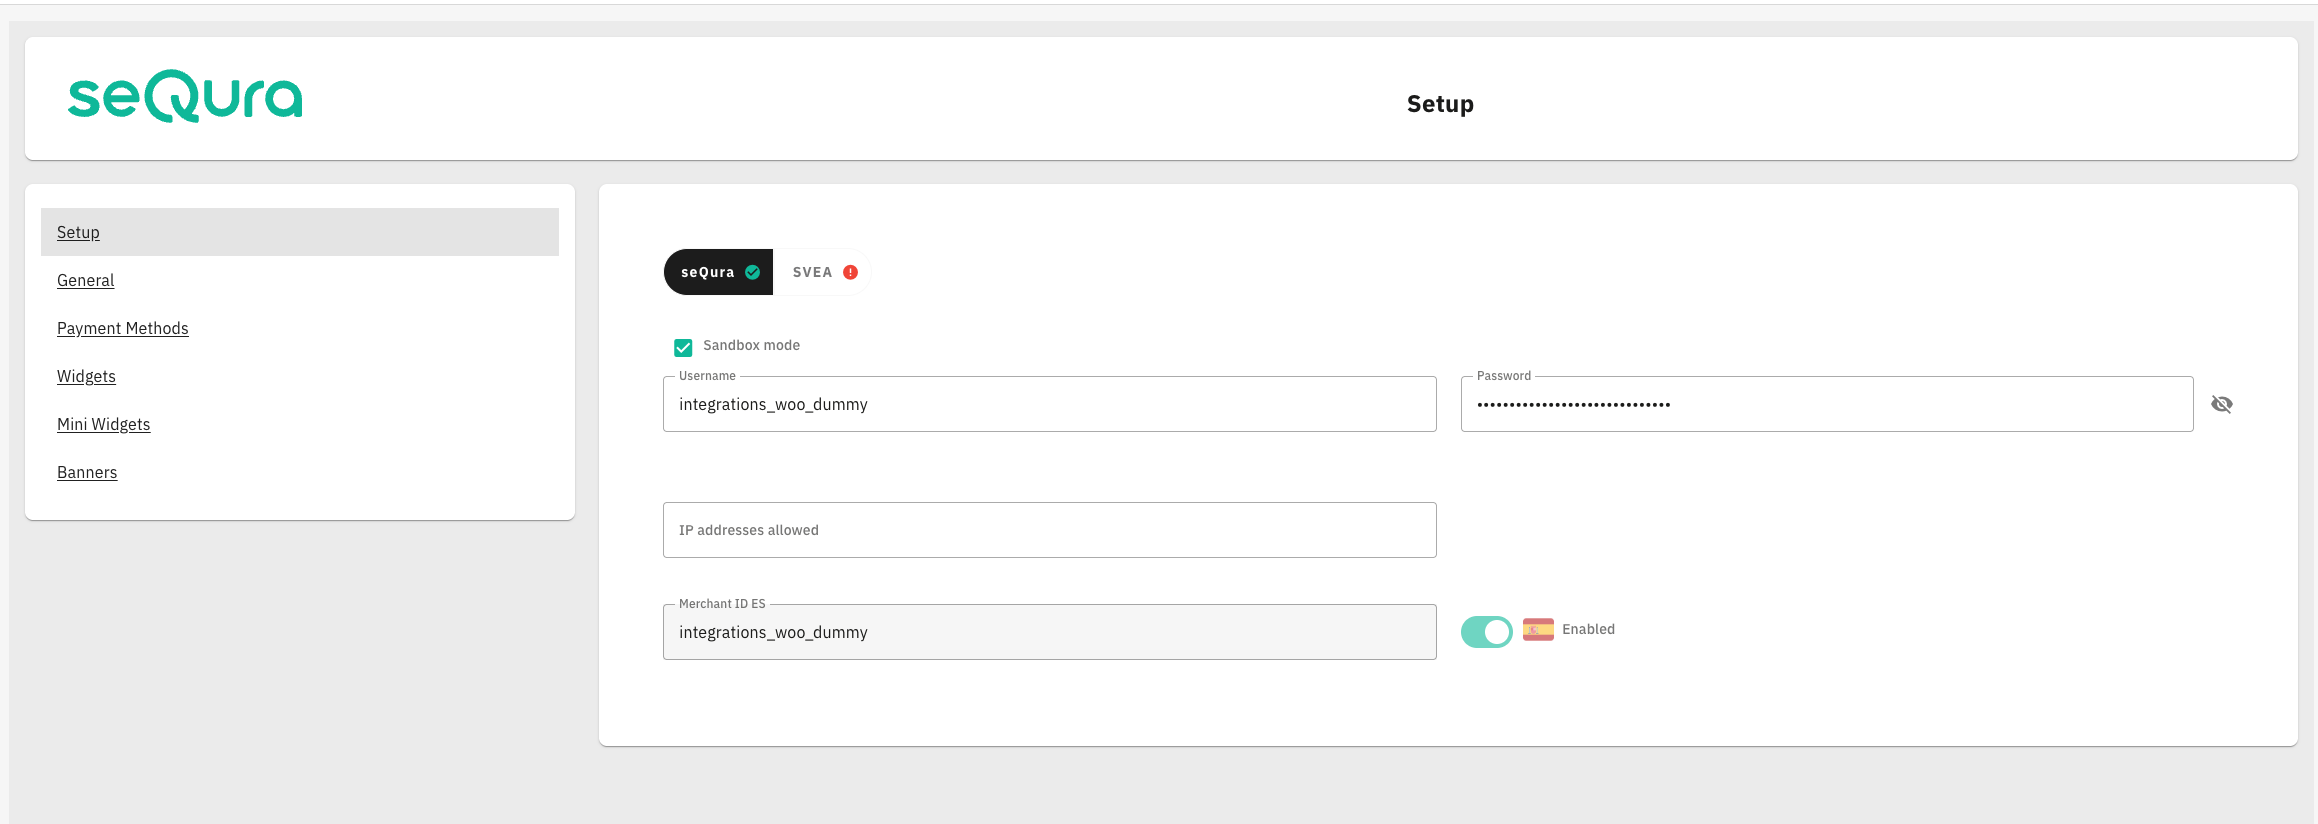
- Credentials: Select seQura for Spanish market and SVEA for International market (Italy, France, Portugal...)
- Environment: Select Sandbox if you are working with test credentials or Live if you are using real credentials.
- Username, Password: These are the parameters sent by seQura along with the module and the documentation, explained on the previous page.
- Allowed IP addresses: Sets which IP addresses will be able to see seQura services. Only users whose IPs are in this field will be able to use SeQura. This option is designed to hide seQura while setting up the module before going live. The default IP will be the one used to install the module. Leave the field blank to show the service to everyone.
- Merchant ID: These are the parameters provided by seQura and were previously explained.
General
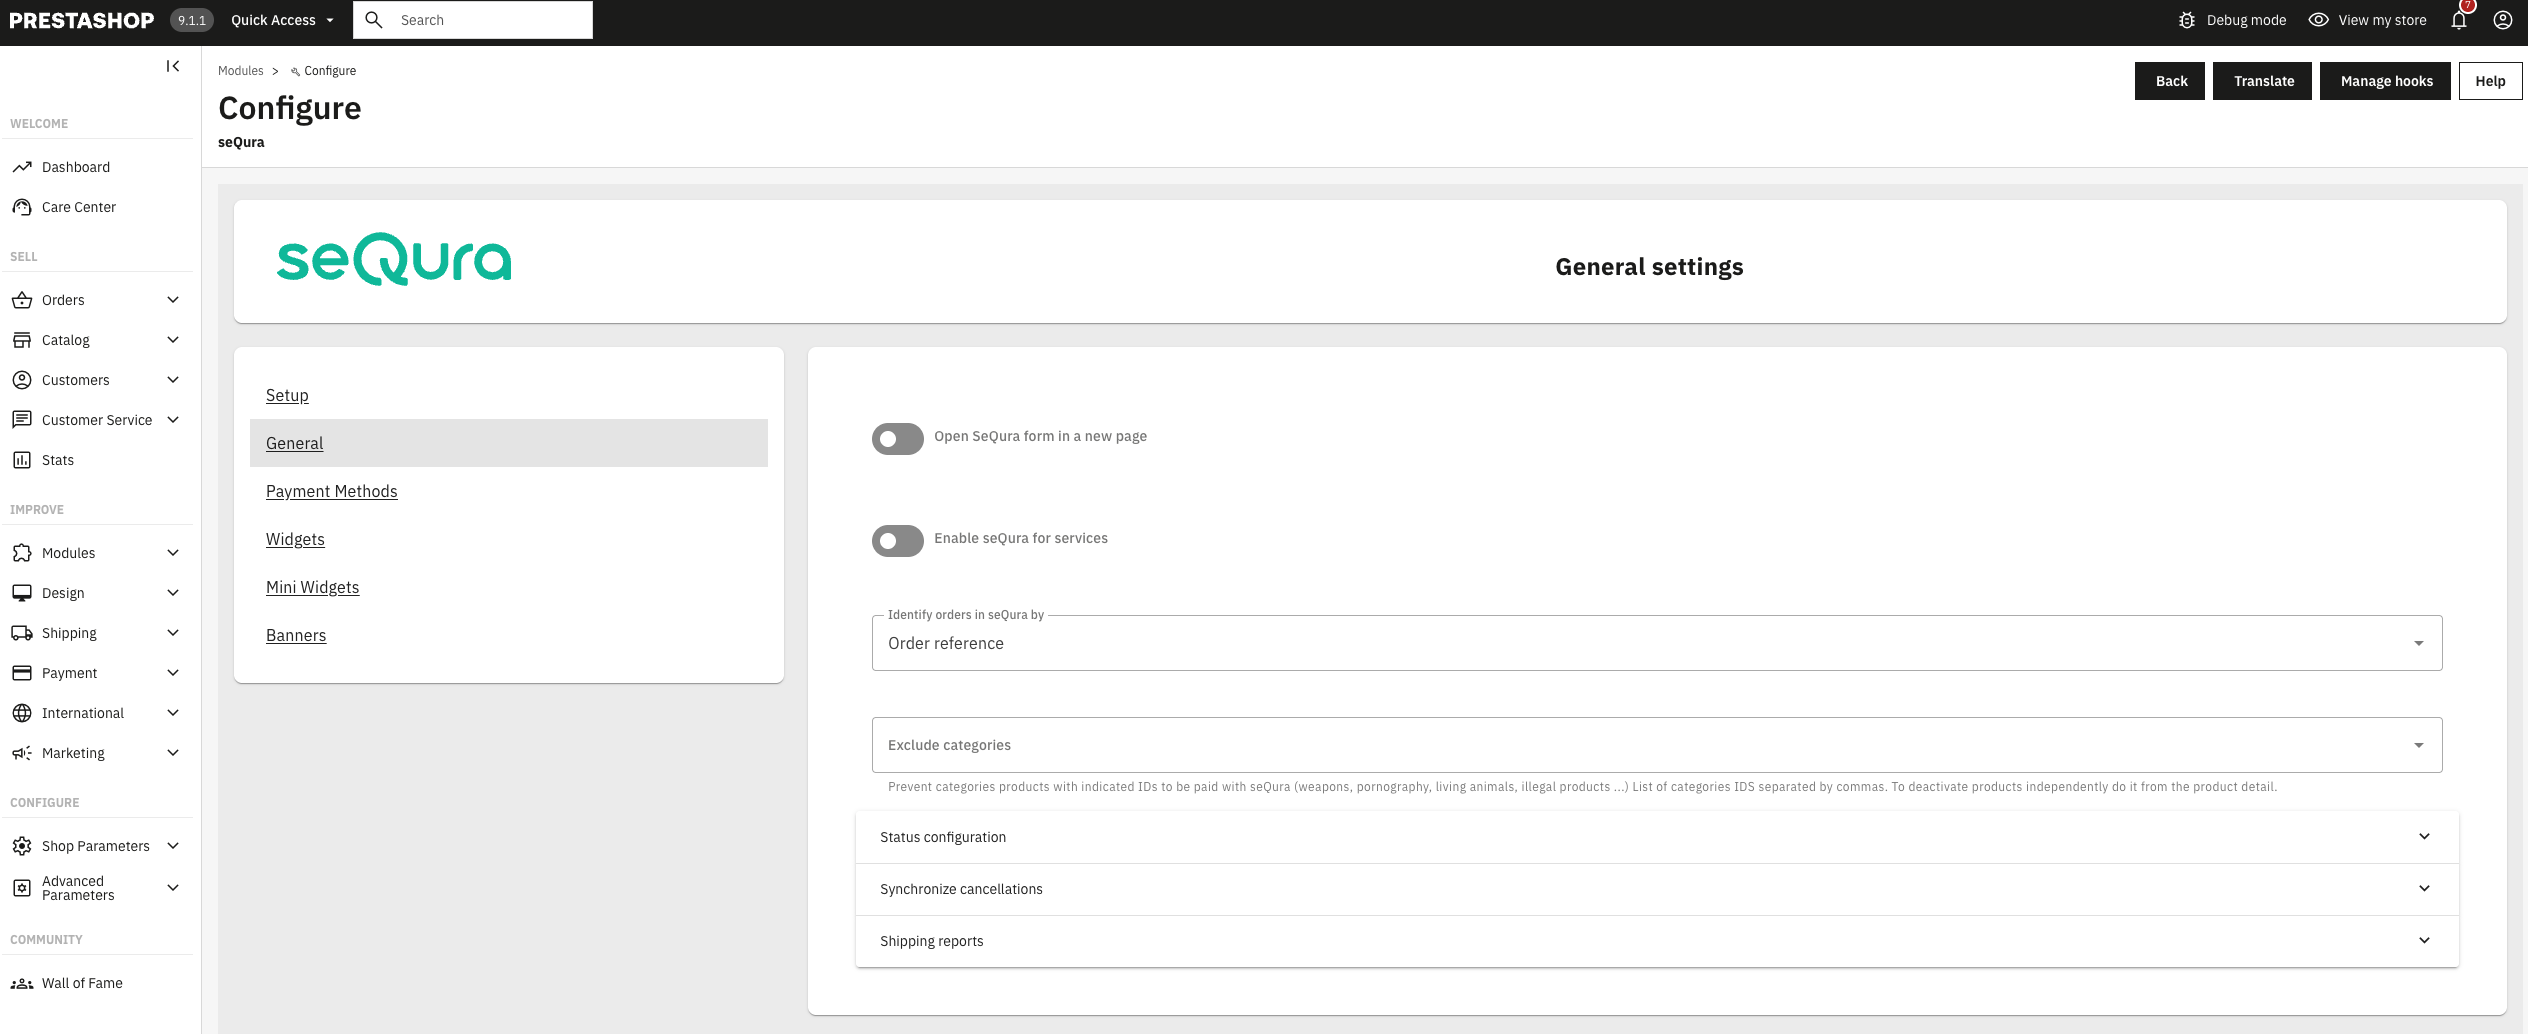
- Open seQura in a new page
- Identify orders in seQura by: The method used to identify the orders in the seQura back office. The most used is "Reference", but if your PrestaShop uses customized references, we recommend using "ID".
- Exclude categories: The categories in this field will not be allowed to be purchased with SeQura.
Status Configuration
- In Review: You shouldn’t modify this field. By default, it will be "SeQura: on review". Make sure that no additional options have been checked in the configuration of the status used.
- Approved: By default, it will be "SeQura: approved". You can change it to the state you use to mark other payment methods' orders as approved.
- Cancelled: By default, it will be "SeQura: cancelled". You can change it to the state you use to mark other payment methods' orders as cancelled.
Synchronize Cancelling
Inform seQura about cancellations: Select if you want to activate or deactivate the automatic synchronization of cancelled orders.
Consider cancelled orders with state: Select which state will be used to notify seQura that the order has been cancelled.
Shipping Reports
Every night, the module will send a report with the orders that have been shipped so we can start managing our operational procedures, such as disbursements or sending payment instructions to the buyer. If you disable this option, you will have to manage the order shipments manually through our back office: Merchant Portal.
- Automatic report sending: Allows activating/deactivating the automatic sending of the report.
- Hour: Select the hour in which the report will be sent every day.
- Minute: Select the minute in which the report will be sent every day.
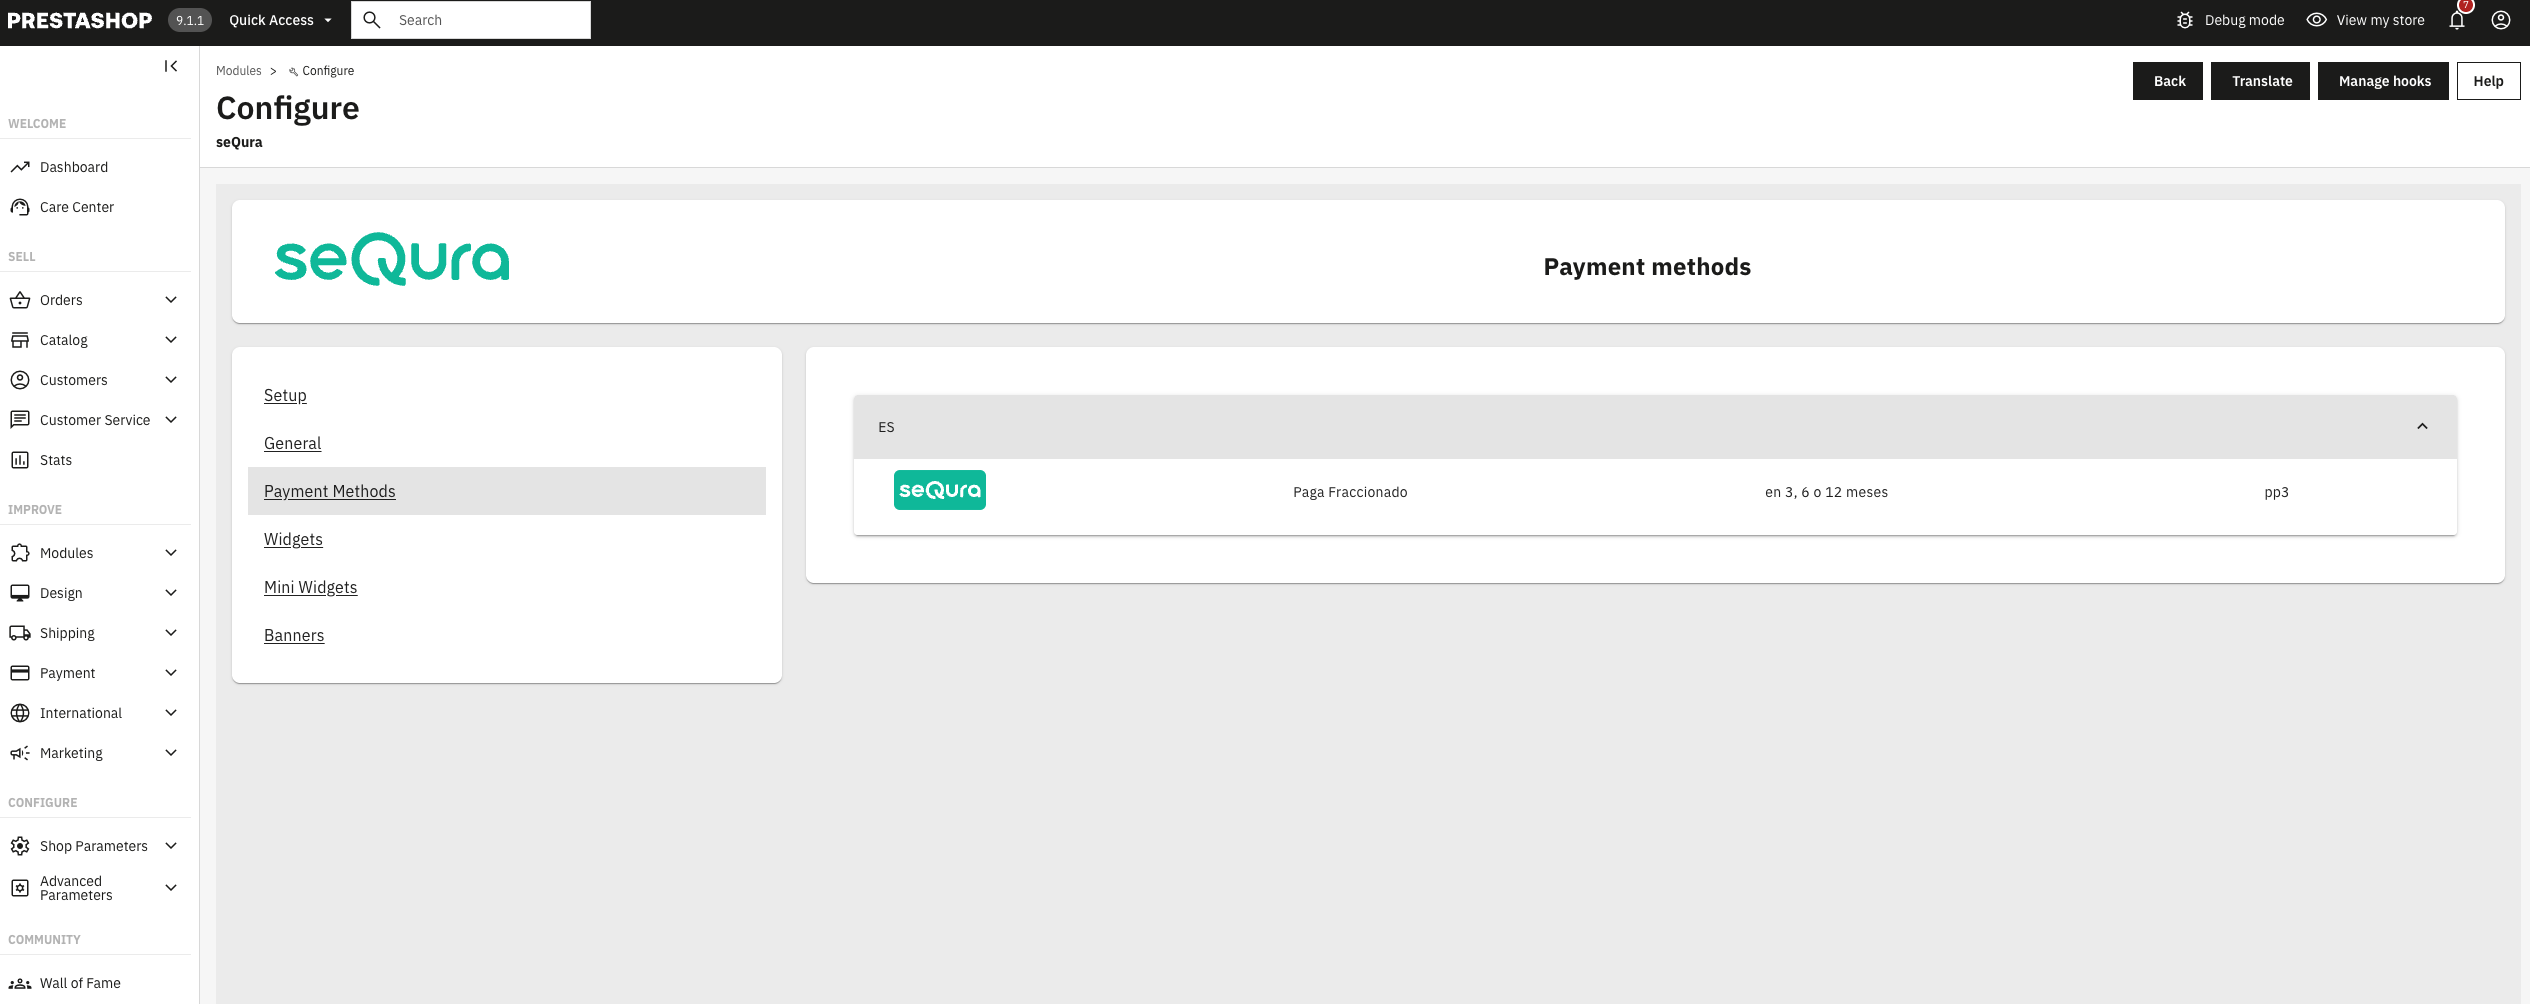
Payment Methods
In this section, the payment methods contracted with seQura will appear.
Visual Integration
Widgets
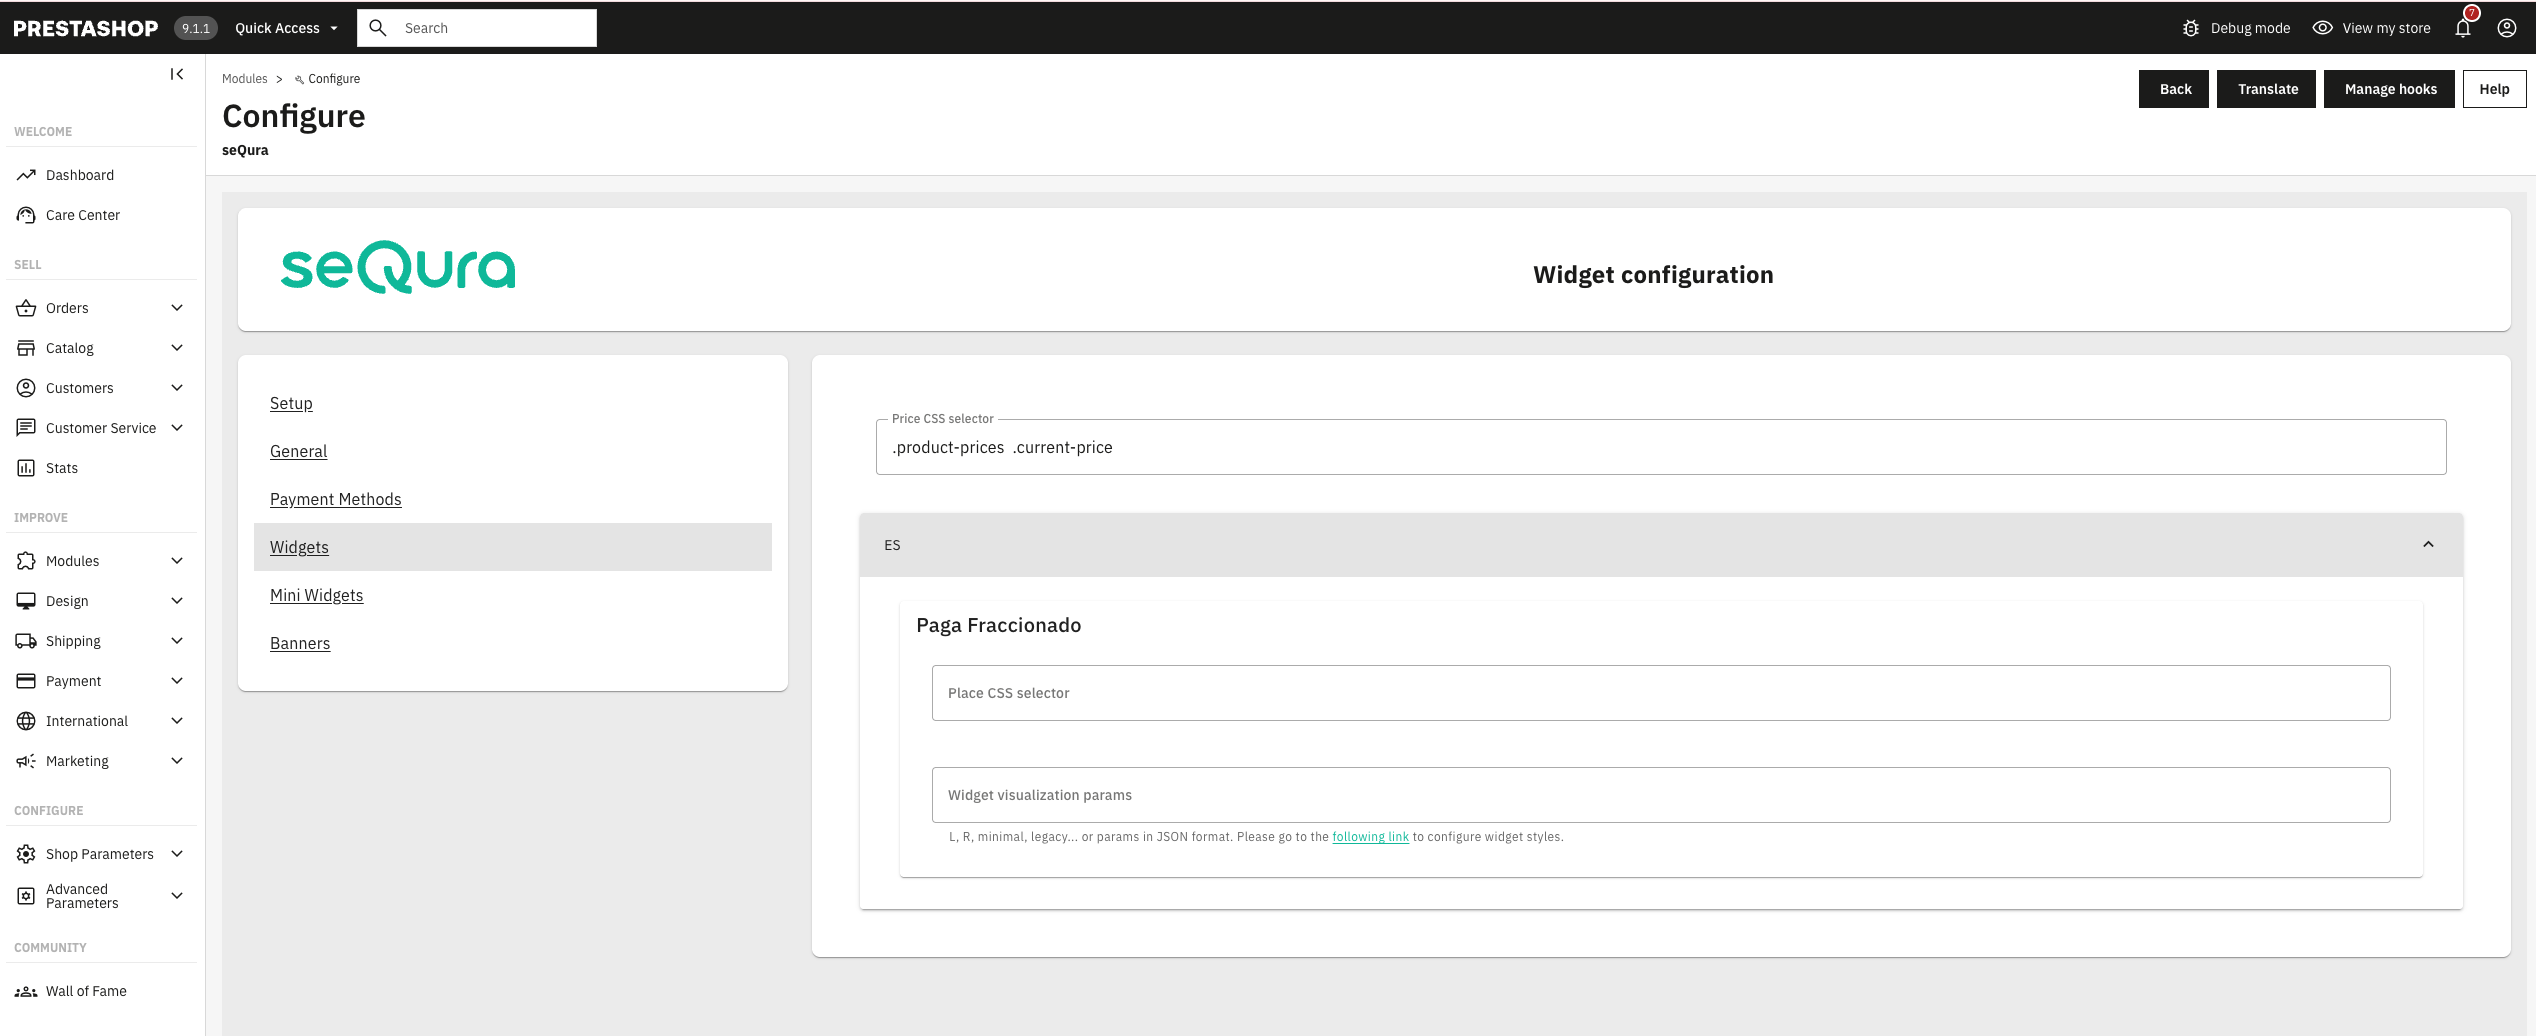
- Price CSS Selector: The CSS selector that indicates the product price to the widgets.
- Assets Key: These are the parameters provided by seQura and were previously explained.
For each product, you can configure:
- Place CSS Selector: CSS selector to indicate where on the product page the widget will be added.
- Widget visualization params: Format for the widget. If left empty, the widget will adopt its default format.
Mini Widgets
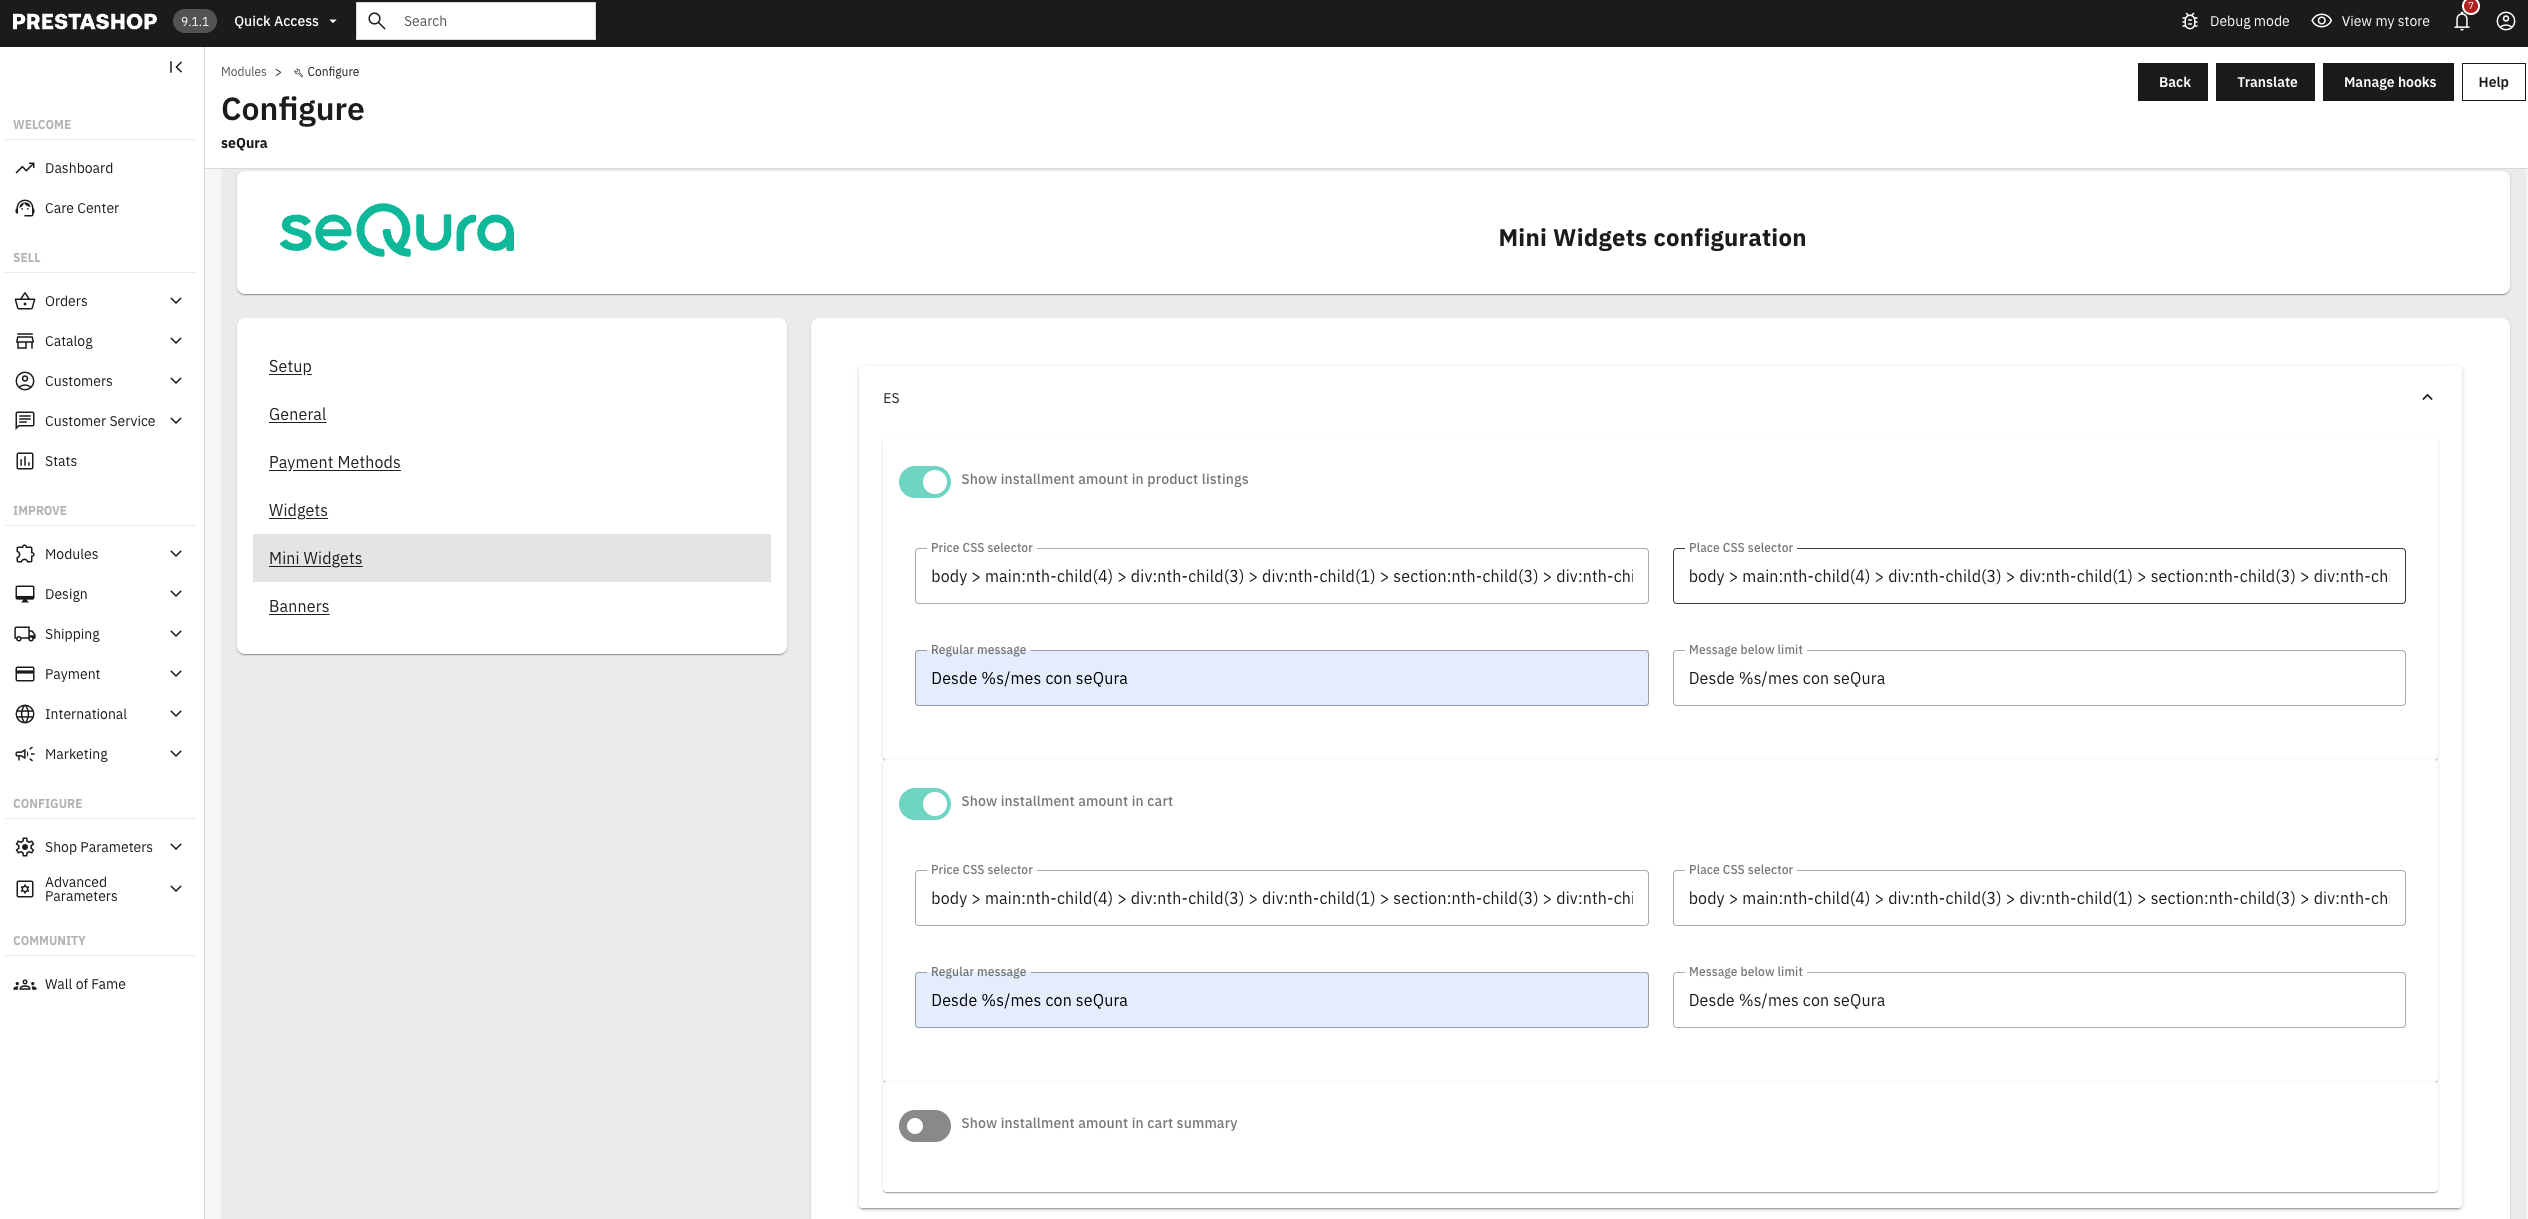
- Product to promote in mini-widgets: Configure which product will appear in the mini-widgets.
- Show installment amount in product listings: Allows activating/deactivating the installment simulator in product categories.
- Show installment amount in shopping cart page: Allows activating/deactivating the installment simulator in the shopping cart.
- Show installment amount in mini cart summary: Allows activating/deactivating the installment simulator in the mini shopping cart.
The following parameters can be configured for each section:
- Price CSS selector: The CSS selector indicating the product price to the widgets.
- Place CSS selector: CSS selector to indicate where on the product page the widget will be added.
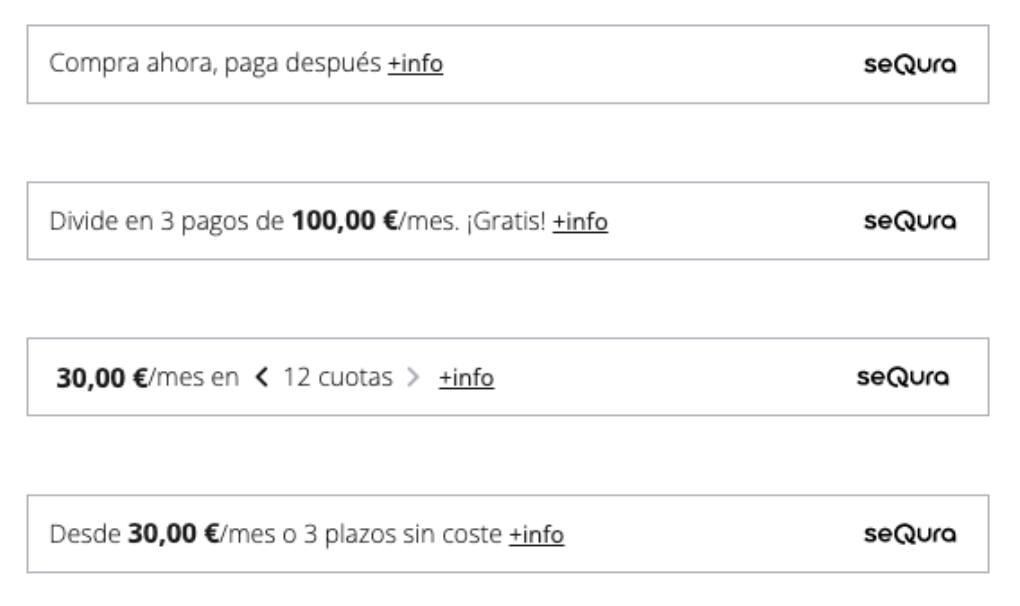
- Regular message: Message displayed in the mini-widget.
- Message below limit: Message displayed in the mini-widget. Leave blank to hide it.
Widget Customization
There are currently two widget styles. You can choose which one to show using the "Widget visualization params" field in the seQura Checkout module:
Text

Banner
They can be further customized using parameters in JSON format. Use the widget simulator to design the widget and paste the generated .json code in the "Widget visualization params" field.
The parameters you can modify are:
- type (text, banner o legacy)
- size (S, M o L)
- font-color (#rrggbb)
- background-color (#rrggbb)
- alignment (left, center o right)
- branding (white, black o default)
- starting-text (only o as-low-as)
- amount-font-size (13, 15, 17)
- amount-font-color (#rrggbb)
- amount-font-bold (true o false)
- link-font-color (#rrggbb)
- link-underline (true o false)
- border-color (#rrggbb)
- no-costs-claim (free o without-cost)
If you leave the field empty the default parameters will be {"type":"text", "size":"M", "alignment":"center", "font-color":"#353735"}.
Marketing resources (sliders, logos and texts)
If you want to create a personalized banner or slider, you can use the images and logos in this link. These images and logos are in PNG and SVG format, in order to give flexibility in the design and make it as close to your design as possible.
- España - Recursos de Marketing
- Portugal - Recursos de Marketing
- Italy - Risorse di Marketing
- France - Ressources de Marketing
In that same link you will find tutorials for the visual elements available for our payment methods.
Updated 2 months ago