
Configuration
First time setting up seQura? When you go to WooCommerce > seQura, we'll launch a setup wizard to get you running fast.
-
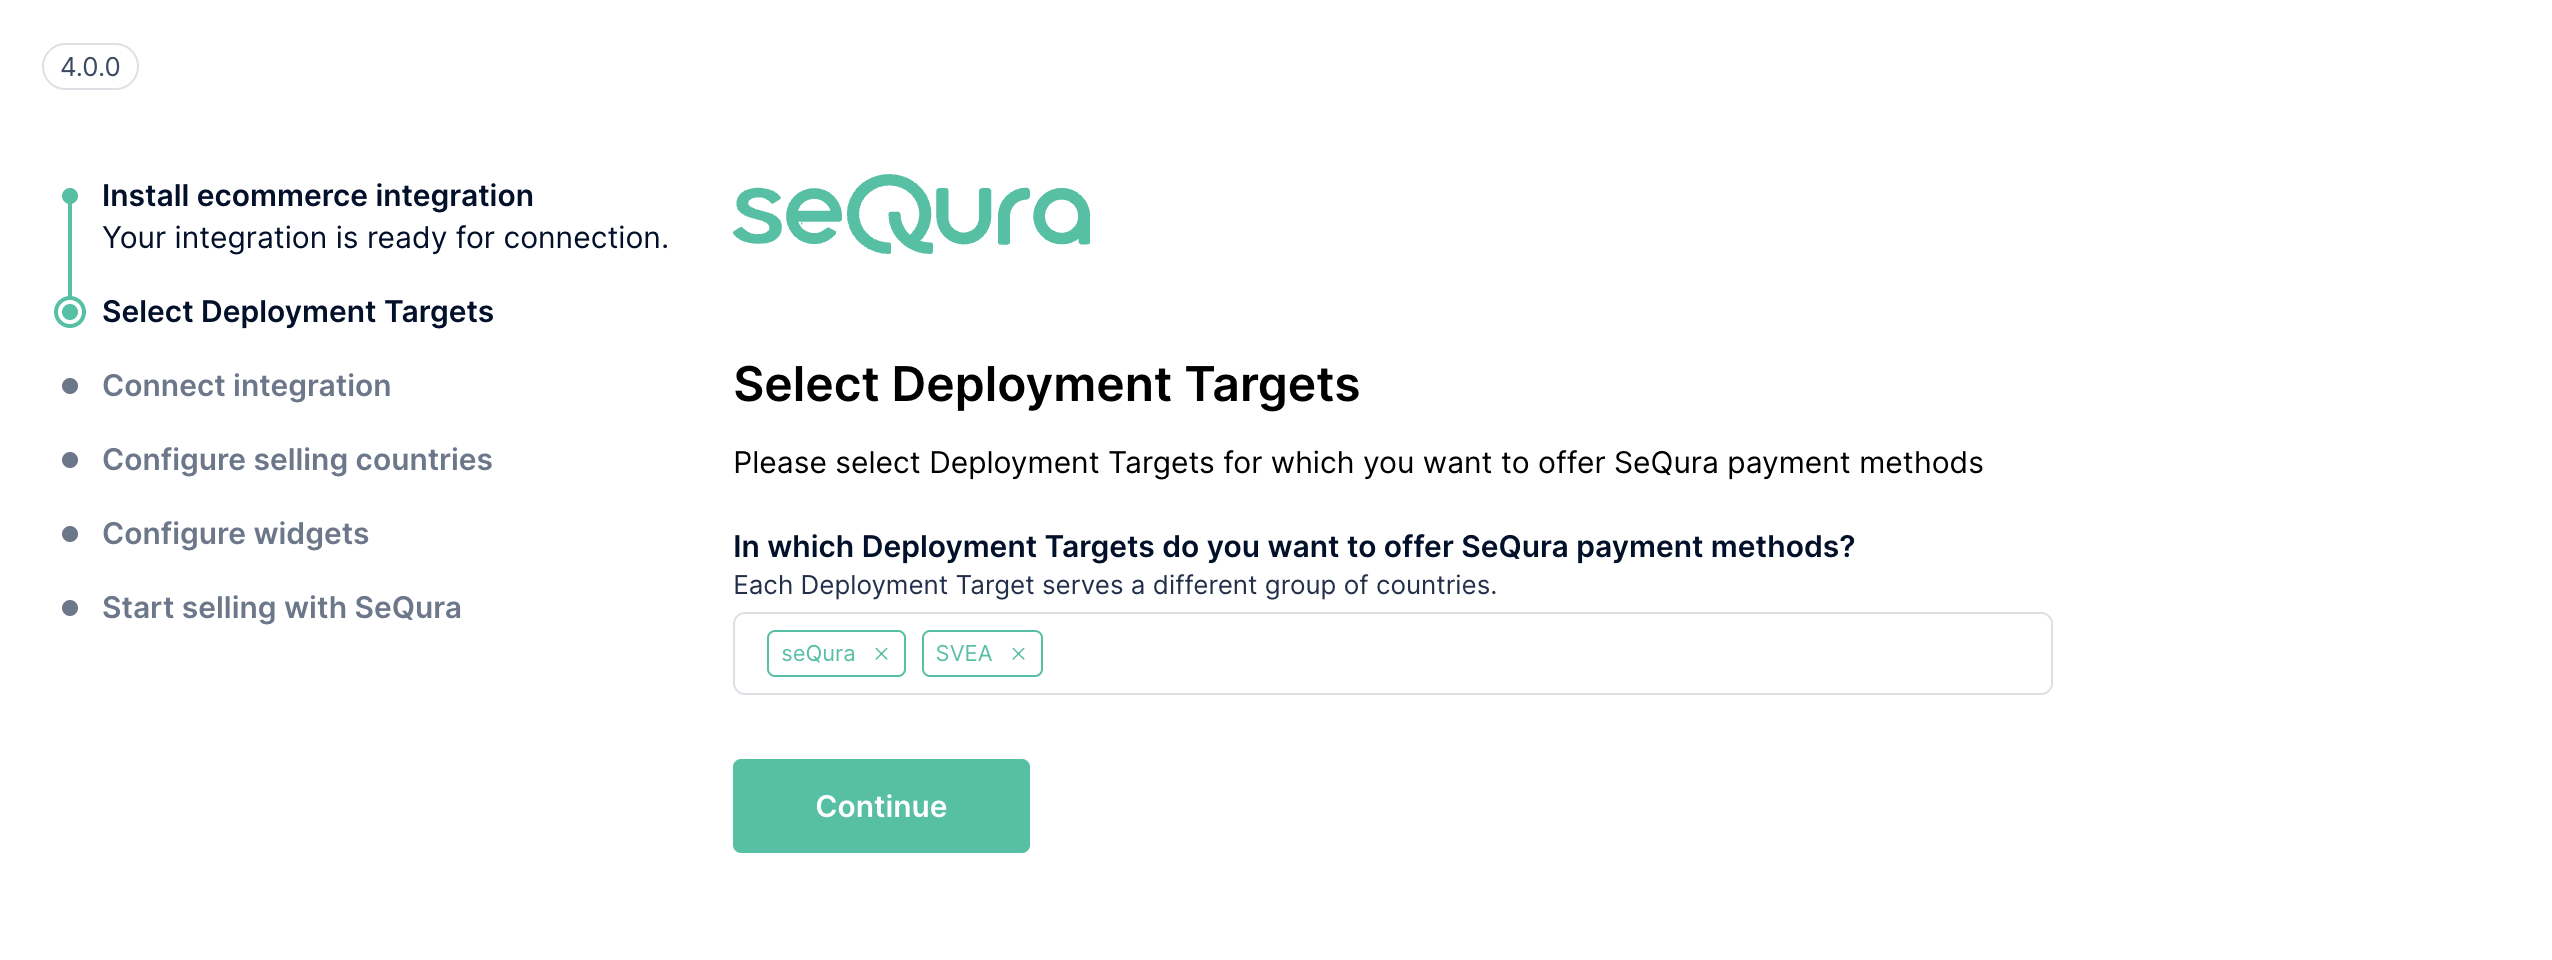
Pick where you want seQura available. Choose seQura for Spain, SVEA for other countries. Offering seQura in multiple regions? Select both.
-
Enter your seQura username and password.
-
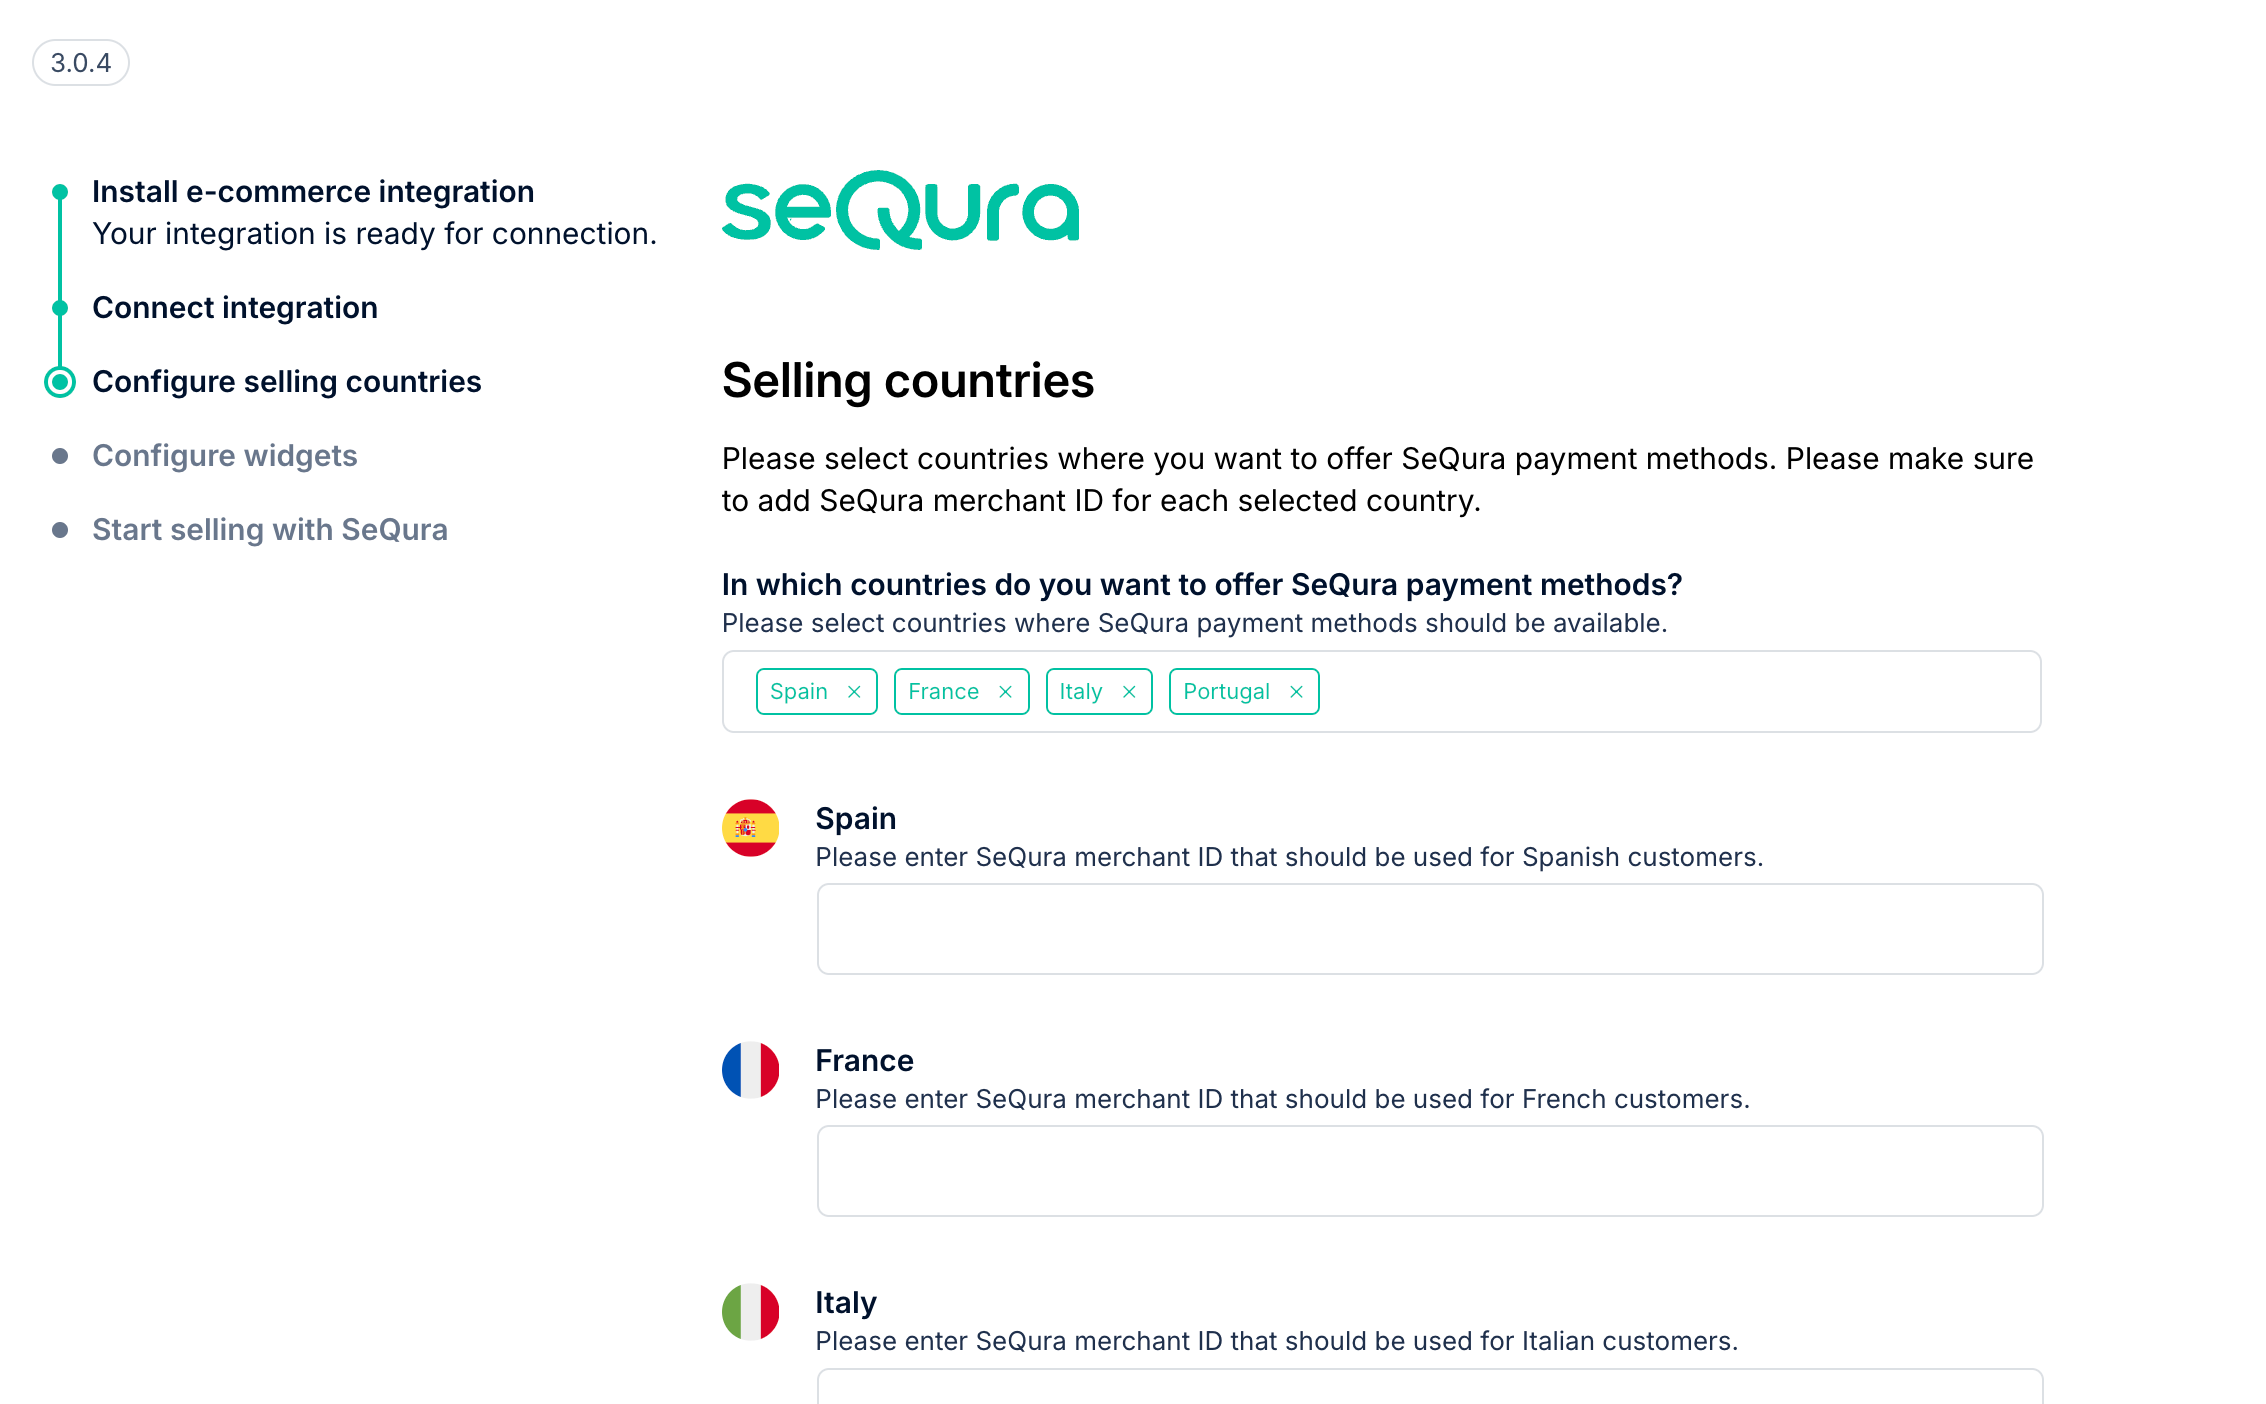
Select which countries get seQura. For each one, add your Merchant ID from seQura.
-
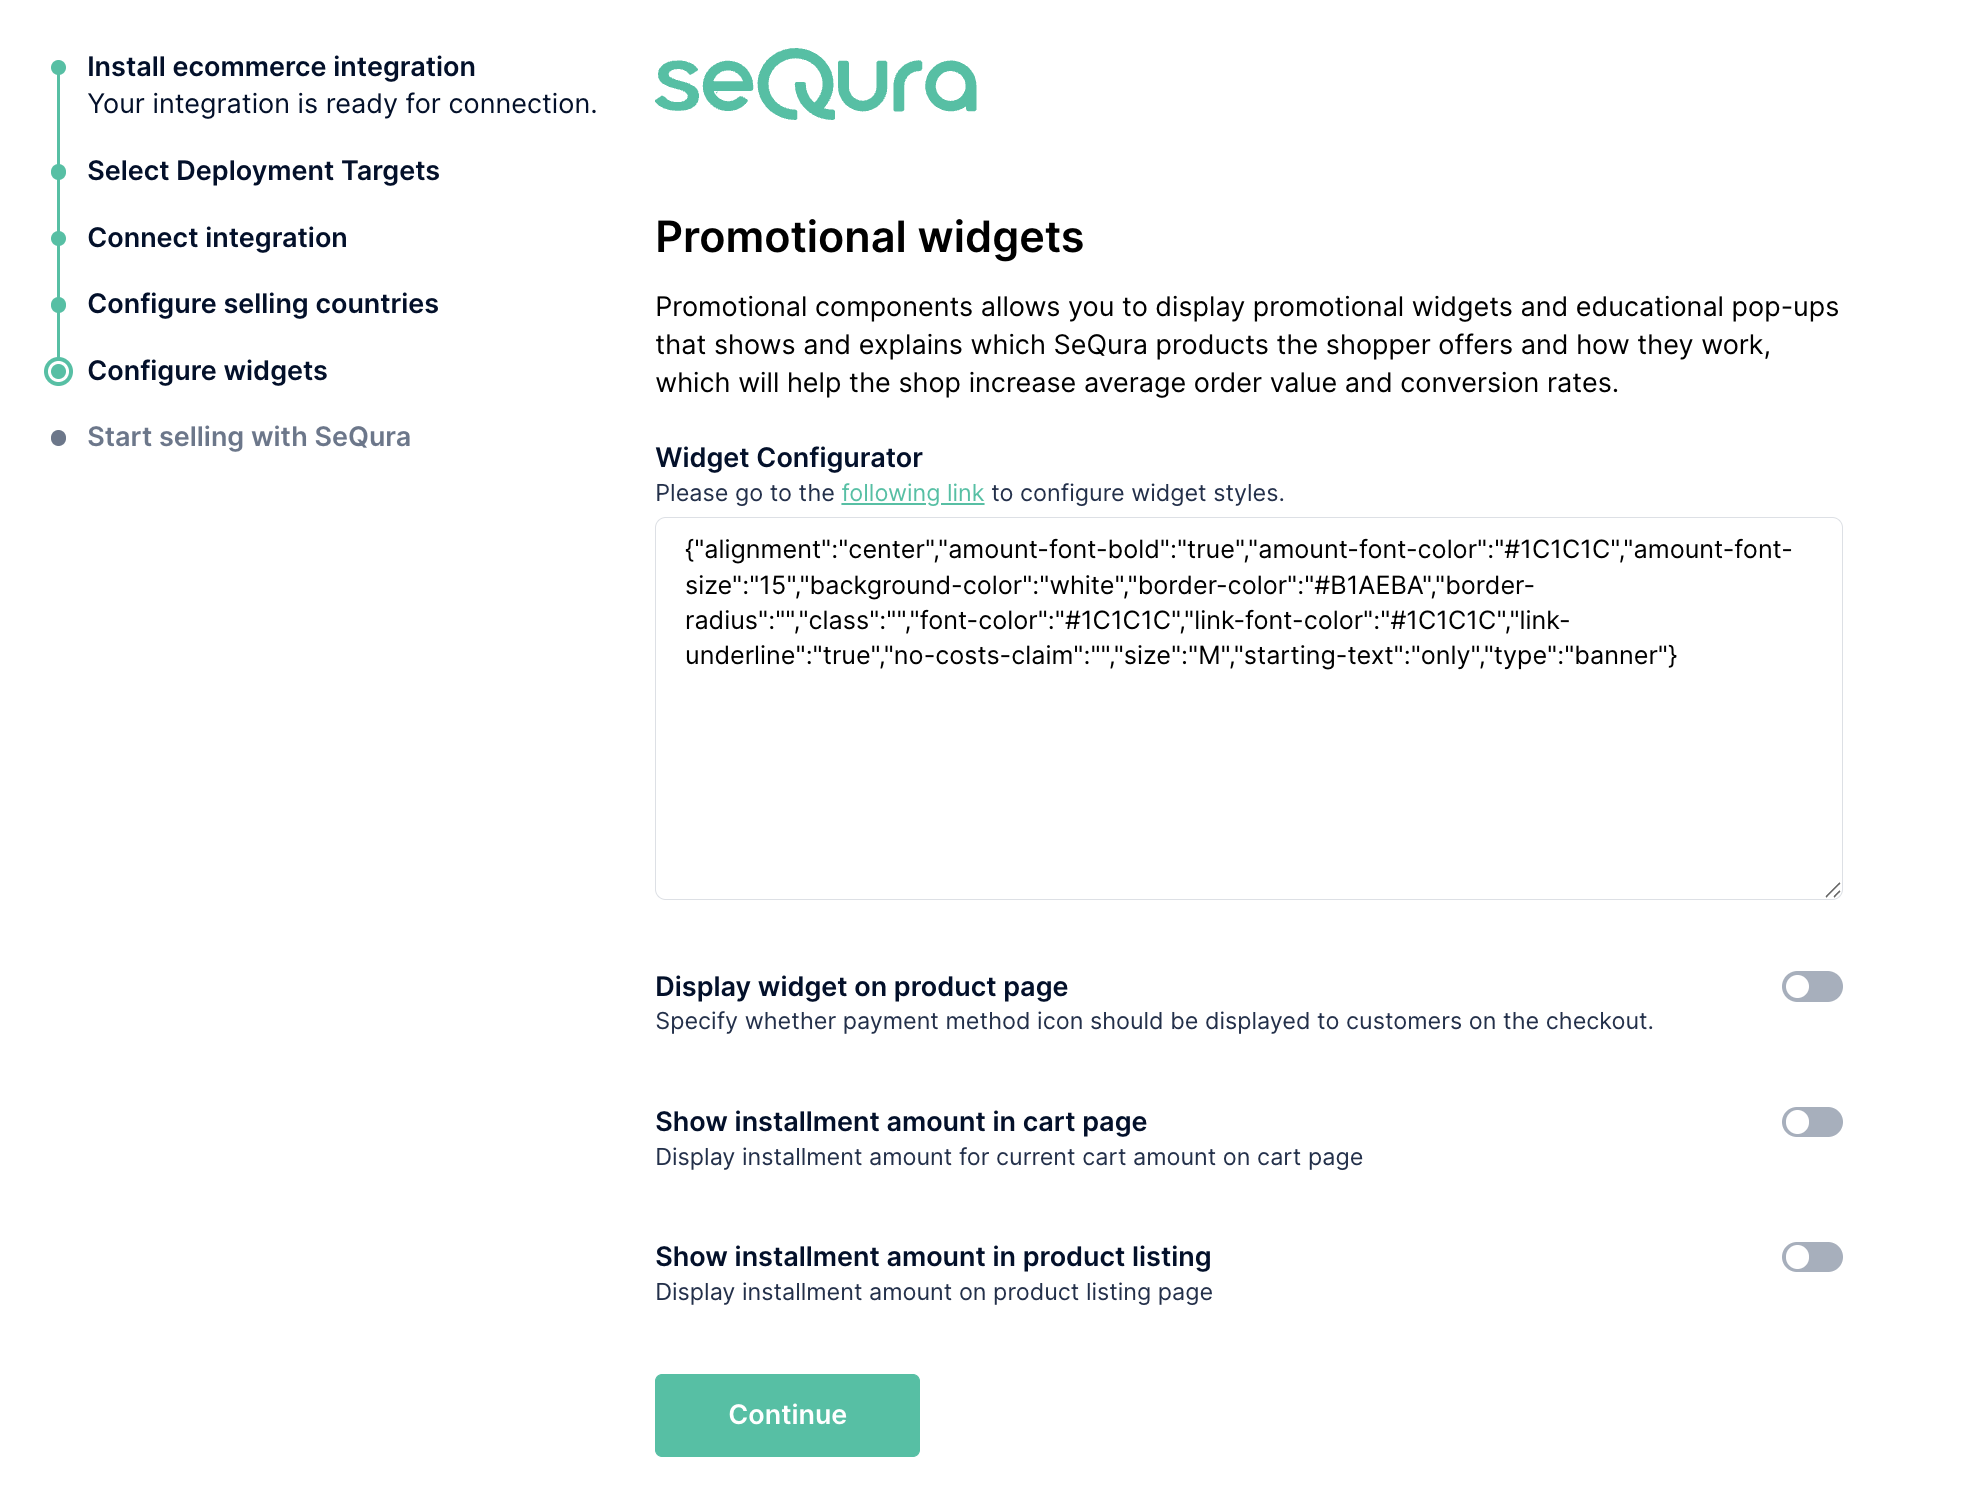
Next, you can customize how our promotional widgets look. More details on that later in this guide.
-
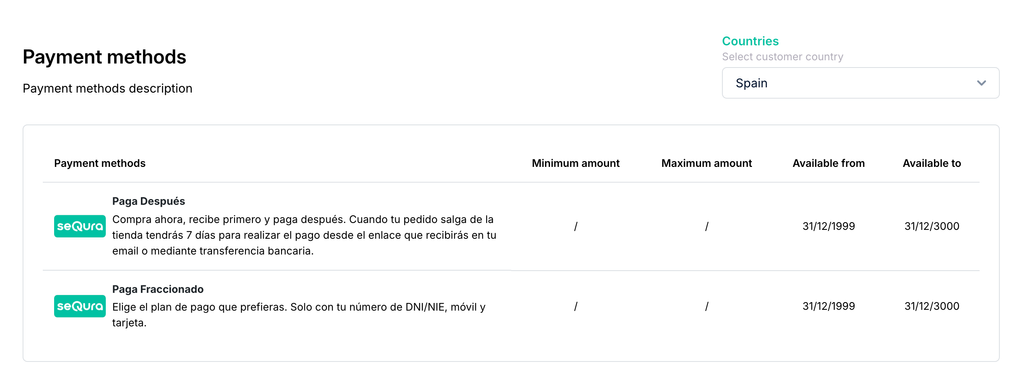
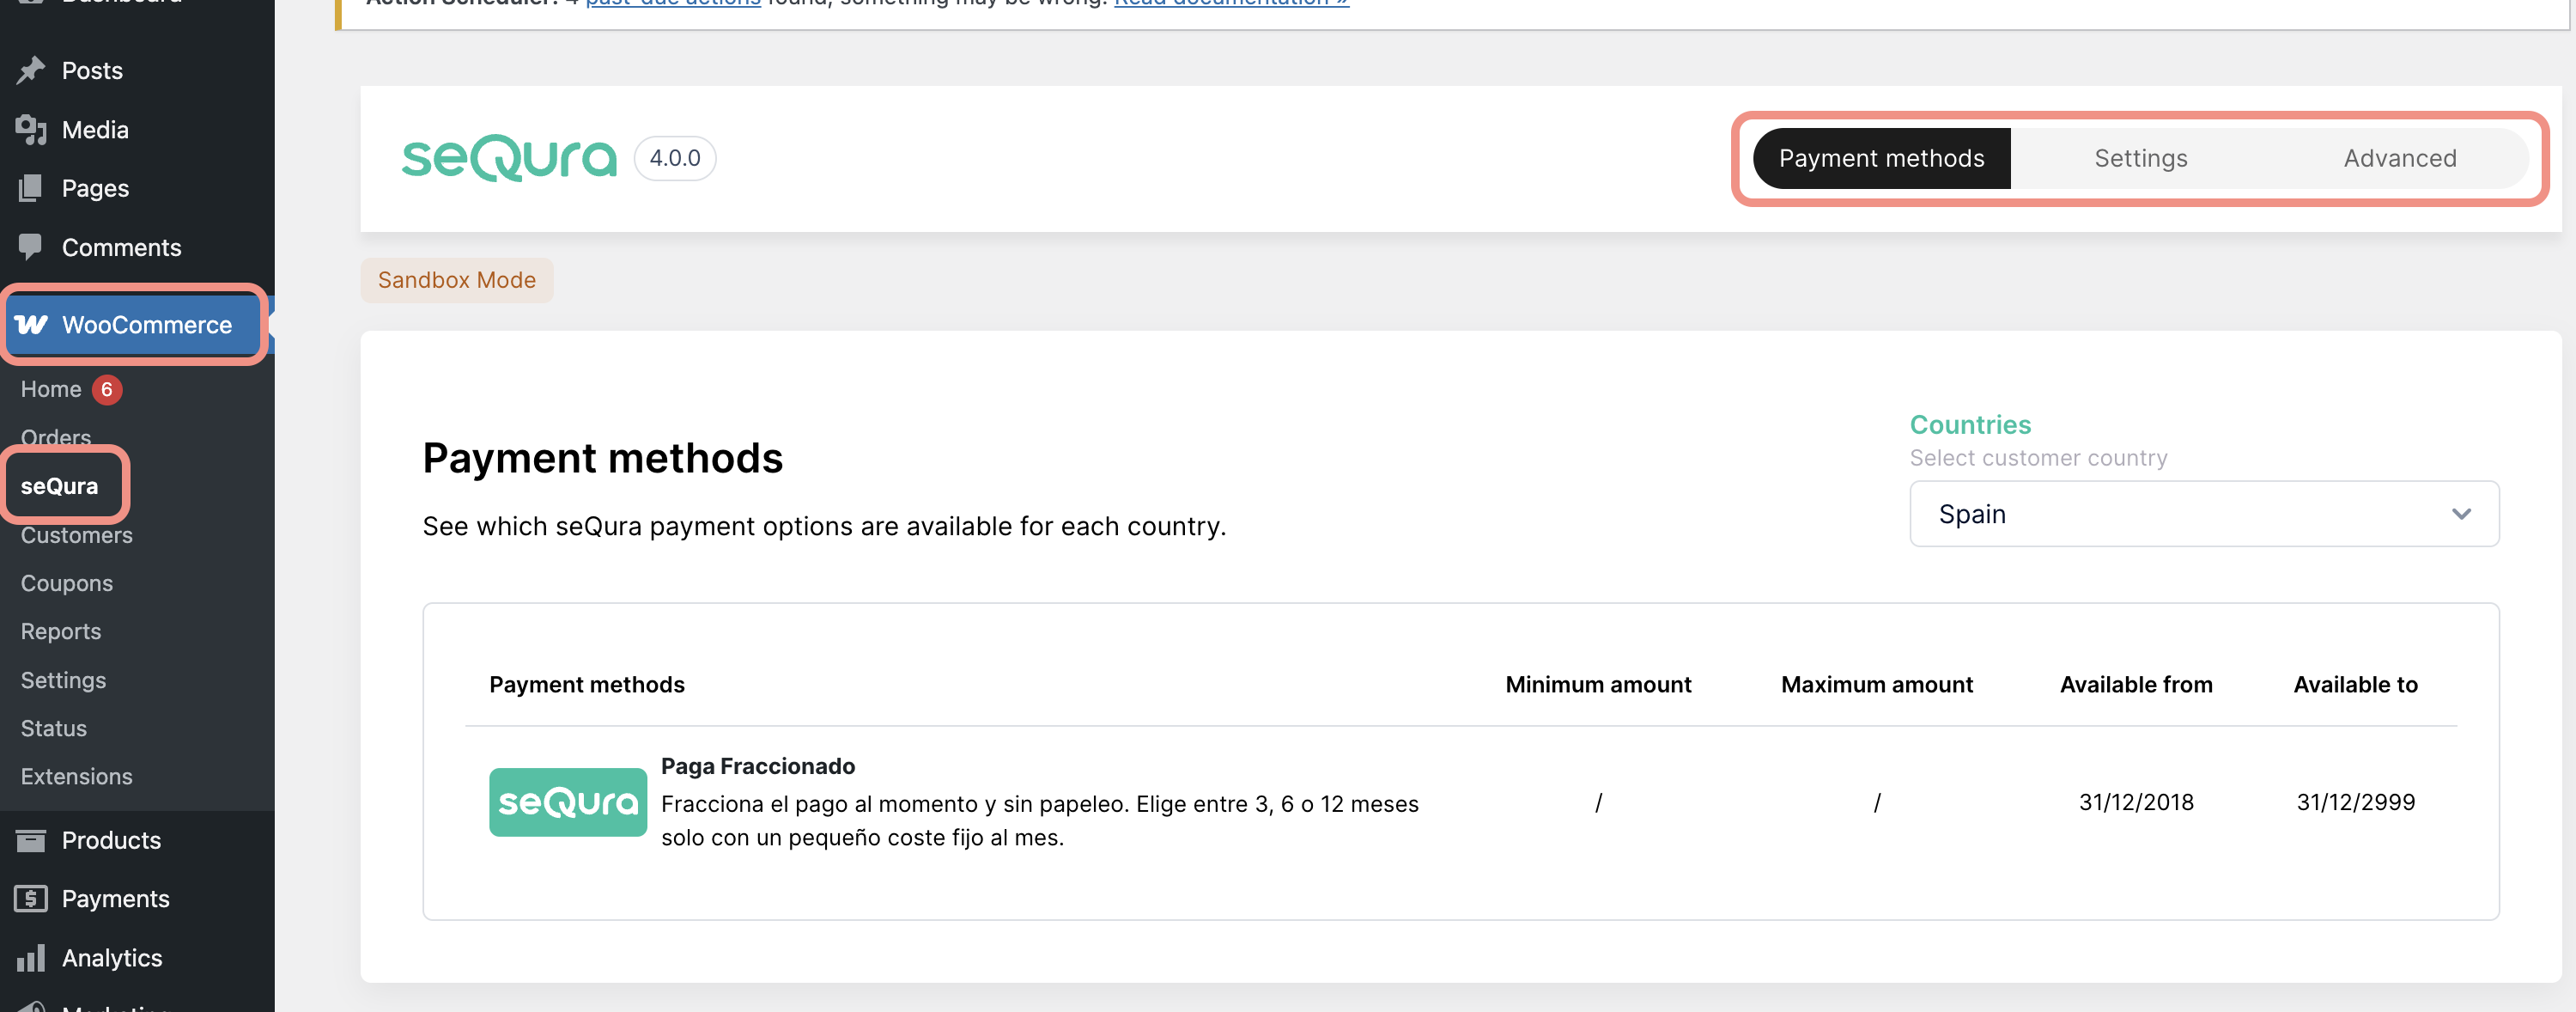
The payment methods contracted with seQura should appear
Configuration Process
Already have seQura running? Go to WooCommerce > seQura to tweak your settings.
-
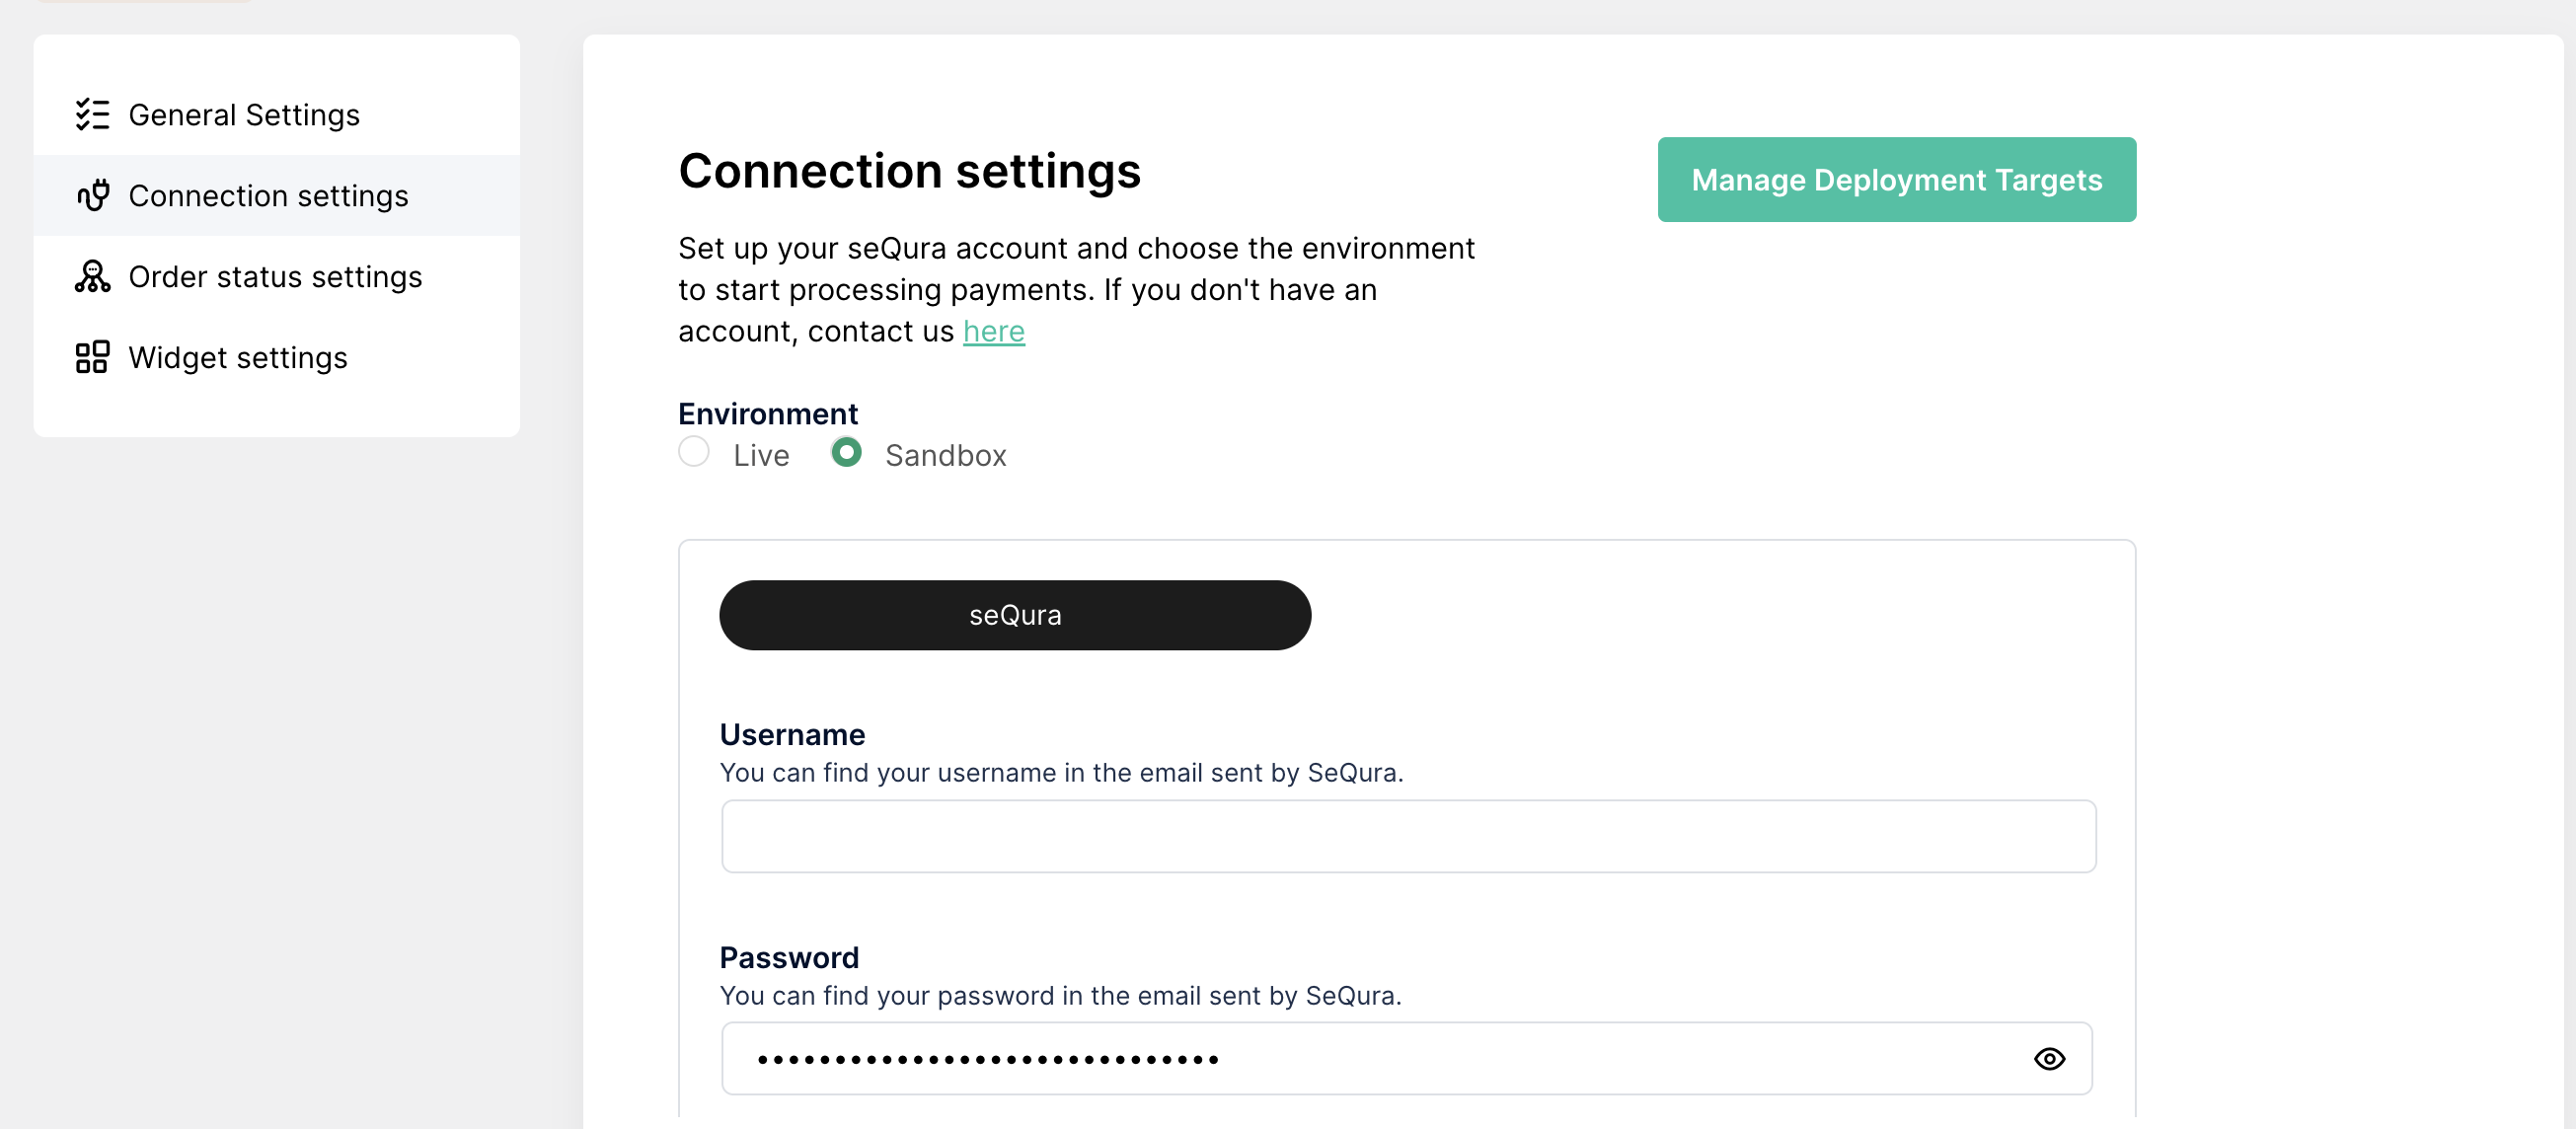
Head to Settings > Connection settings. You've got 2 environments:
- Sandbox – Test everything here, safely. Your customers can't see this.
- Live – Flip this on once seQura is configured and working perfectly.
-
Check your seQura username and password
-
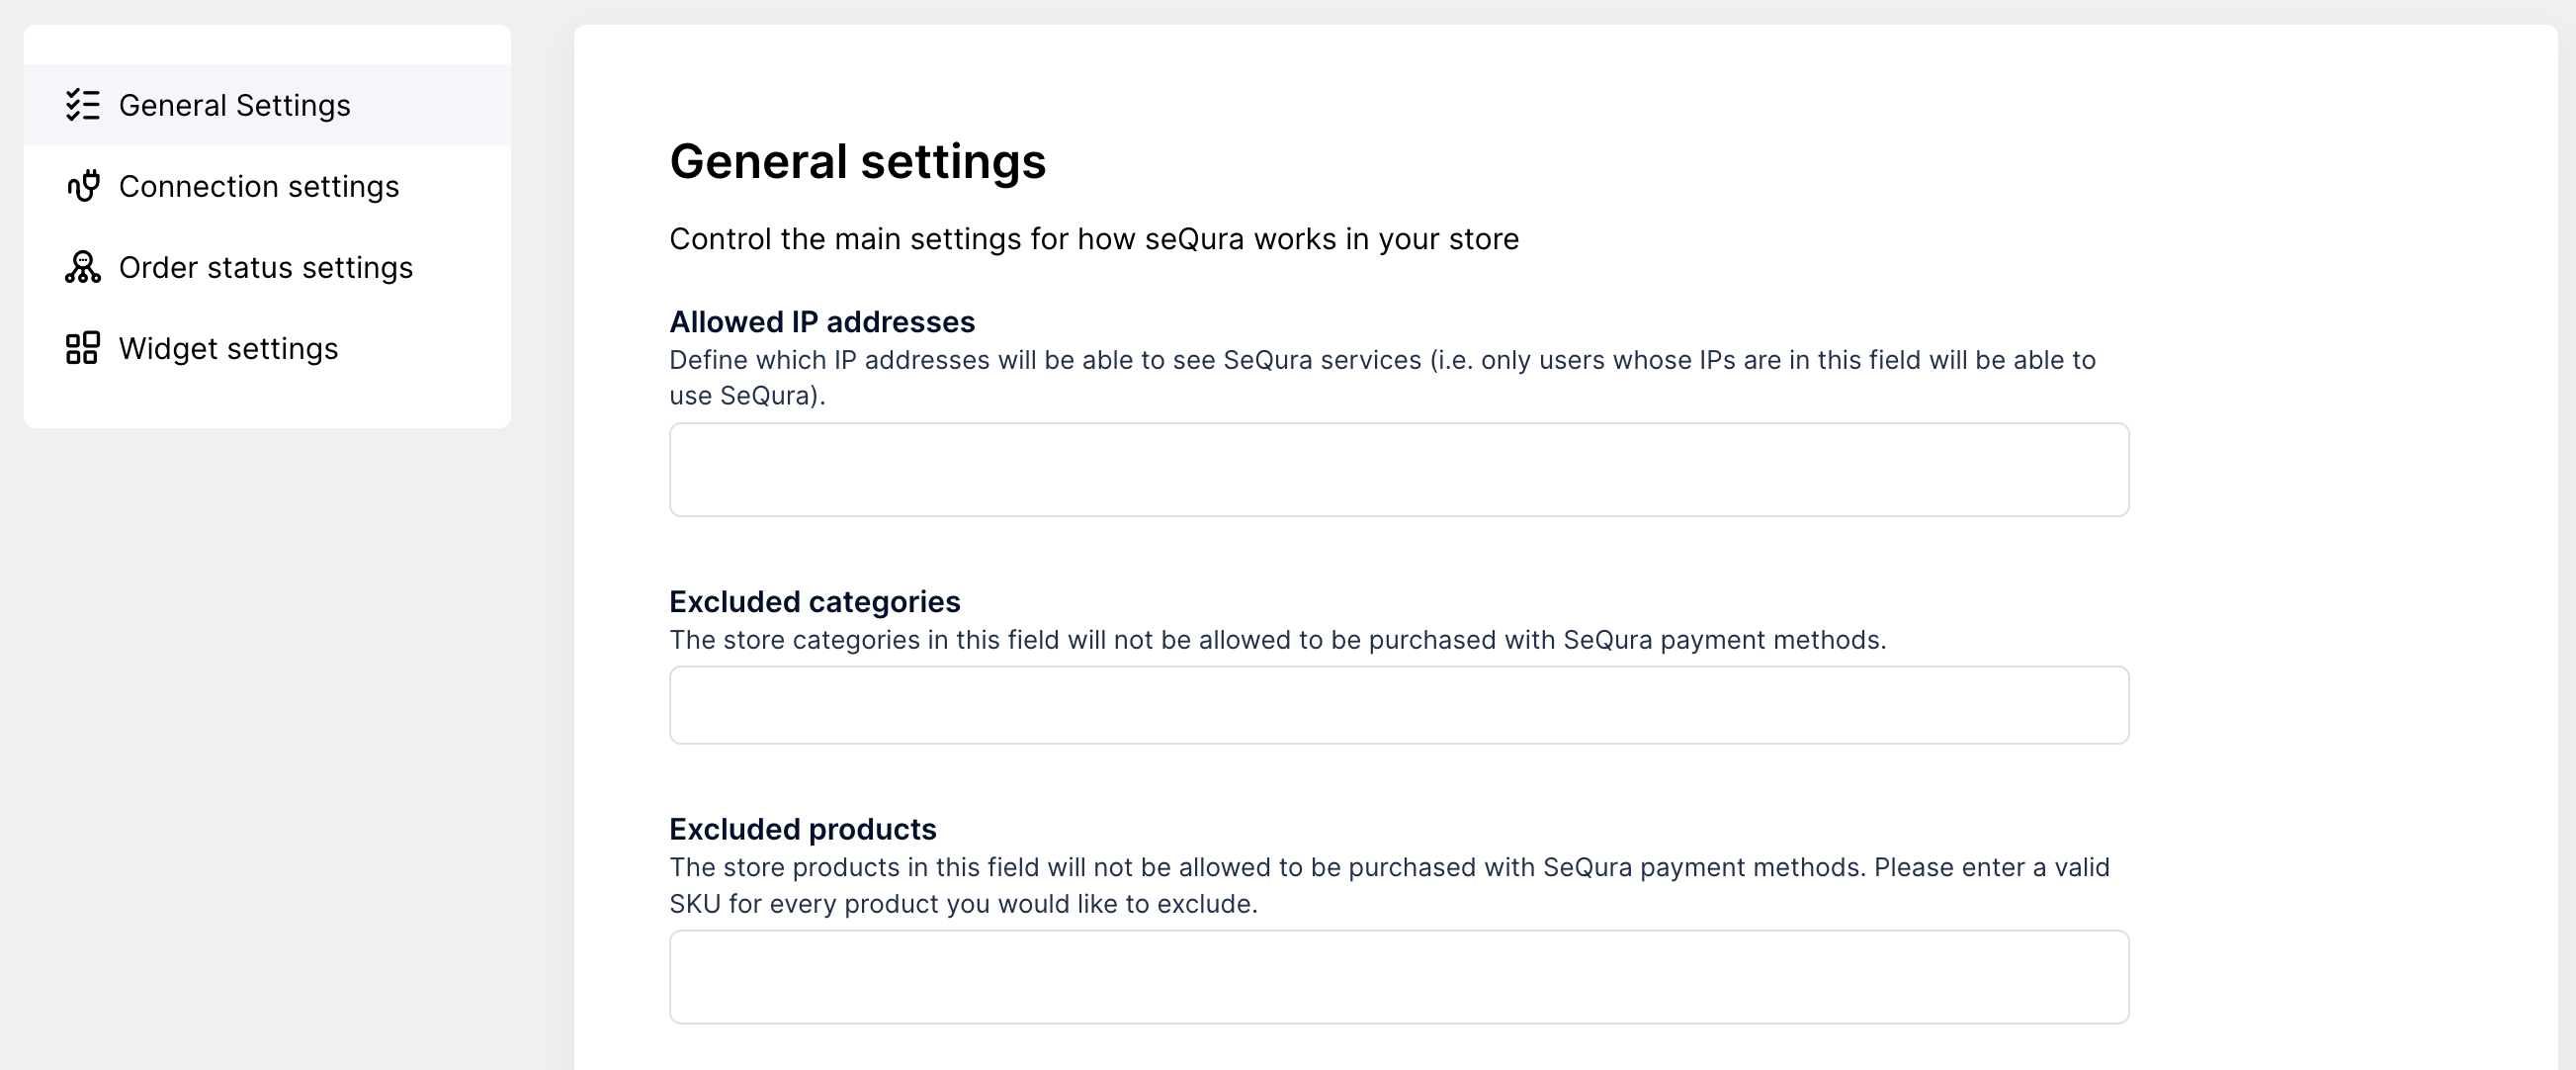
In General Settings, customize what works for you:
-
Allowed IP Addresses – In Sandbox mode, only IPs you add here see seQura. Add an IP and press Enter.
-
Excluded Categories – WooCommerce categories where seQura shouldn't show up.
-
Excluded Products – Specific products where seQura shouldn't be available.
-
Enabled for Services – Turn this on if your contract covers services.
-
Countries – Pick where seQura is available. Add your Merchant ID for each country.
-
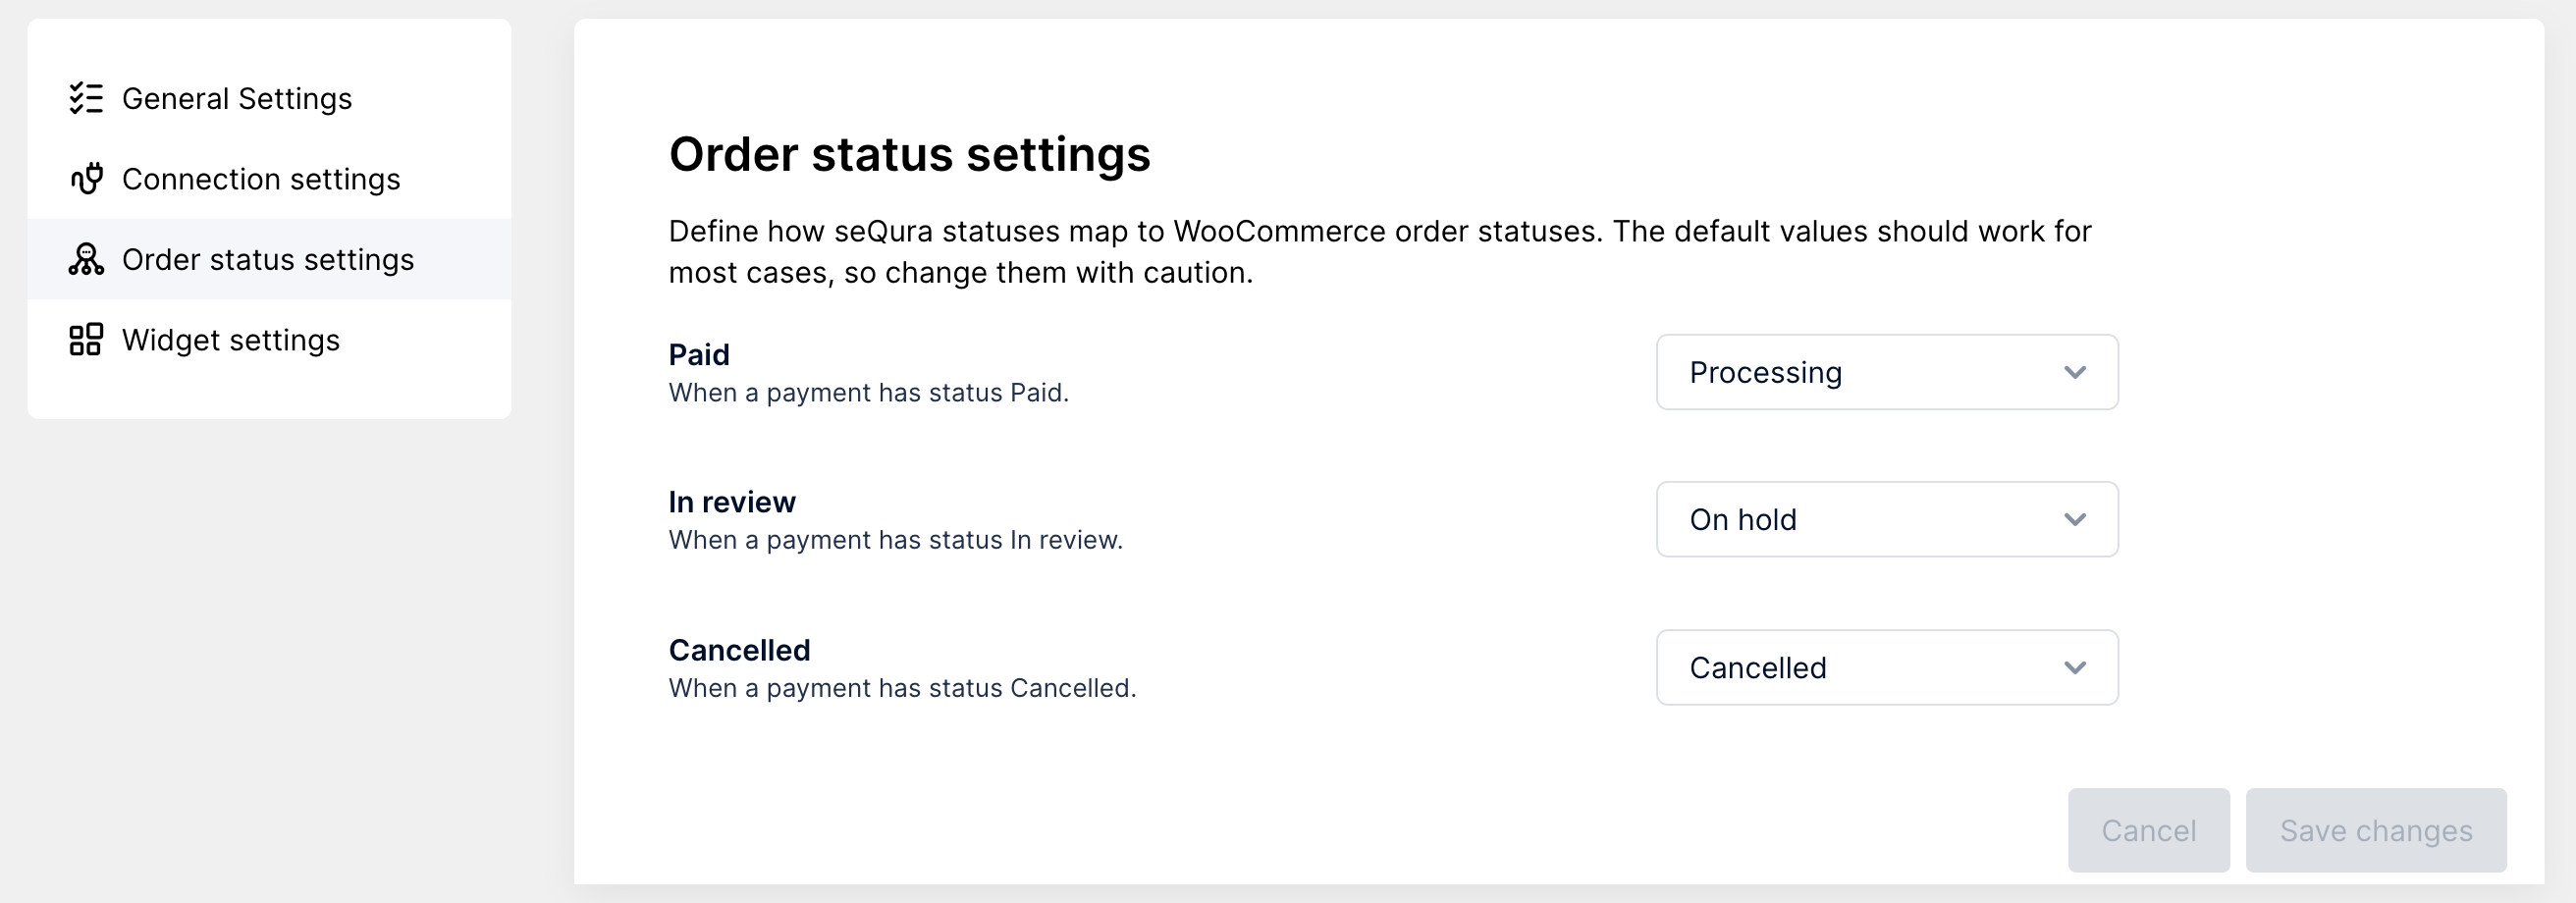
- In Order status Settings, map seQura statuses to WooCommerce ones. The defaults work great for most stores—we suggest leaving them as is unless you have a good reason to change them.
Education
If the business line is TRAINING COURSES, scroll to the bottom of this page to view the specific configuration.
Visual Integration
Want to show seQura widgets on your product pages? You can customize how they look.
Go to WooCommerce → seQura → Widget Settings.
-
In the section Would you like to use promotional components?, select Yes, which will activate a series of configurations.
-
In the "Assetkey" section, add the code provided in the seQura email.
-
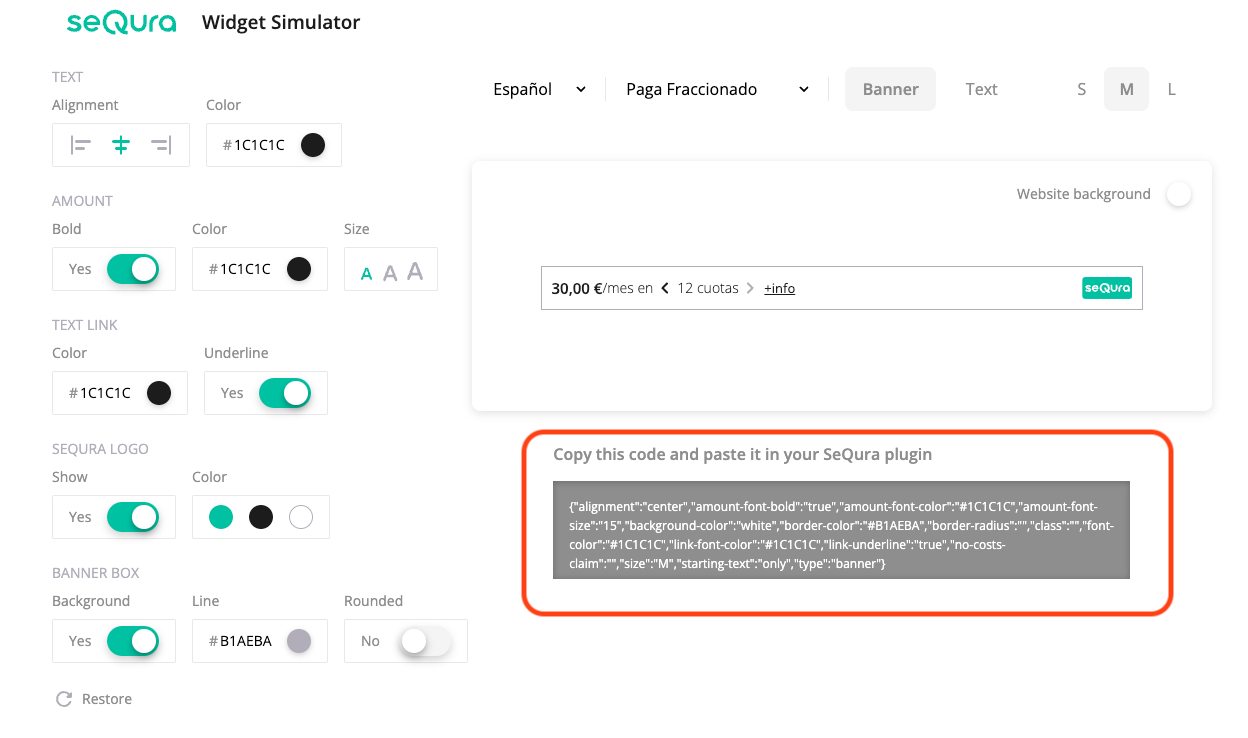
In the Widget Configurator, you can modify the visual appearance of the widget. In our Widget Simulator, you can choose the design that best fits your website. Once the different parameters are selected, you can copy the resulting JSON code and paste it into the Simulator Parameters in our plugin.
-
To display the different available widgets on your page, activate the following options:
| Options | Image |
|---|---|
Display widget on product page: Activate our widget on the product page. Price selector: CSS selector to retrieve the product price. Alternative price selector: CSS selector to retrieve prices for variable products. Alternative price detection: CSS selector for cases where we want to select an alternative price for the product. Default widget location selector: CSS selector of the location below which our widget will be added. Customize widgets: Allows you to choose a different location selector and styles from the default ones for one or more of the enabled seQura products. | 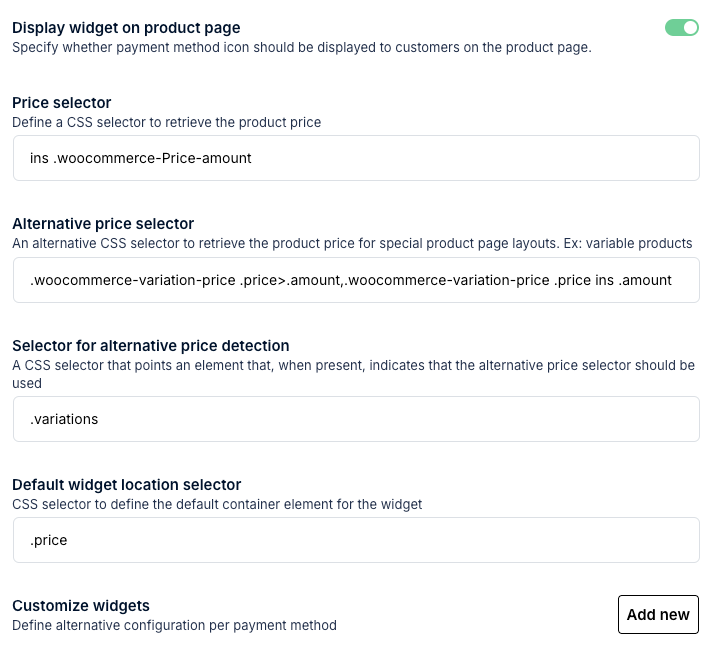 |
| Widget in the Cart This option allows you to select the CSS selectors for the price and location in the cart. The widget will be added below the selected location selector. | 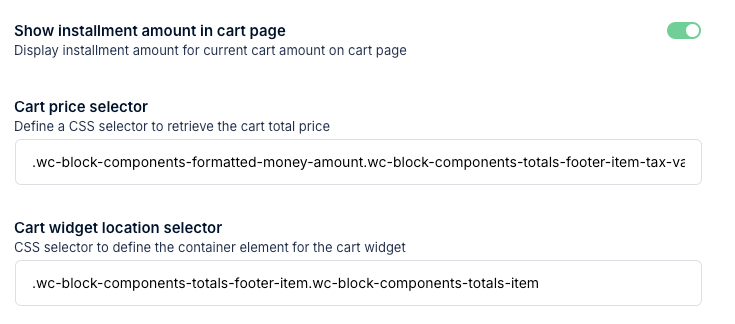 |
| Product List This option allows you to select the CSS selectors for the price and location in the product list. The widget will be added below the location selector of each product displayed in the list. | 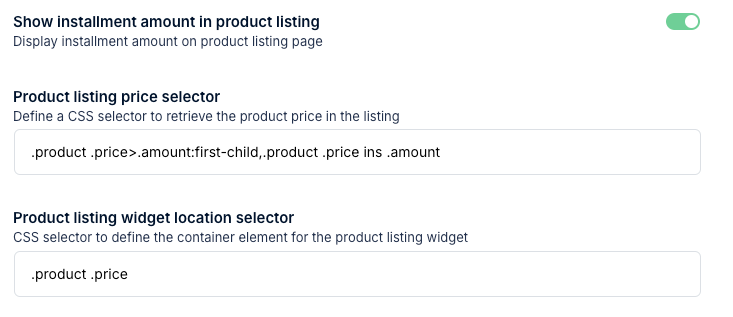 |
Visual material (sliders, logos and texts)
If you want to create a personalized banner or slider, you can use the images and logos. These images and logos are in PNG and SVG format, in order to give flexibility in the design and make it as close to your design as possible.
🇮🇹 ITALY
- Resources:Marketing Toolkit
- FAQ: Preguntas Frecuentes
🇵🇹 PORTUGAL
- Resources: Marketing Toolkit
- FAQ: Perguntas Frequentes
🇫🇷 FRANCE
- Resources: Marketing Toolkit
- FAQ: Preguntas Frecuentes
In that same link you will find tutorials for the visual elements available for our payment methods.
Education Configuration
If the business line is TRAINING COURSES Follow the next steps:
Accessing the seQura module settings (WooCommerce > seQura):
-
In General Settings, we need to enable the Enabled for Services option.
-
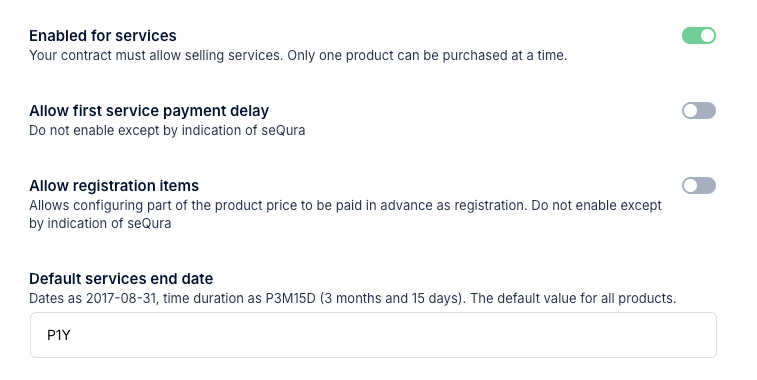
Specify the overall course or service completion period in the Default service completion date.
- The format for the duration will be PXY:
- X: the number that will define days, weeks, months or years.
- Y: one of the following letters:
- D for days.
- W for weeks.
- M for months.
- Y for years.
- For example, you can define the service duration like this:
- 15 days: the code will be P15D.
- 6 weeks: the code will be P15D.
- 3 months: the code will be P3M.
- 2 years: the code will be P2Y.
- 1 year and 6 months will be P1Y6M.
-
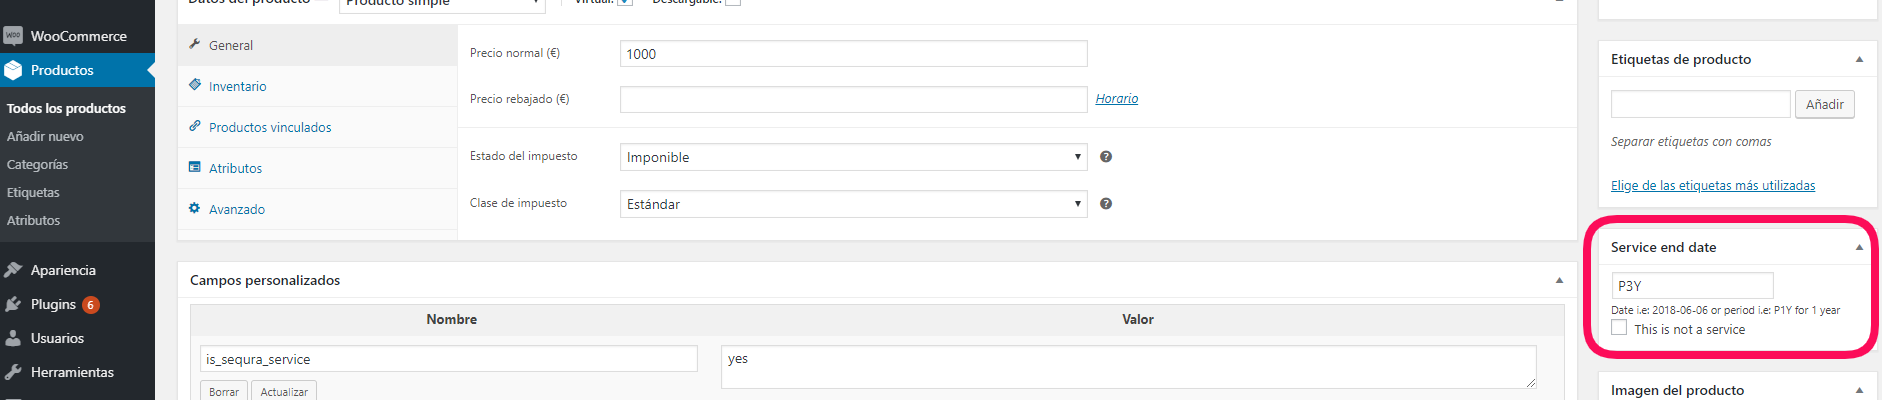
If each course completion period is different, a new option called Service End Date will appear on the right side of the course details, where you can specify the individual date.
-
Configuration of courses/services depending on the teaching mode (presential, online or mixed)
Besides the end period or date, we also need to know if the course is online, presential or mixed. You can set this in the product configuration page. Scroll down until you see the configuration section:

- Make sure the service is set as Virtual.
- If the course is presential, you must disable the Downloadable option.
- If the course has downloadable content, you should enable the Downloadable option.
- The rest of the configuration must be checked in order to ensure it doesn’t affect negatively to the performance.
CSV configuration for courses/services
If you have many courses with different end dates, WooCommerce allows you to export, edit and upload a CSV list file with your courses and their conditions, so you can avoid editing each product separately.
Note: if you don’t find the columns with seQura metas when exporting, please introduce the duration manually to one of the courses, save it, and try exporting again.
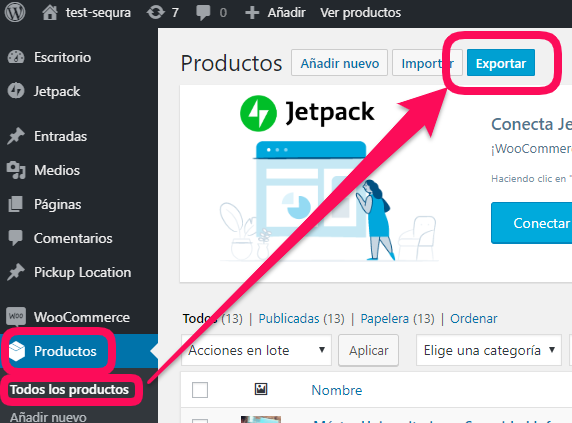
Go to Products → All products → Export
-
Type these parameters in the exportation columns field: ID, SKY, Name, Categories. Also make sure the “Export custom meta” is enabled.
-
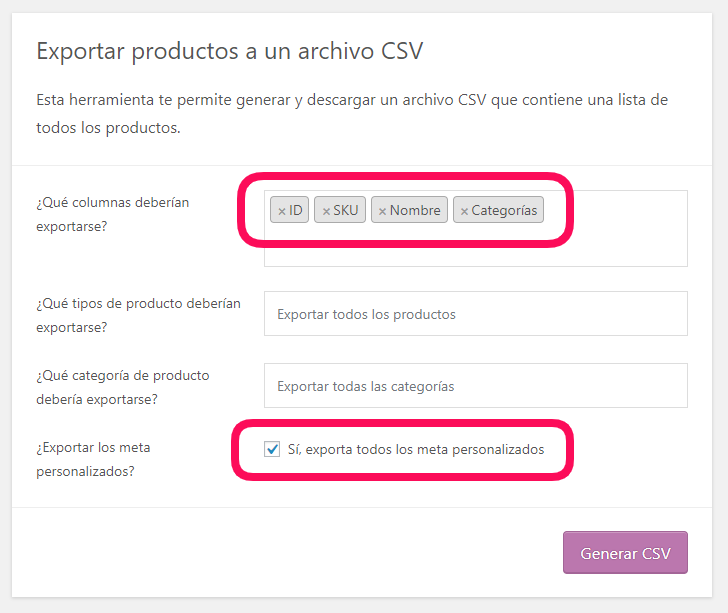
The exportation process will begin once you click on Generate CSV, and the file will be downloaded. Open the file with Excel and you should see all the info in one same column.
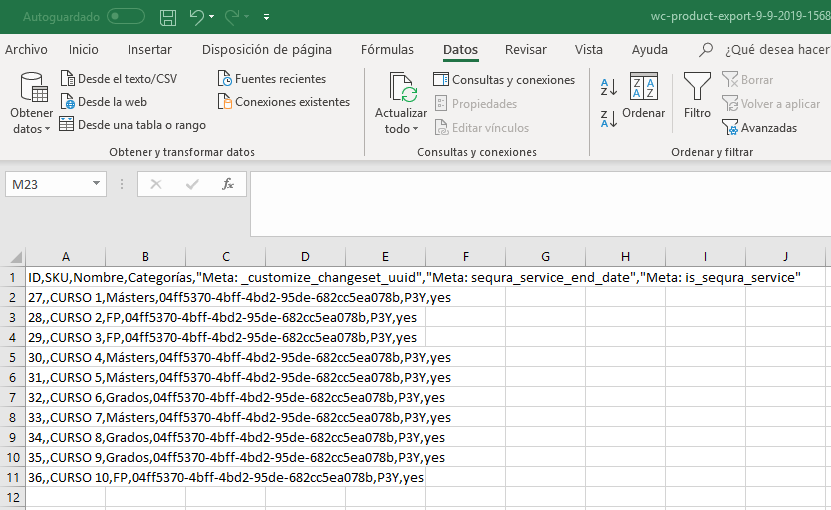
- To see all the info distributed in columns in order to ease the editing, please follow these steps:
-
Select the first column and click on “Text in columns” in the “Data” tab.
-
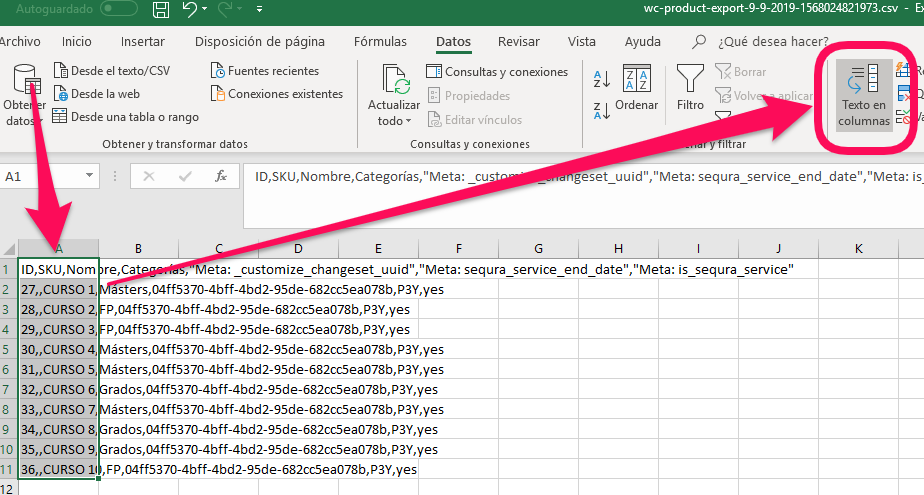
A window will pop up. Select the “Delimited” option and click on “Next”.
-
On the next screen, select ONLY the “Coma” option and click on “End”.
-
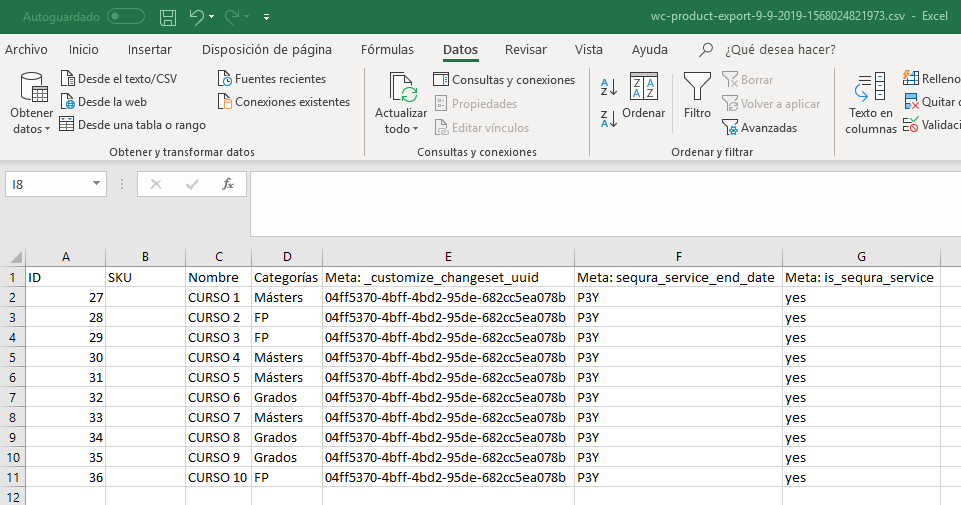
Now you should already see the info distributed in columns.
-
You can edit now the column “Meta: sequra_service_end_date” and add the desired end date to each service.
-
If you want to filter a product to unable it with seQura payments, you can edit the the column “Meta: is_sequra_banned”, writing “yes”.
-
Once you have done the modifications you must delete all the columns except for: “ID”, “Meta: is_sequra_banned”, “Meta: sequra_service_end_date”, “Meta: is_sequra_service” and “Meta: sequra_registration_amount”.
-
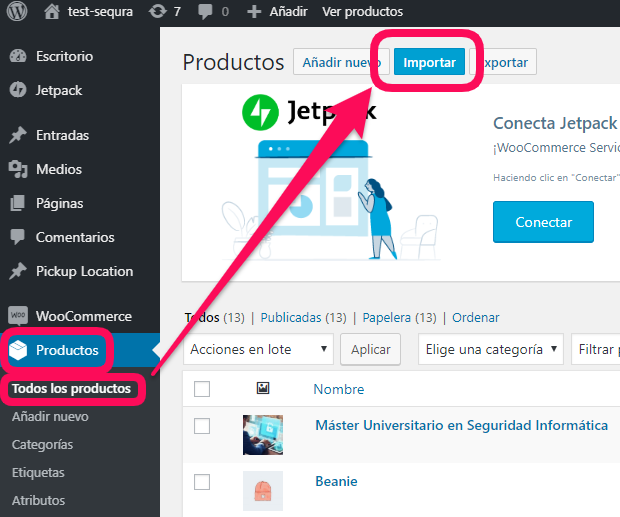
Return to WooCommerce → Products → All products and click on “Import”.
-
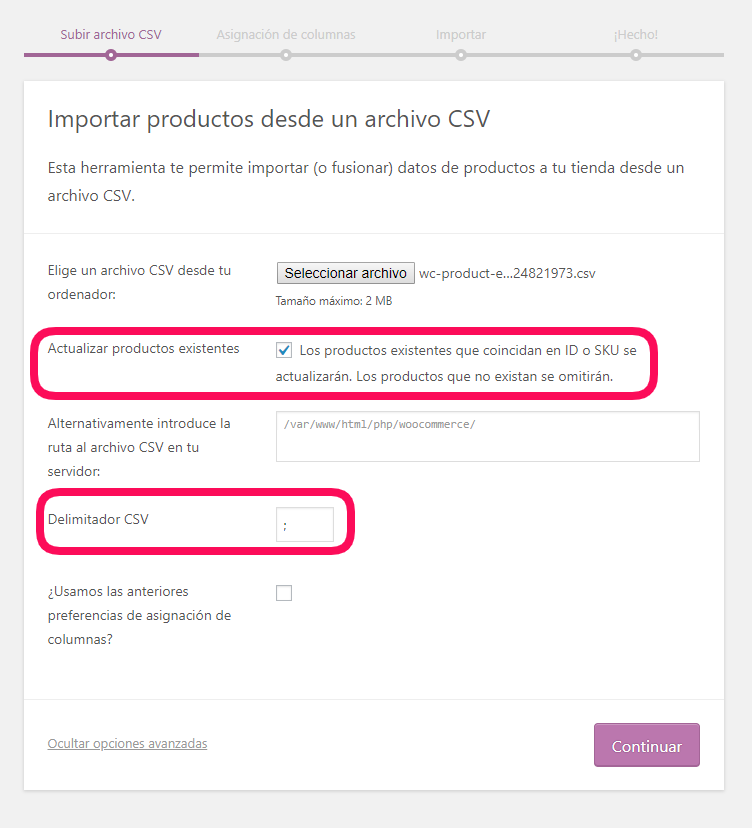
On the first step you should do the following:
- Select the Excel file.
- Check the “Update existent products” checkbox
- Click on “Show advanced options”.
- Type “;” (semicolon) in the “Delimiter CSV” field.
-
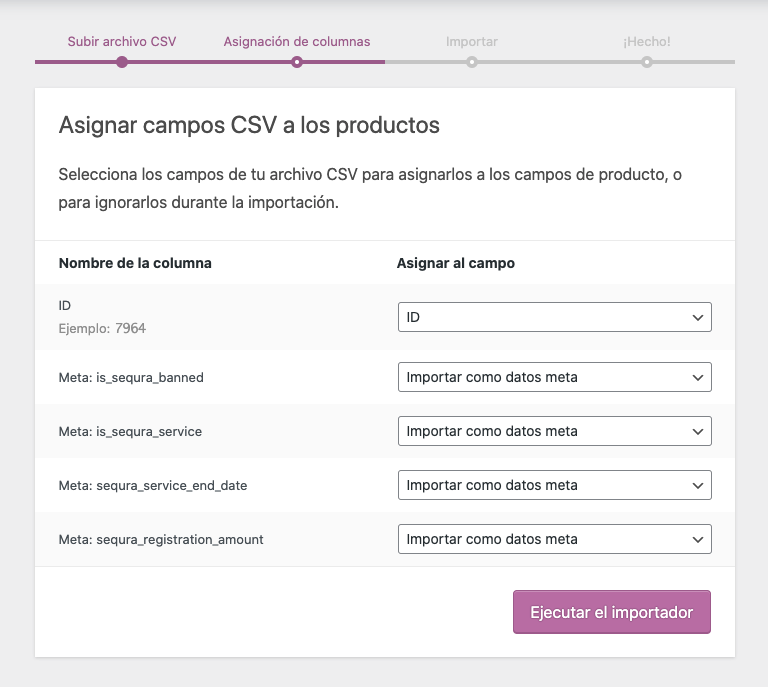
On the next step WooCommerce will show you the columns that have been recognized as edited. Click on “Execute importing” if they are correct.
-
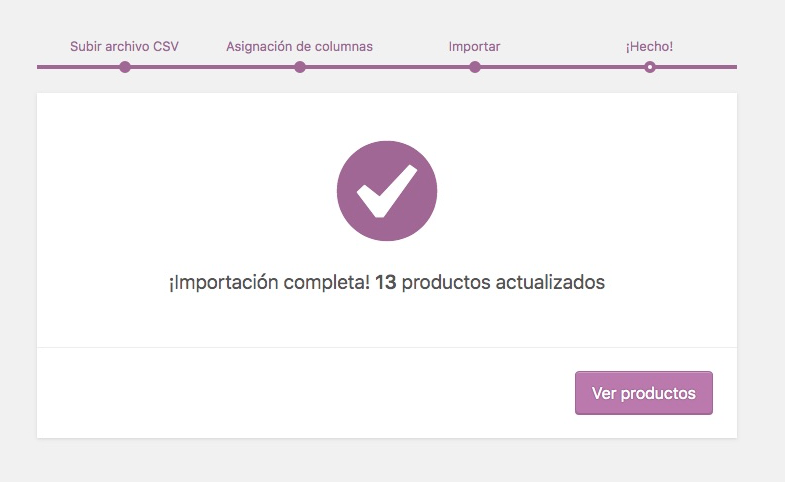
The last step will confirm everything went correctly. At this point you can end the process.
Updated 5 months ago