
Configuration
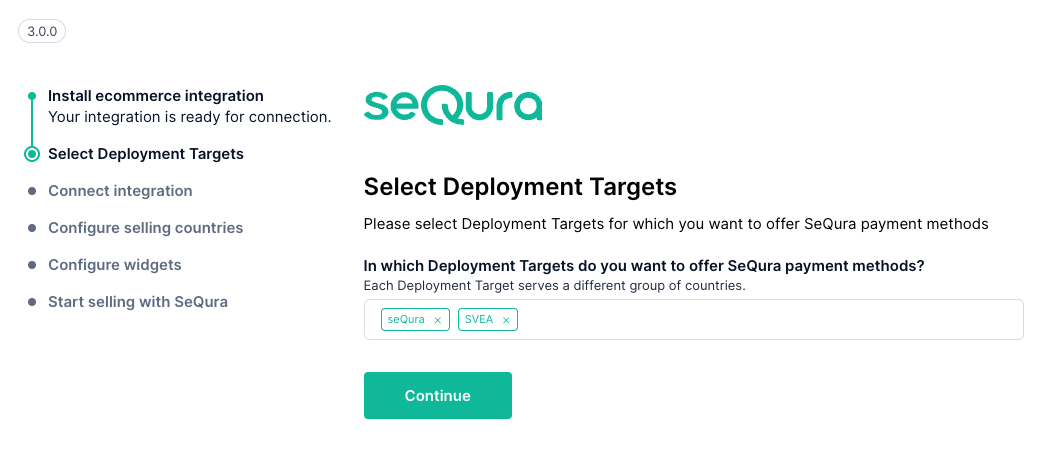
Deployment Targets
- Select the deployment target where you want to enable seQura. Choose seQura for Spain and SVEA for all other countries. If you offer seQura both in Spain and internationally, make sure to include both options.
.
General settings
- Enter the username and password provided by seQura.

- Add the countries where seQura will be available. For each country, you must add the Merchant ID provided by seQura.

Configure Widgets
If you already had seQura on your website, to configure it, go to Sales → SeQura:
-
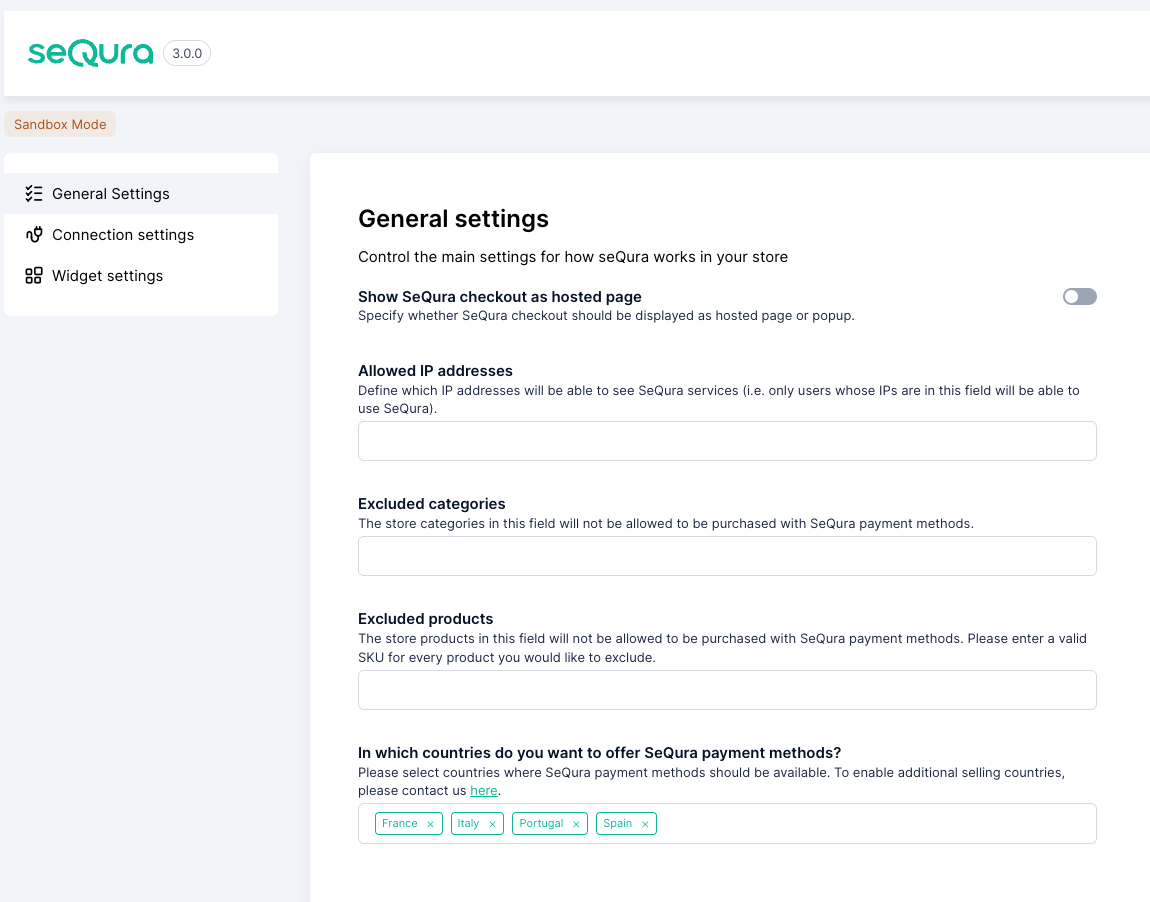
in the General Settings section
- Allowed IP Addresses: When working in Sandbox mode, only the IP addresses in this field will be able to see seQura integrated on the page. Add the IP and press Enter to confirm it.
- Excluded Categories: These are Magento product categories where we do not want to offer seQura as a payment method.
- Excluded Products: These are specific Magento products where we do not want to offer seQura as a payment method.
- Enabled for Services: Available if your contract permits the sale of services.
- Countries: Select the countries where seQura payment methods should be available. For each available country, add the ID provided by seQura for that country.
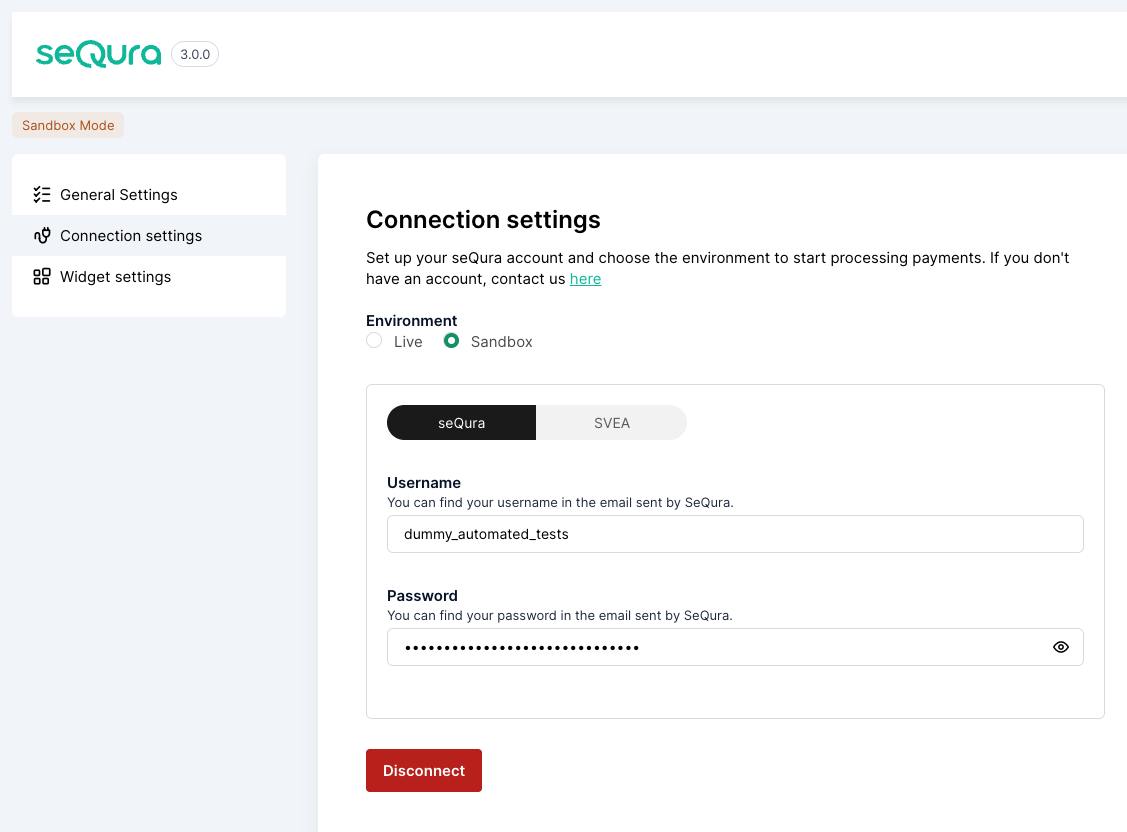
In the Connection settings We have two working environments:
-
- Sandbox: This is the testing environment, invisible to customers, where we can run all necessary tests until the integration is complete.
- Live: We will activate this environment once the payment method is fully configured and functioning.
- Enter or check the username and password provided by seQura
Visual Integration
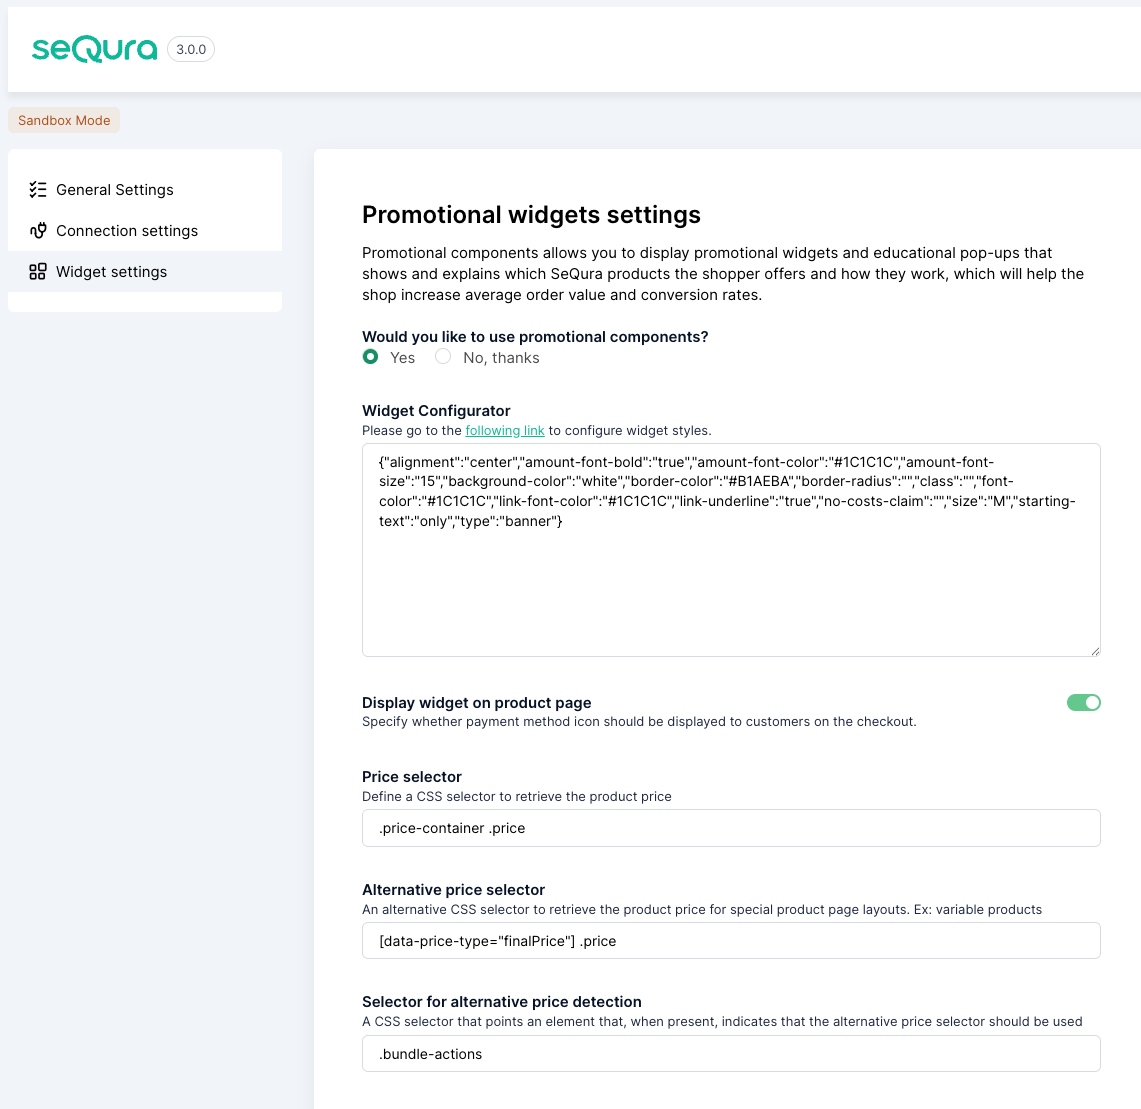
In the configuration of our plugin, you can modify the visual parameters of the widget that will be displayed on the product page.
Go to Widget Settings.
- In the section Would you like to use promotional components?, select Yes, which will activate a series of configurations.
-
In the "Assetkey" section, add the code provided in the seQura email.
-
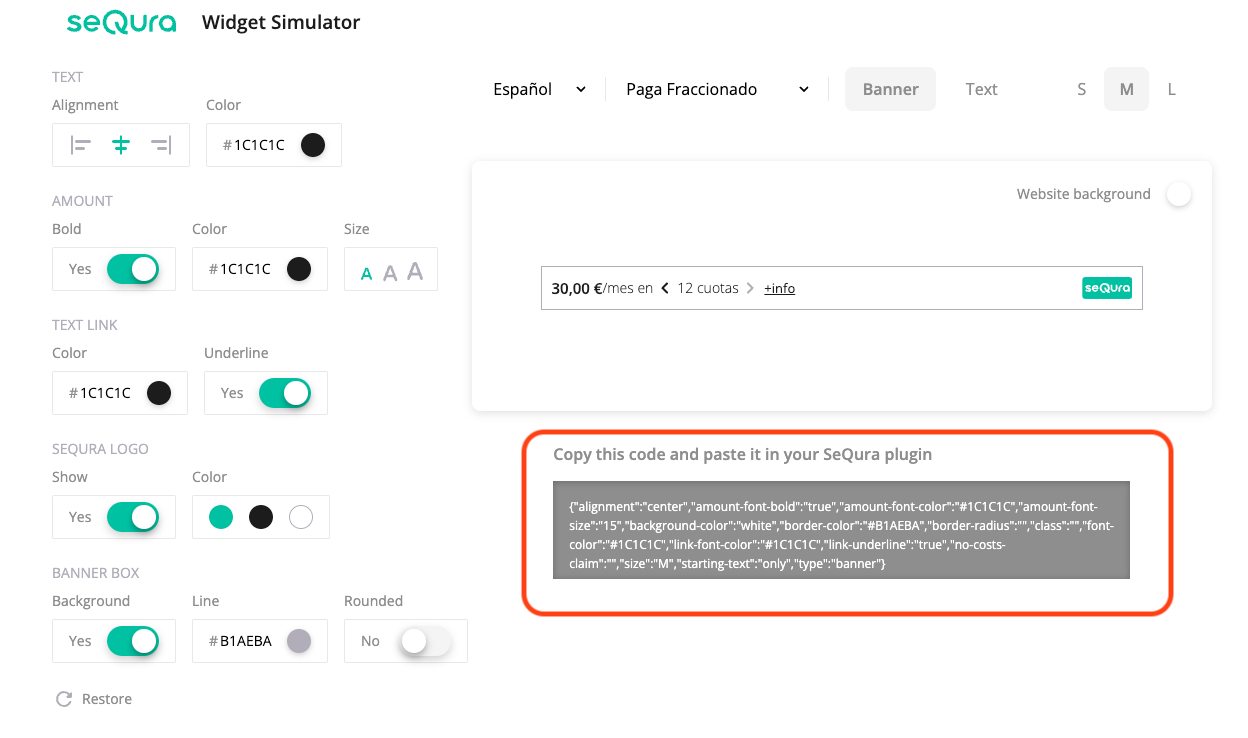
In the Widget Configurator, you can modify the visual appearance of the widget. In our Widget Simulator, you can choose the design that best fits your website. Once the different parameters are selected, you can copy the resulting JSON code and paste it into the Simulator Parameters in our plugin.
-
To display the different available widgets on your page, activate the following options:
| Options | Image |
|---|---|
Display widget on product page: Activate our widget on the product page. Price selector: CSS selector to retrieve the product price. Alternative price selector: CSS selector to retrieve prices for variable products. Alternative price detection: CSS selector for cases where we want to select an alternative price for the product. Default widget location selector: CSS selector of the location below which our widget will be added. Customize widgets: Allows you to choose a different location selector and styles from the default ones for one or more of the enabled seQura products. | 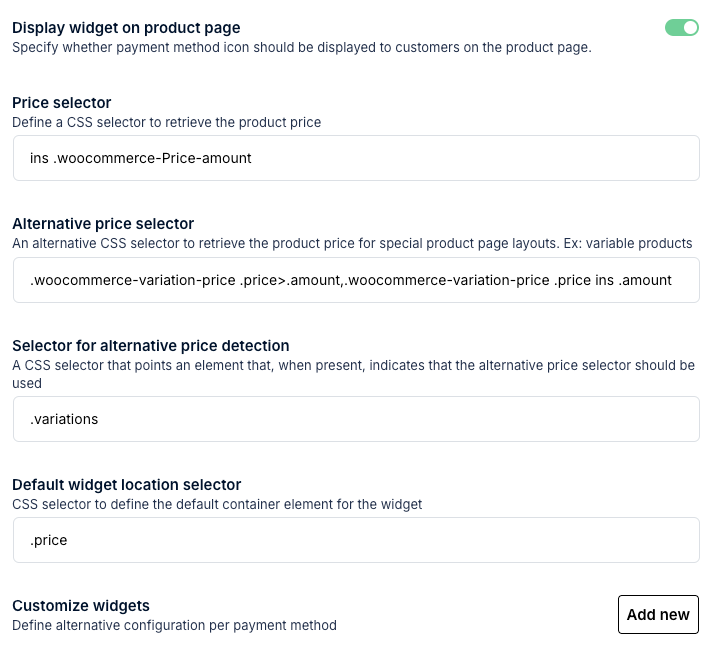 |
| Widget in the Cart This option allows you to select the CSS selectors for the price and location in the cart. The widget will be added below the selected location selector. | 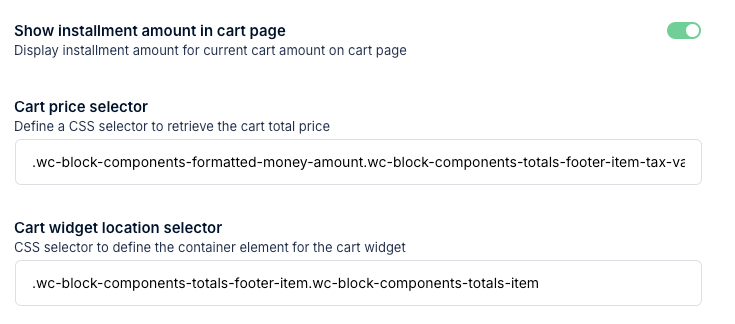 |
| Product List This option allows you to select the CSS selectors for the price and location in the product list. The widget will be added below the location selector of each product displayed in the list. | 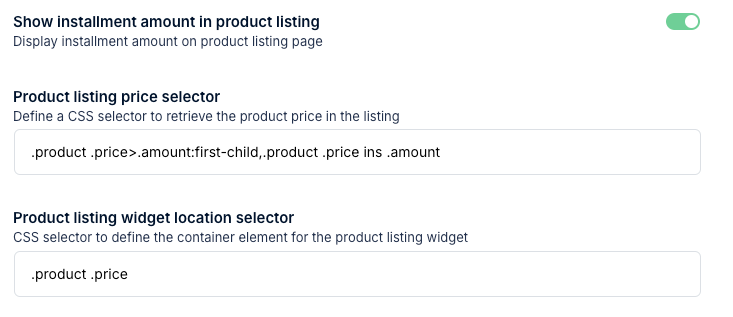 |
Visual material (sliders, logos and texts)
If you want to create a personalized banner or slider, you can use the images and logos. These images and logos are in PNG and SVG format, in order to give flexibility in the design and make it as close to your design as possible.
🇮🇹 ITALY
- Resources:Marketing Toolkit
- FAQ: Preguntas Frecuentes
🇵🇹 PORTUGAL
- Resources: Marketing Toolkit
- FAQ: Perguntas Frequentes
🇫🇷 FRANCE
- Resources: Marketing Toolkit
- FAQ: Preguntas Frecuentes
In that same link you will find tutorials for the visual elements available for our payment methods.
Payment methods interaction
Once the seQura integration is successfully connected to the shop, customers will be able to select seQura payment methods on the checkout page as their payment method of choice.
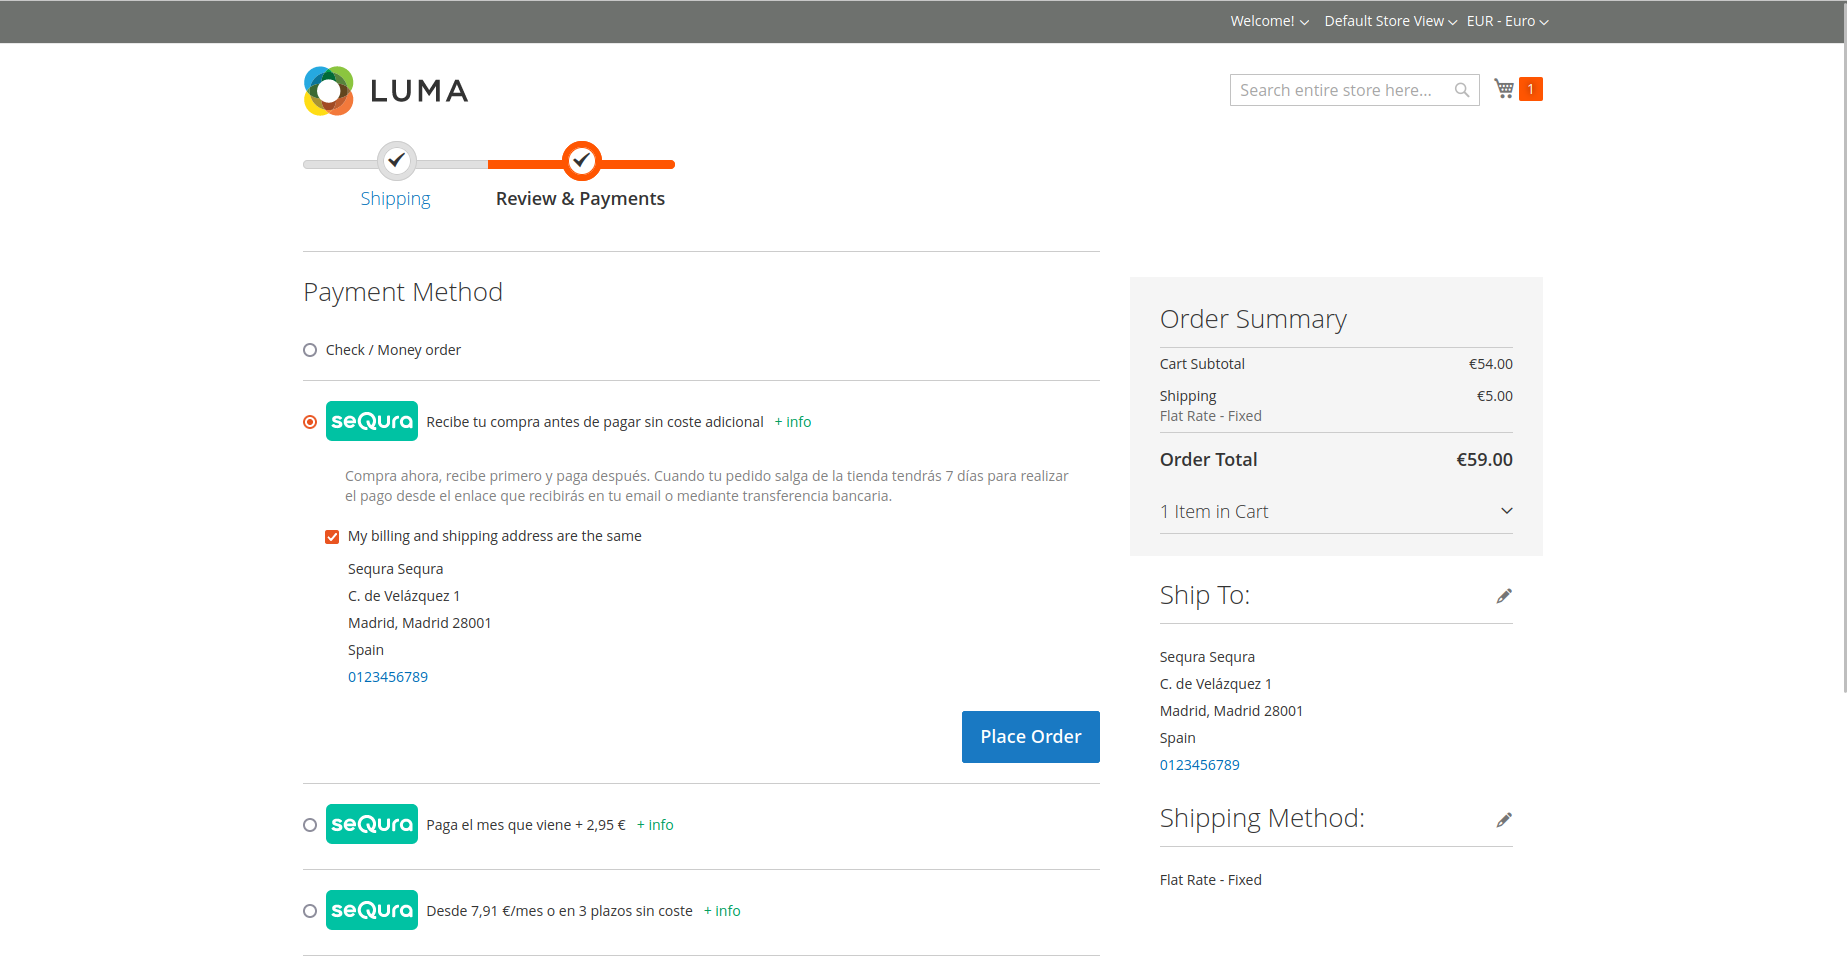
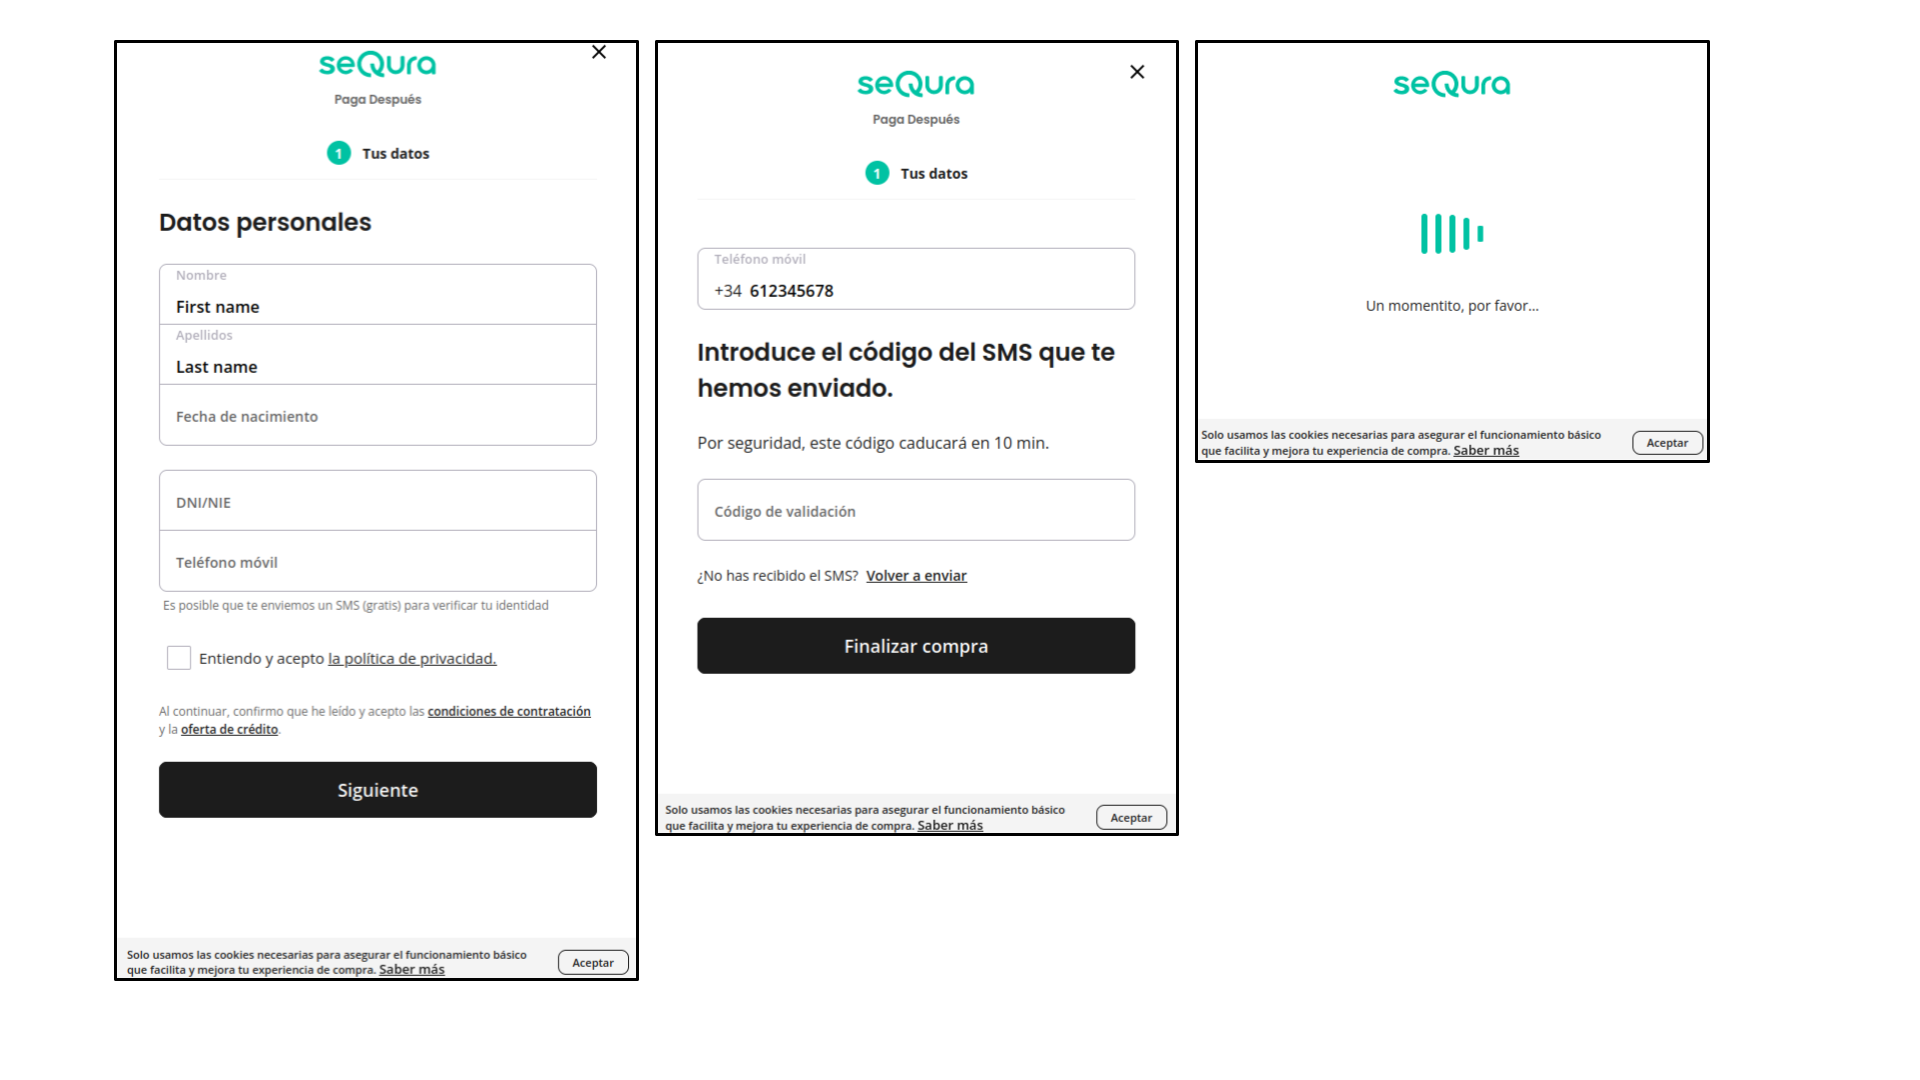
Once the payment method is picked the Sequra form is displayed. After following the instructions described in the form, the payment process should be completed.
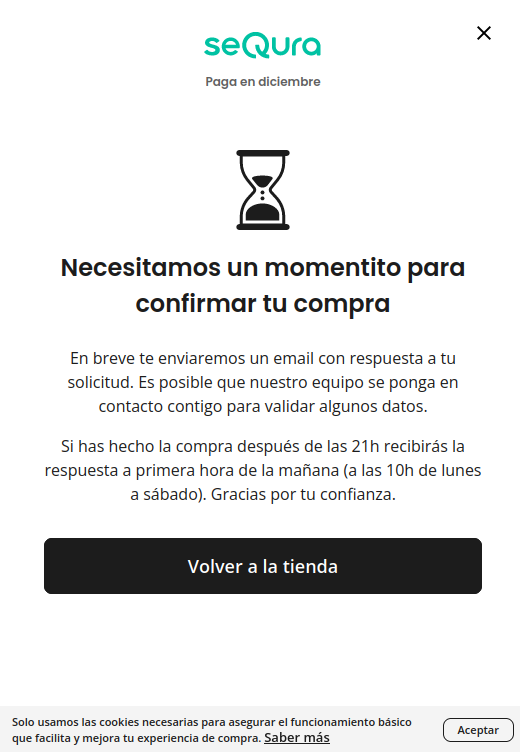
If a payment needs to be reviewed by seQuraBefore it can be processed and declared successful, as the last form view there will be a notification about payment revision, before redirecting to the thank you page.
After a successful payment, customer should be greeted by the shop’s thank you page:
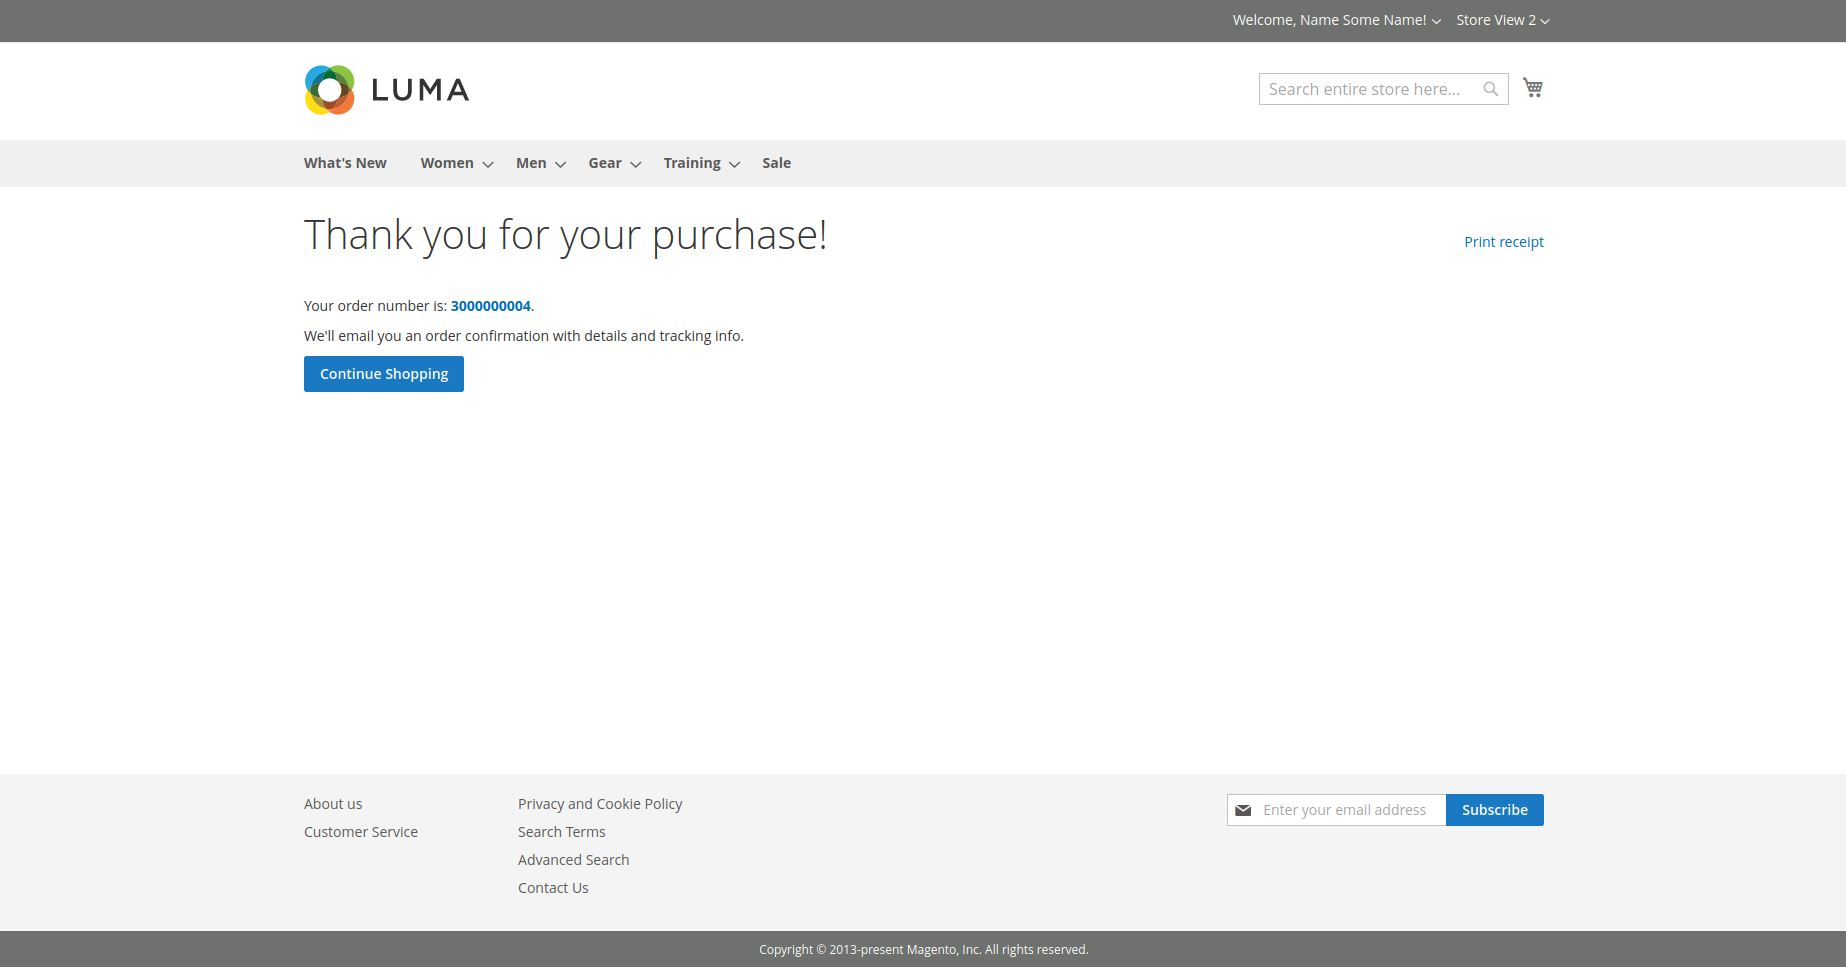
Since the payment may need a review from SeQura, merchants are able to check and monitor the payment status in the Magento 2 admin panel in the Orders page.
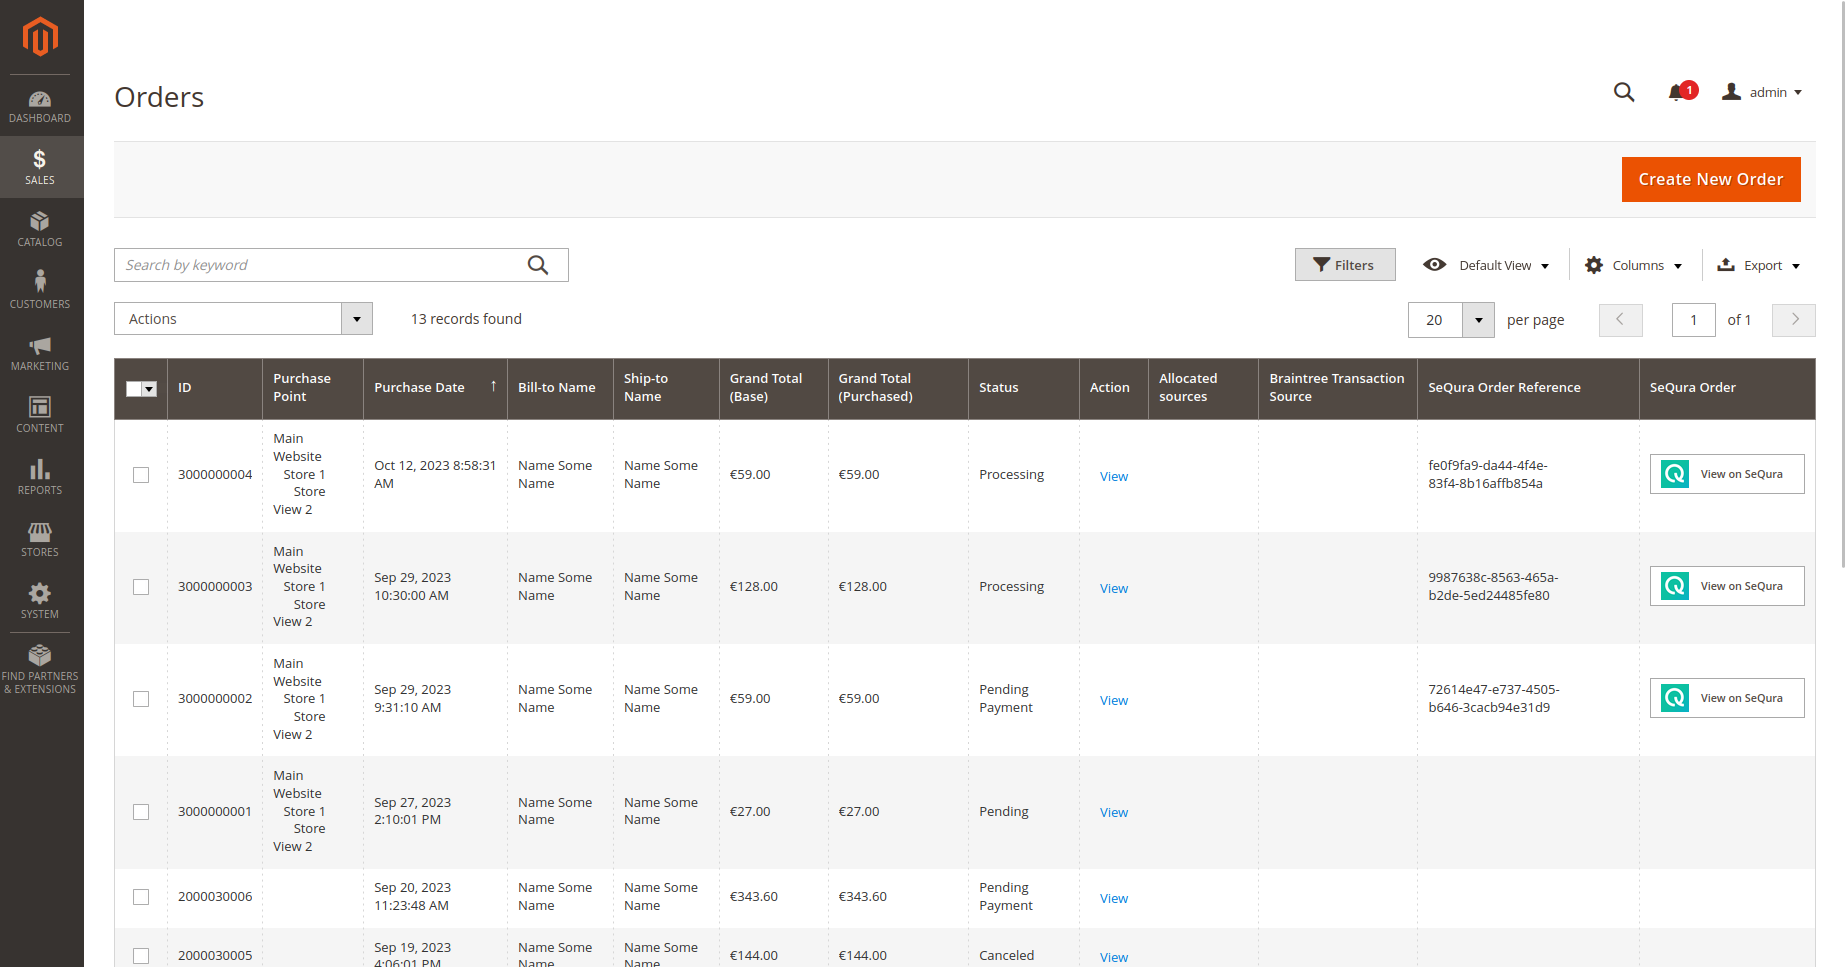
Order management
seQura order information
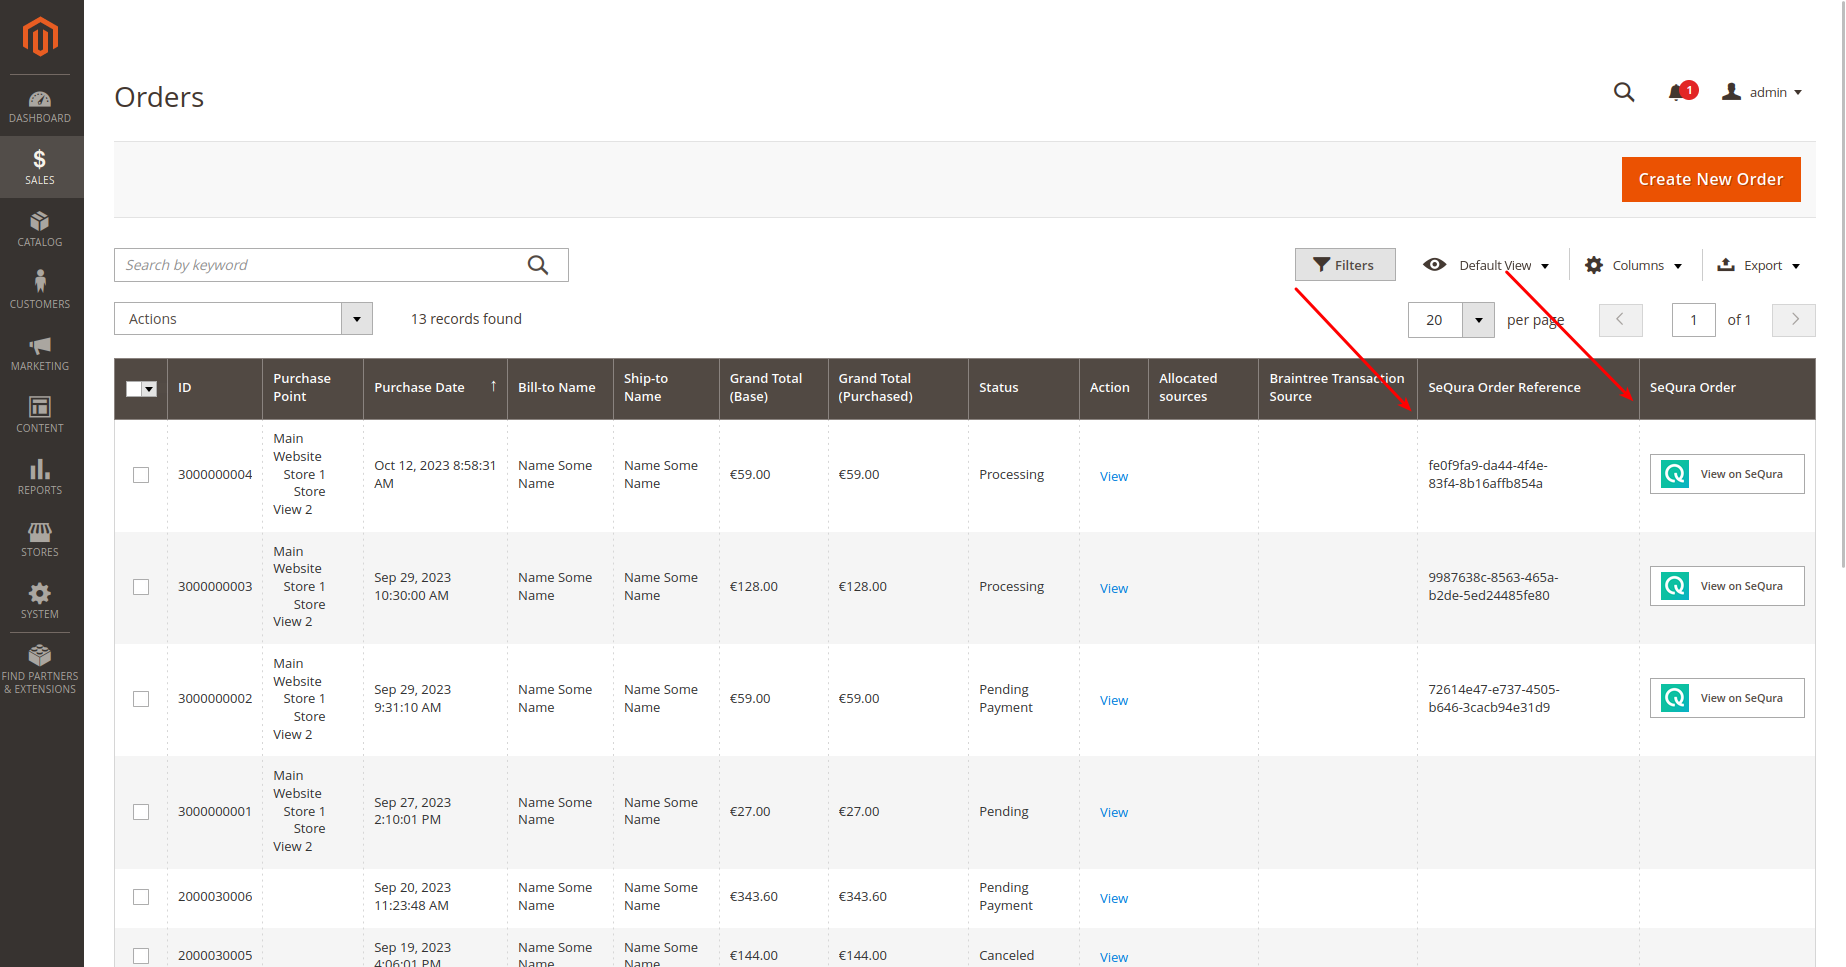
Merchant is able to view seQura payment information - the order reference and the link to seQura order on the Order overview page.
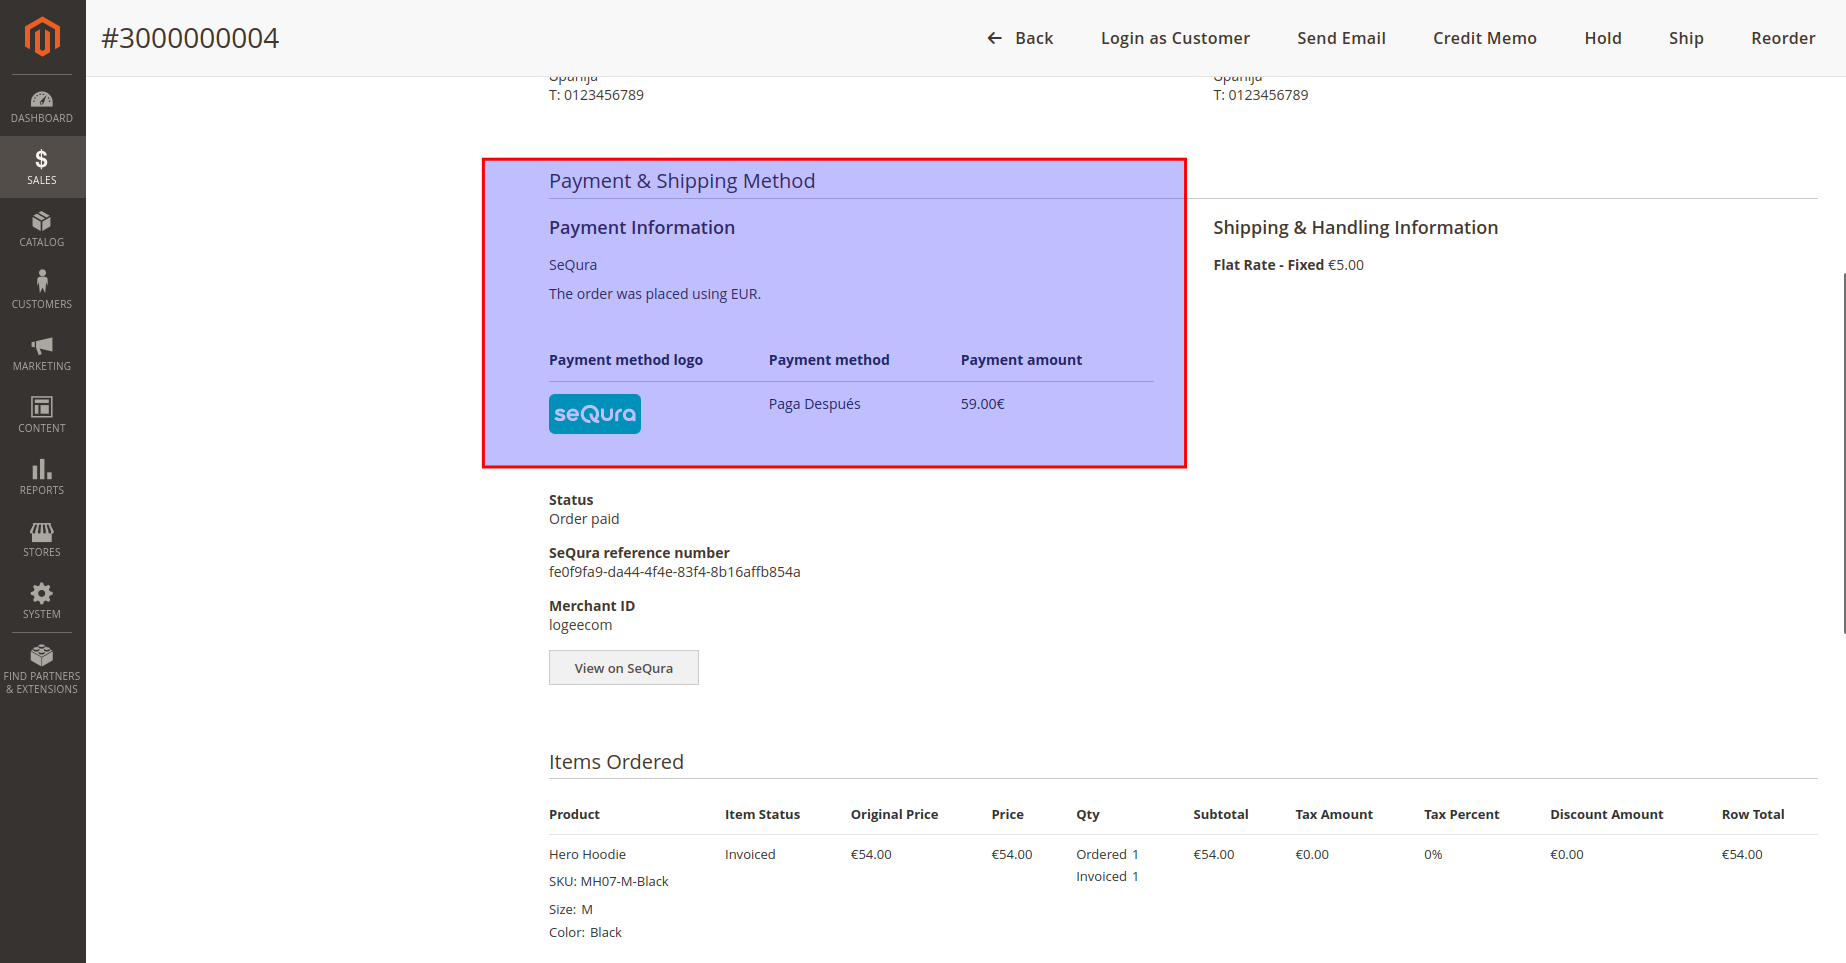
Merchant is able to view seQura payment information on the Order details page.
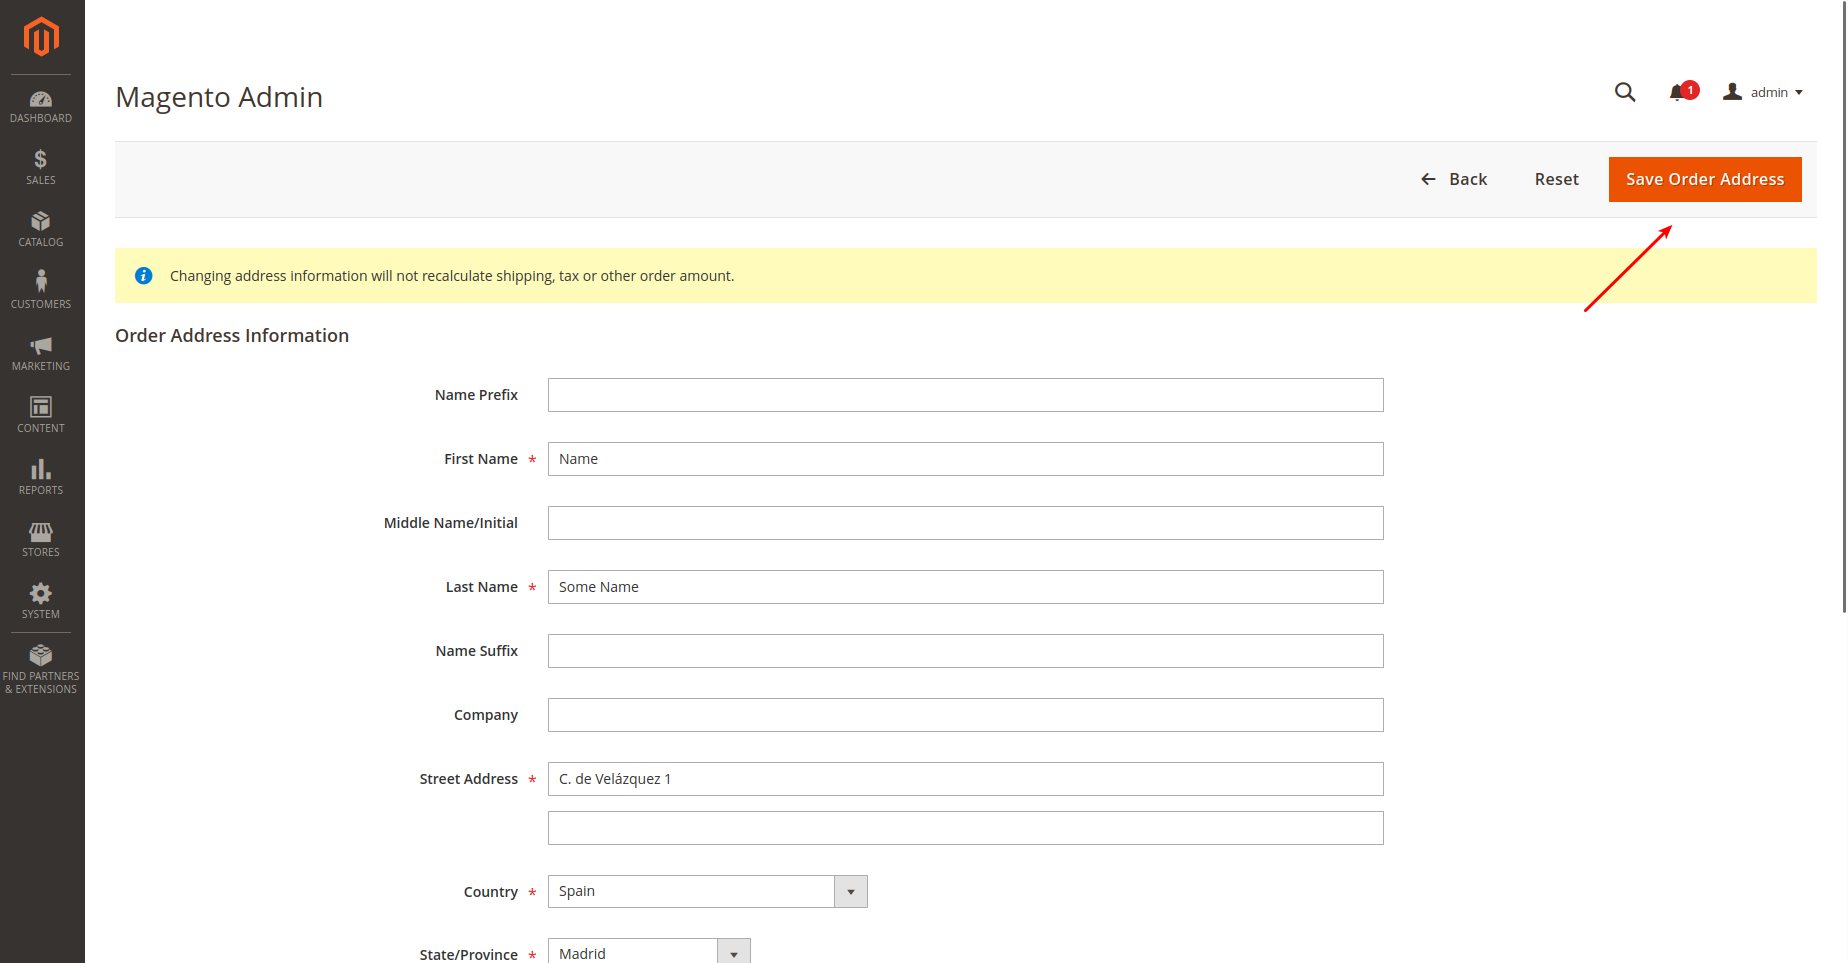
Update order
Merchant is able to update an order placed with seQura payment method in the shop system and see that change propagated to the seQura portal or rejected if the seQura does not support such a change. The integration propagates changes in billing and shipping addresses.

Ship order
Merchants can either partially or fully ship an order placed with the seQura payment method using the native Magento 2 mechanism for shipping an order.

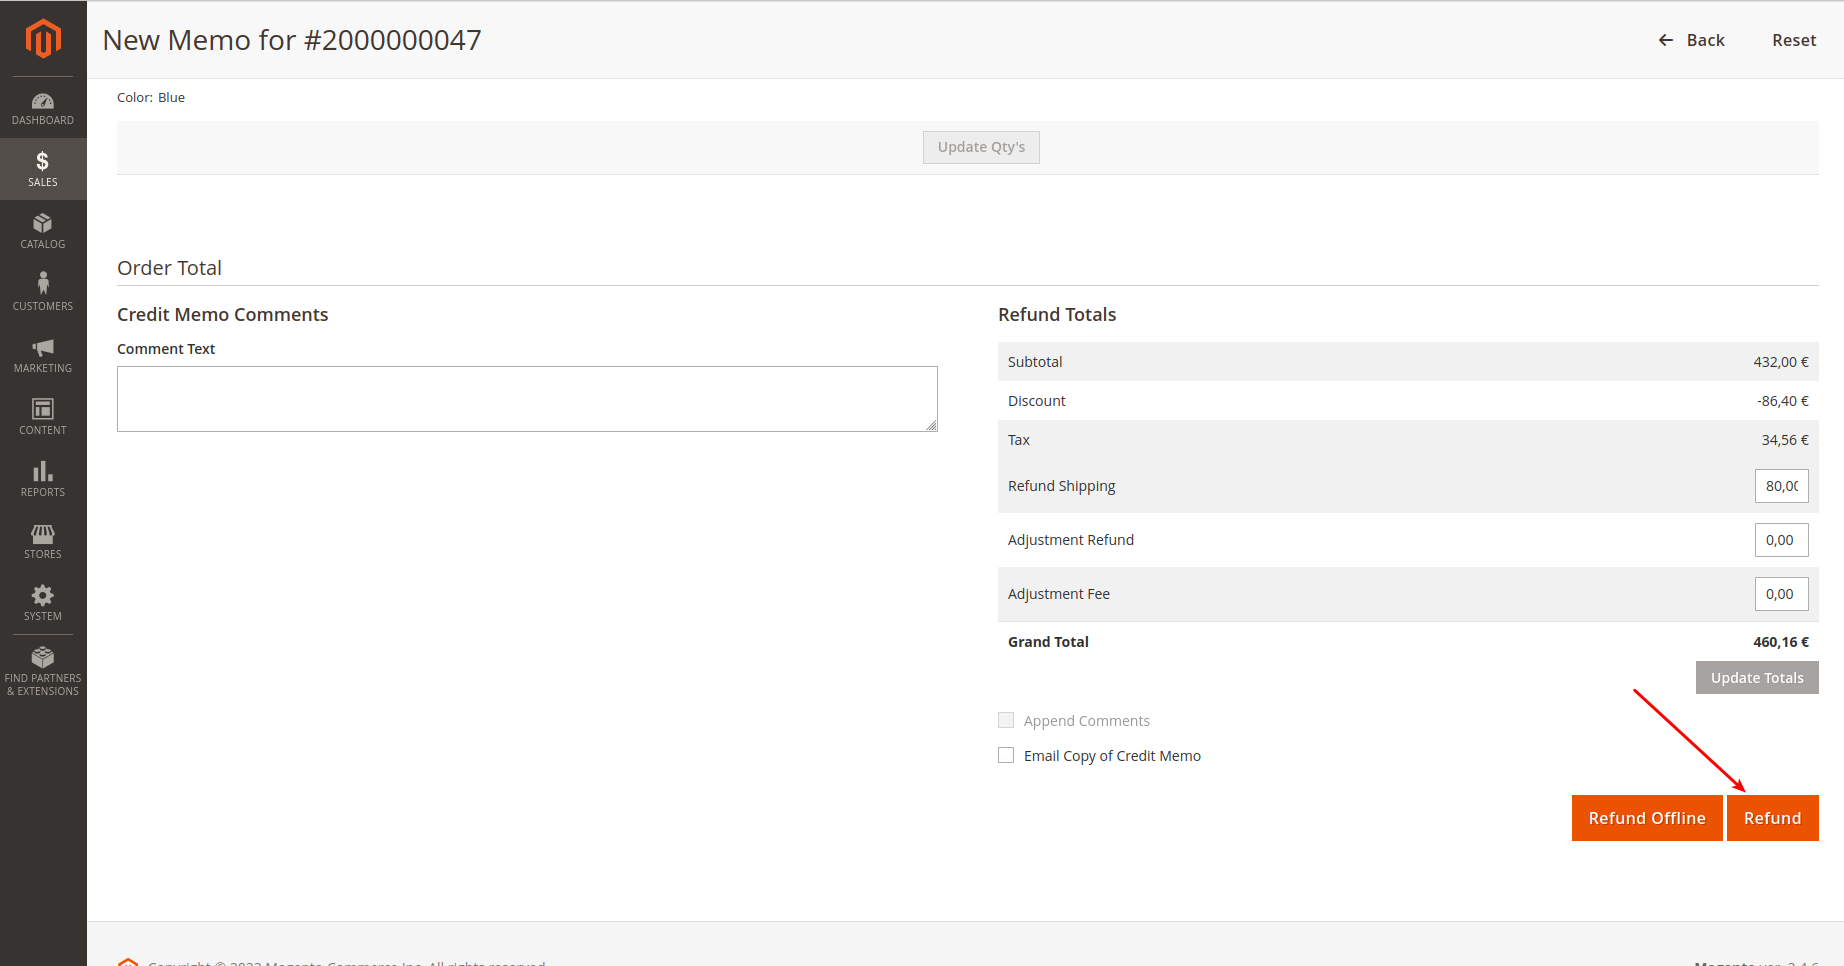
Refund order
Merchants can either partially or fully refund order items using the native Magento 2 mechanism for refunding order line items.
To refund an order placed with the seQura payment method, merchants should open an invoice for the created order and create a Credit Memo.
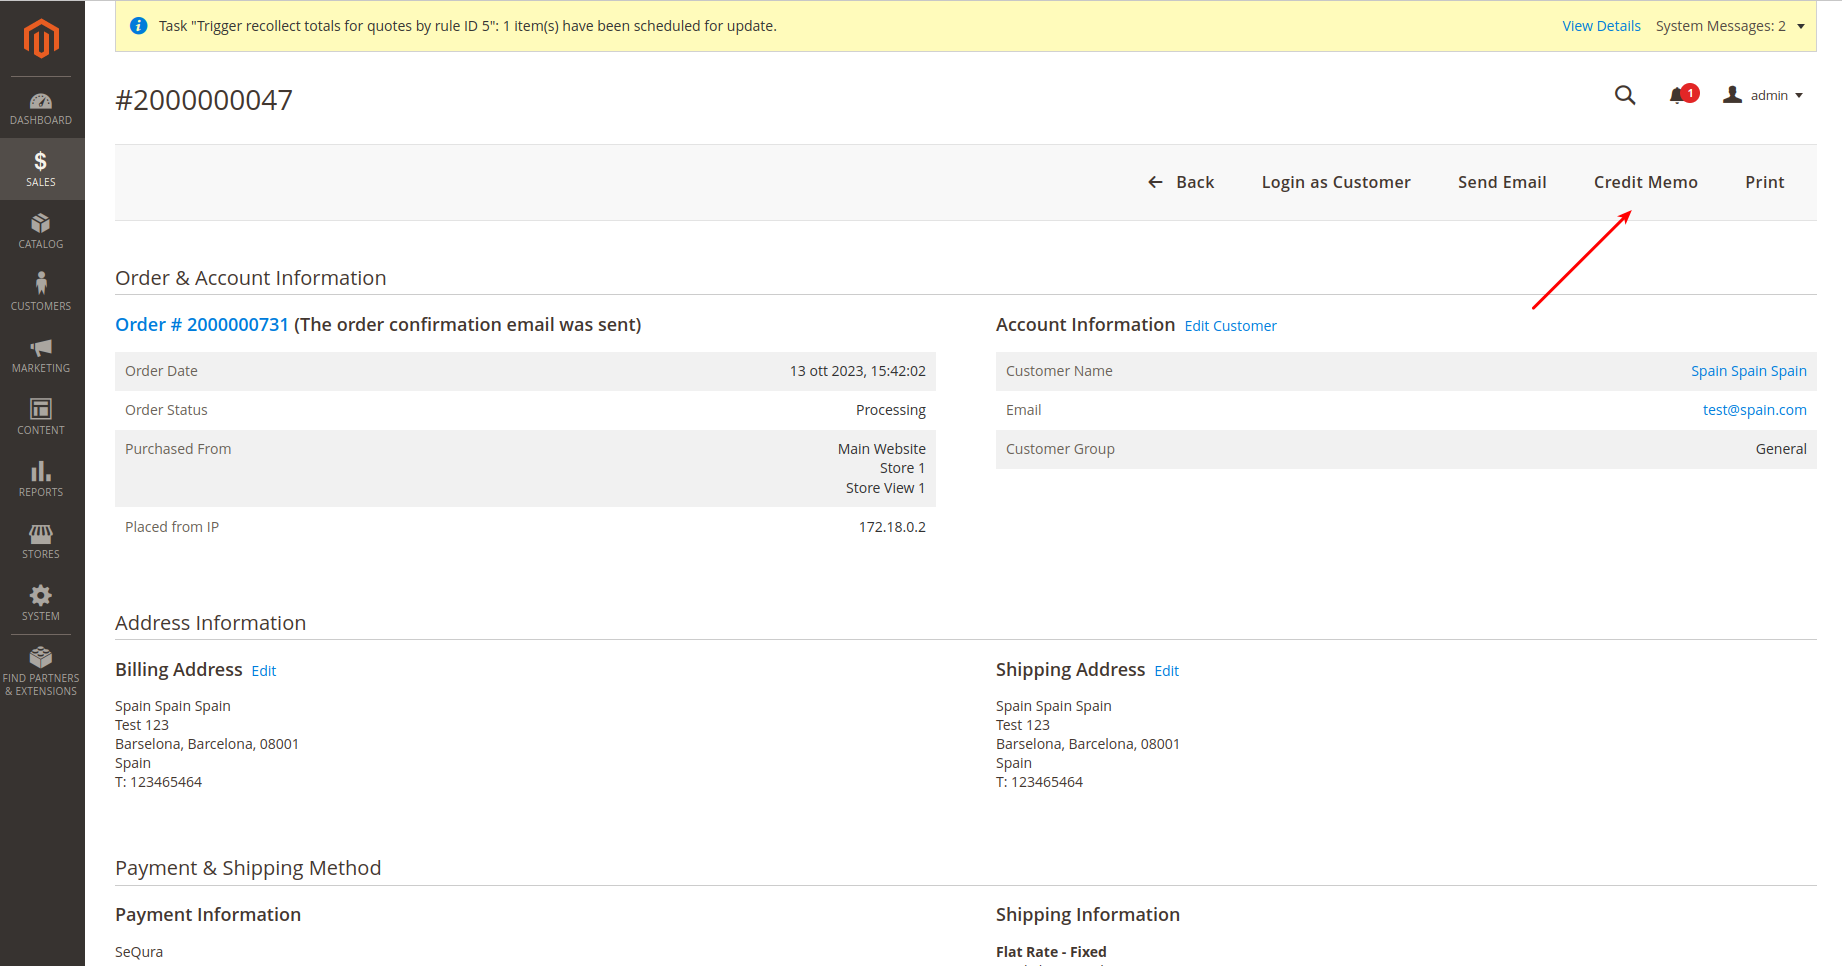
SeQura integration supports only online refunds:
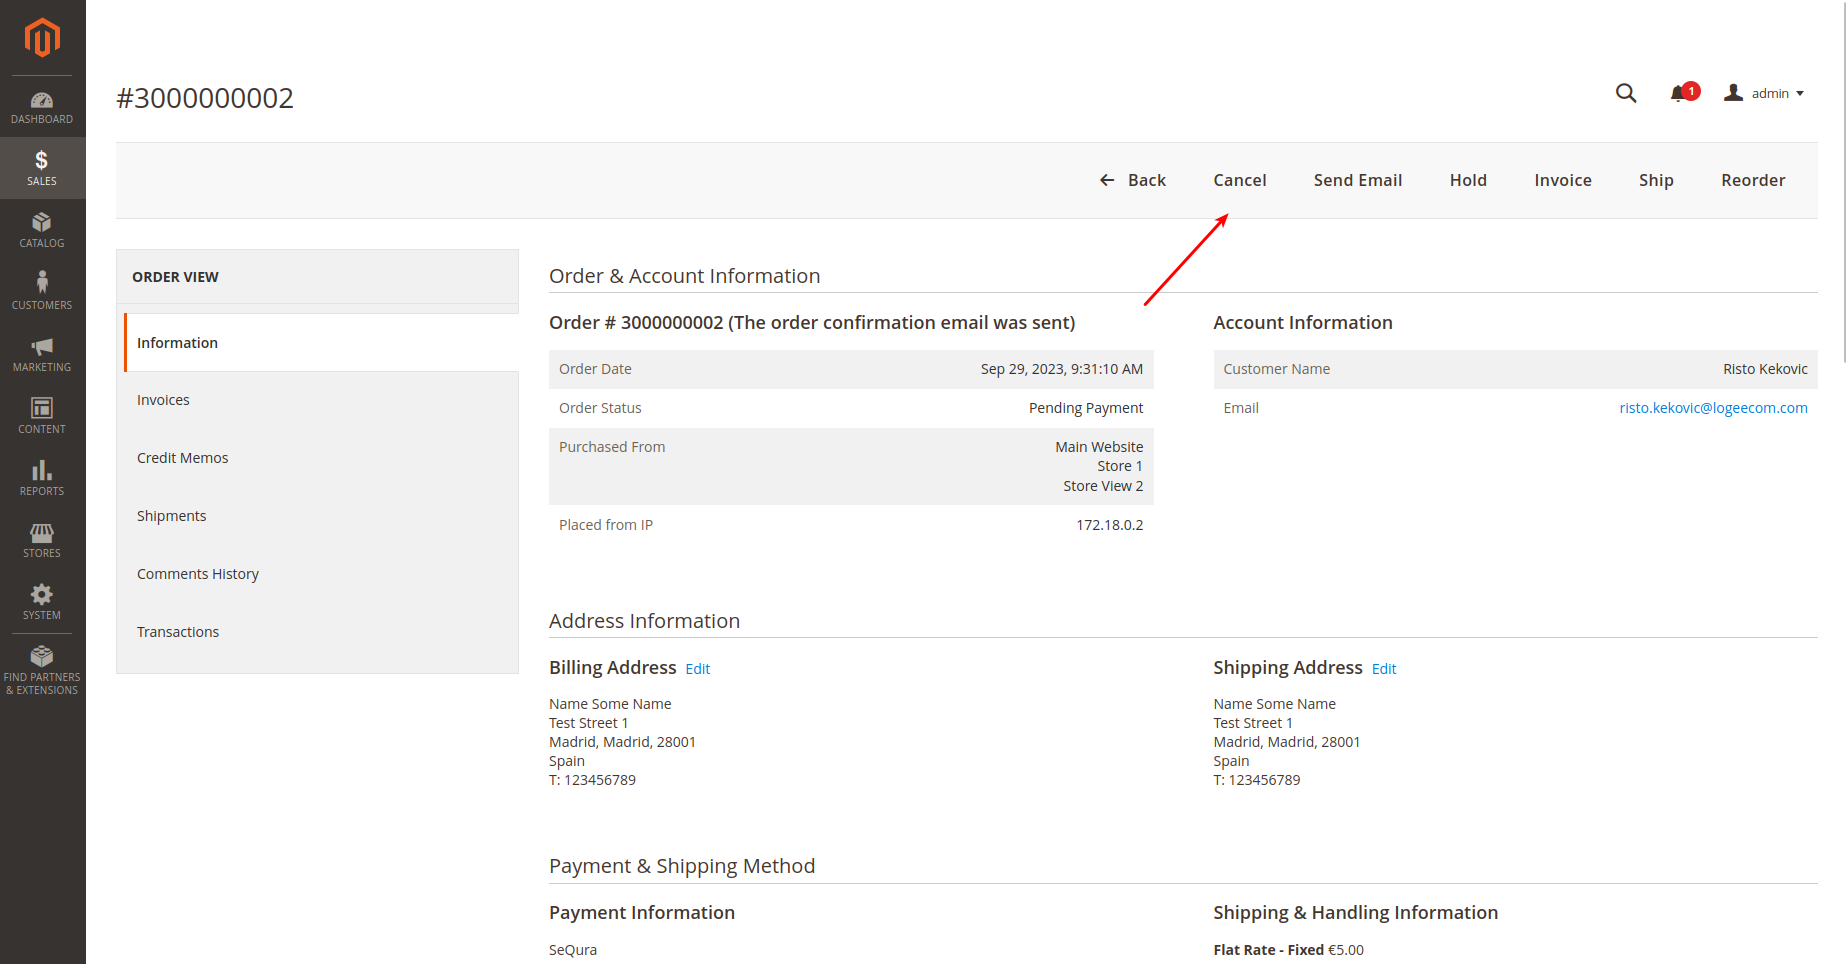
Cancel order
Merchants can cancel an order made with seQura payment methods using the native Magento 2 mechanism for cancelling an order. Magento 2 only allows merchants to cancel an order that has not yet been paid and shipped.
Updated 8 months ago