
Installation
seQura Payment Gateway
Install seQura using this link: seQura Payment Gateway
Here's what happens:
-
Authorize the app installation:
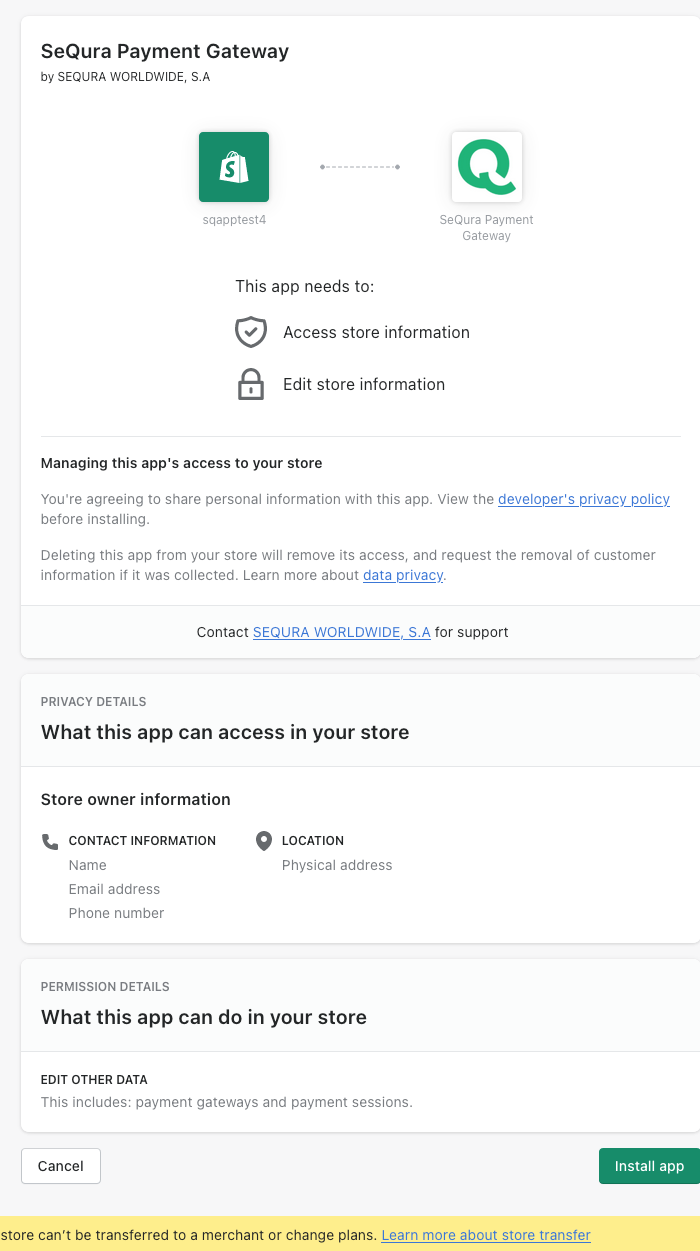
-
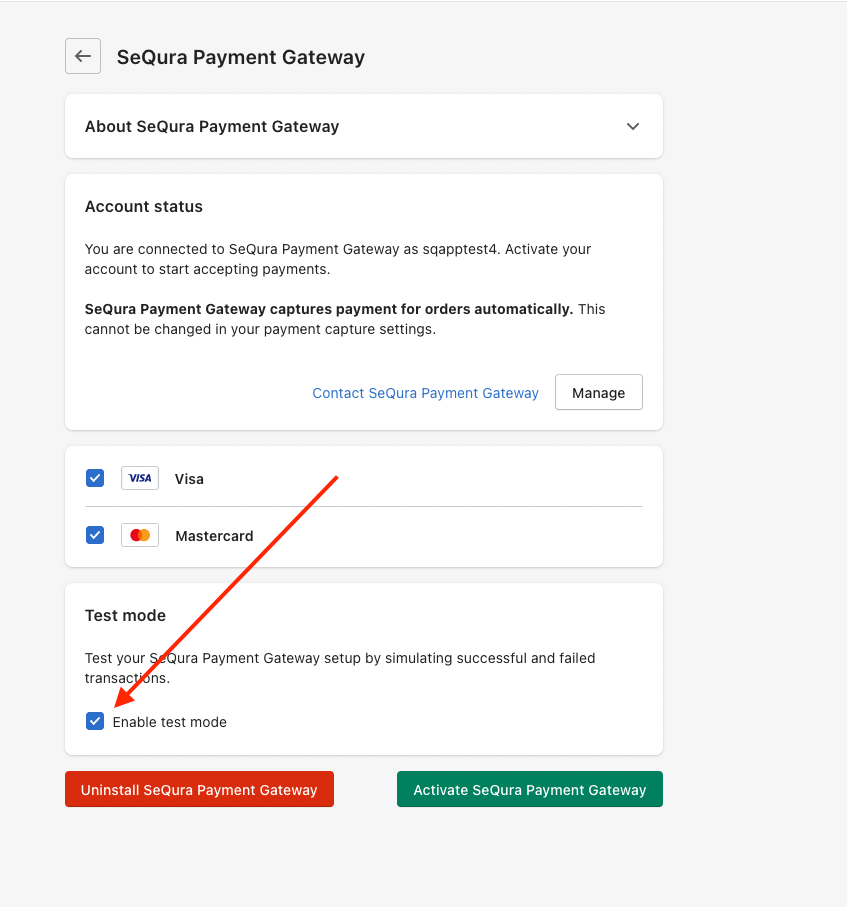
Once installed, you'll see the seQura payment method where you can toggle between Sandbox and Live modes:
Install the app
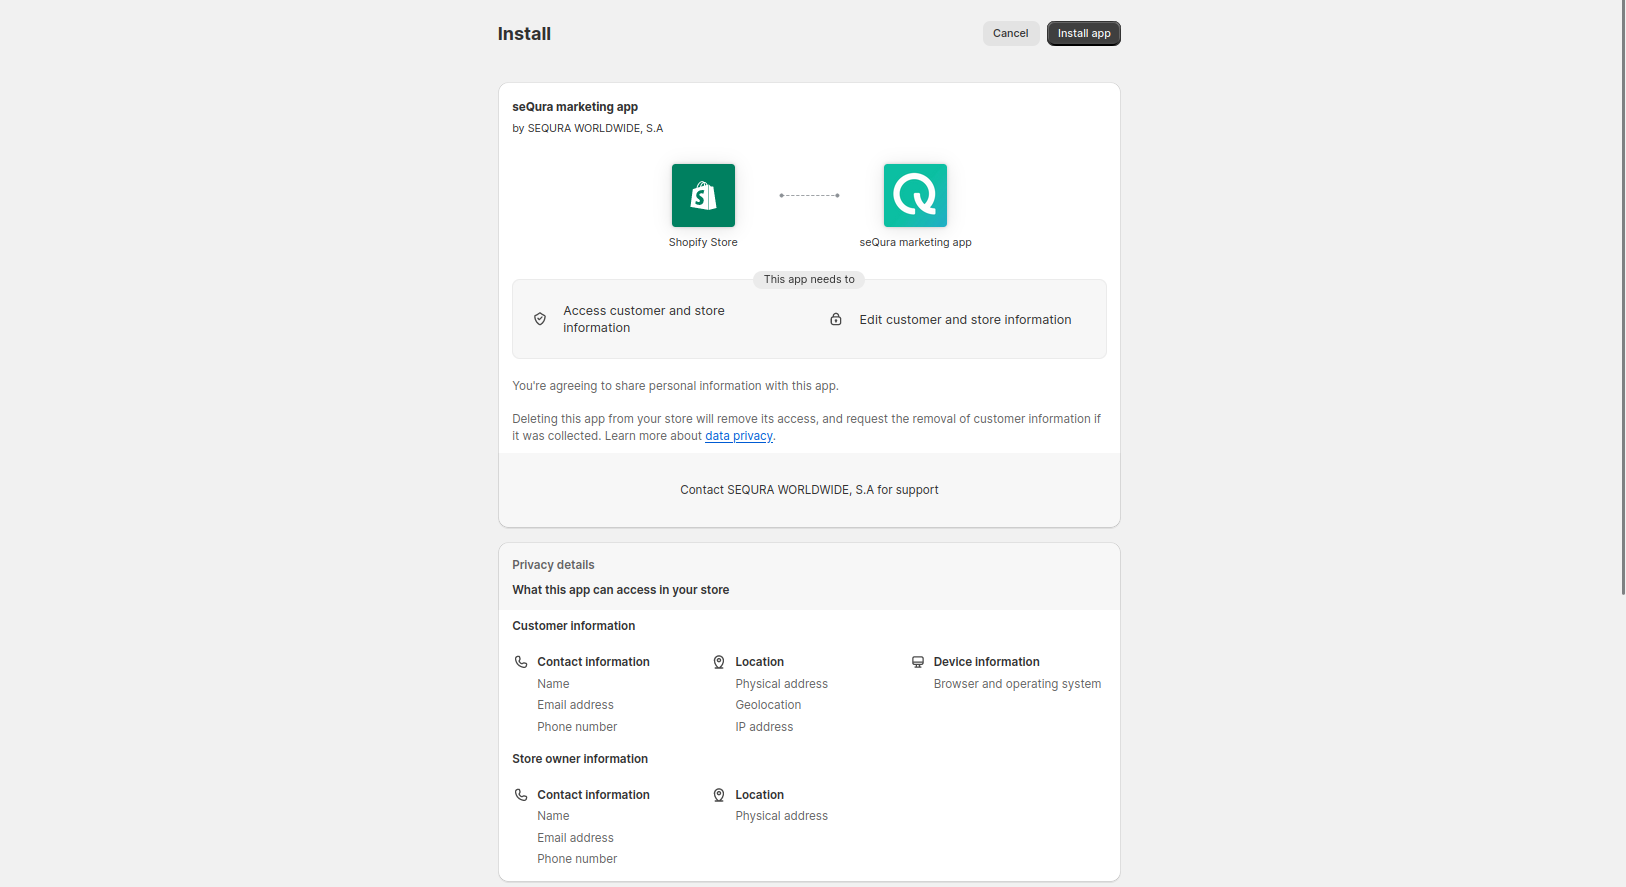
Next, install the seQura On-Site Messaging App from the Shopify marketplace. You'll see a permission request—just confirm it and you're good.
You'll land on your app dashboard.
Set up the seQura payment gateway
The On-Site Messaging App needs the seQura payment gateway running first. No worries—if you don't have it installed, we'll prompt you to set it up.
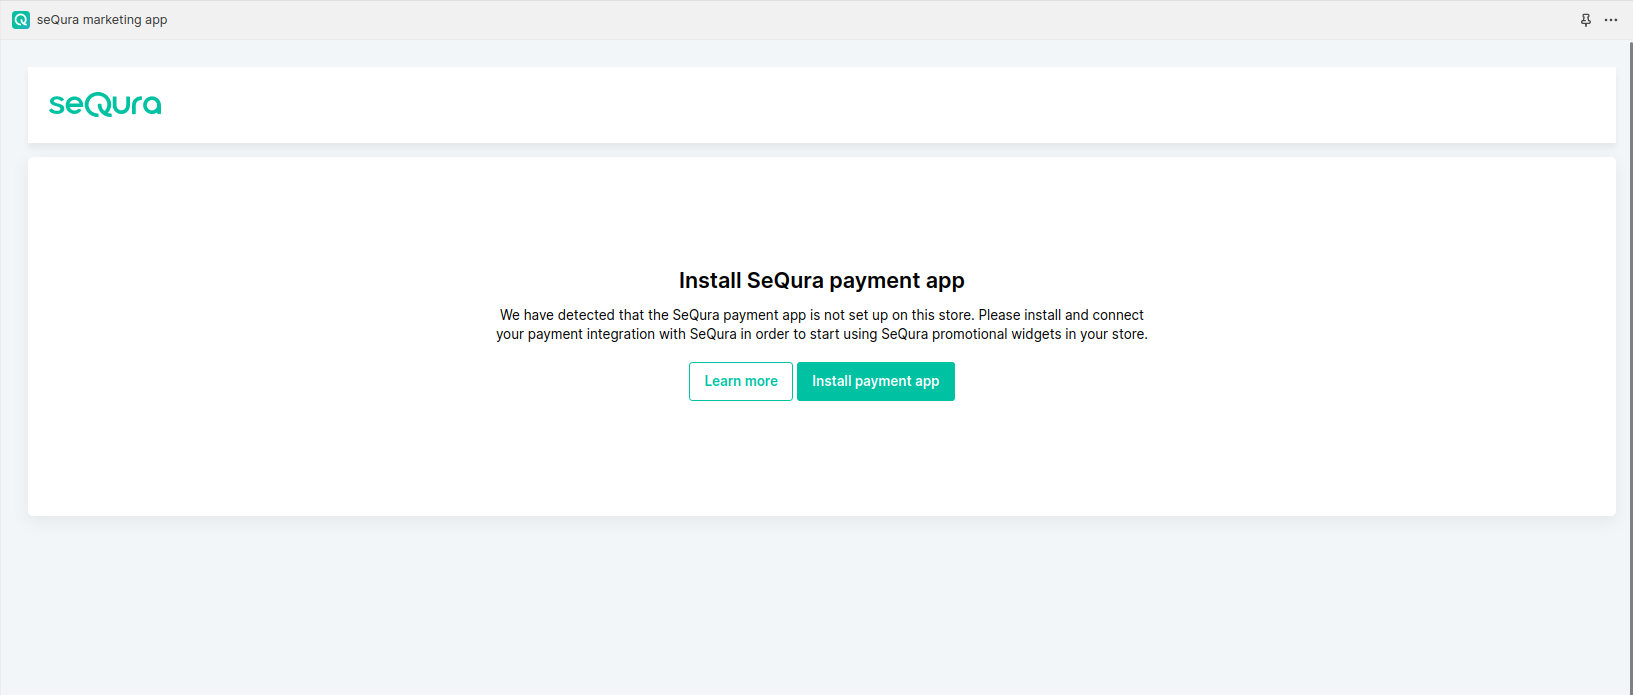
Clicking on the link on this page will lead you to the seQura payment gateway page in your store.
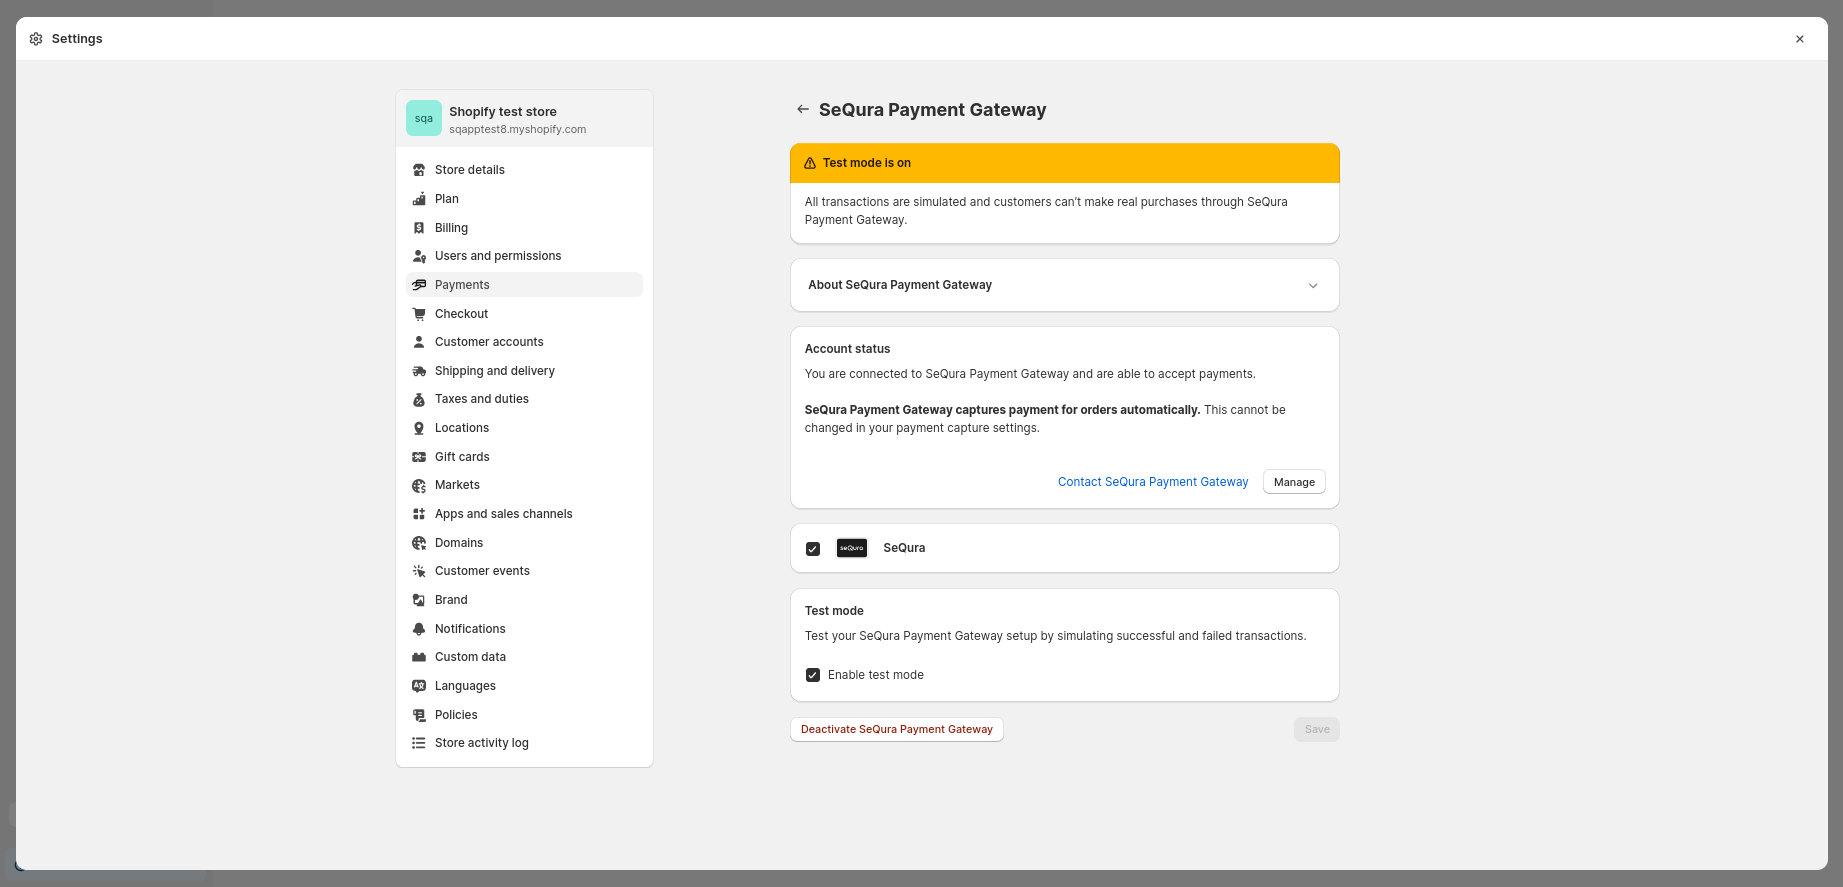
Once the seQura payment gateway is installed and activated, the seQura On-Site Messaging App will pull all the necessary data from it and use it for initialization.
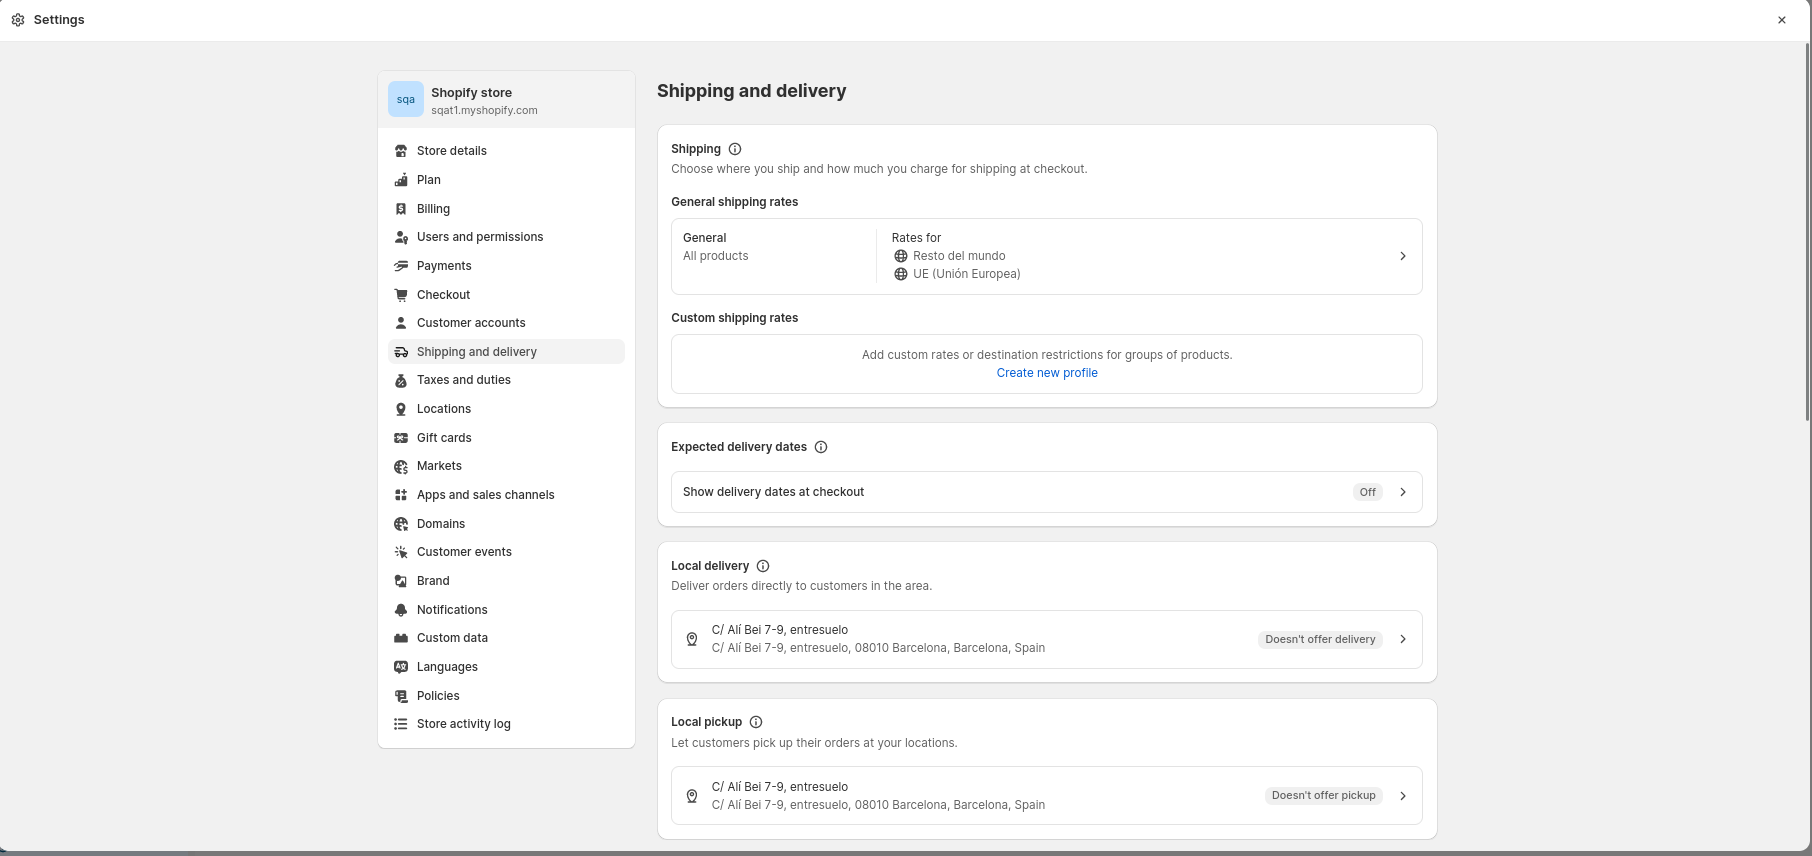
Set up selling countries
Once your payment app is ready, we'll check which countries you sell to and which ones seQura supports. If there's a mismatch, we'll ask you to add more countries.
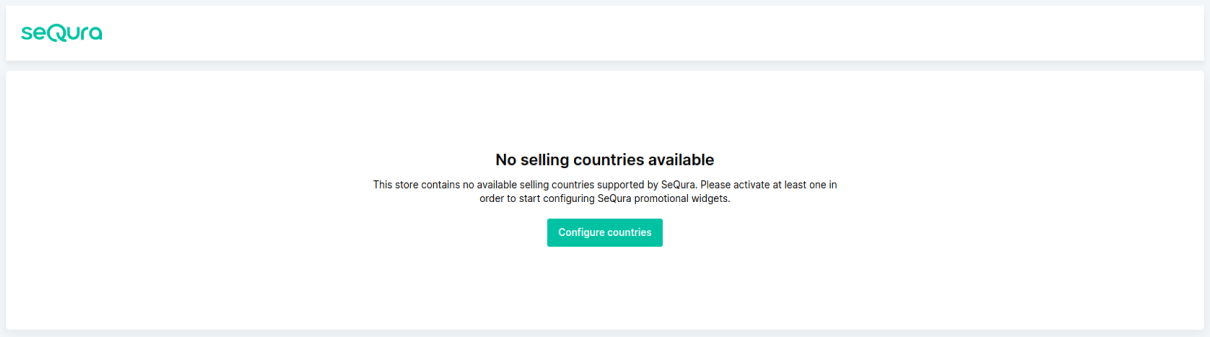
Just click the button and you'll go to Shopify's country settings where you can activate seQura for additional regions.
Once there is at least one selling country supported by seQura available in the store configuration, you will be taken to the widget configuration page.
Updated 5 months ago